Description
ATTENTION : This module is distributed by subscription. By subscribing you get access to all make shop modules.
Please note: modules will only work with an active subscription!
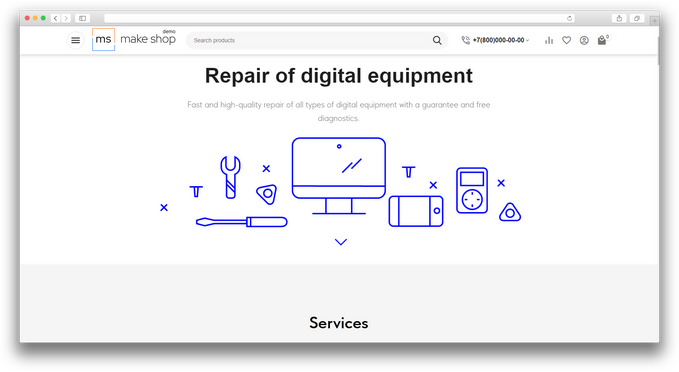
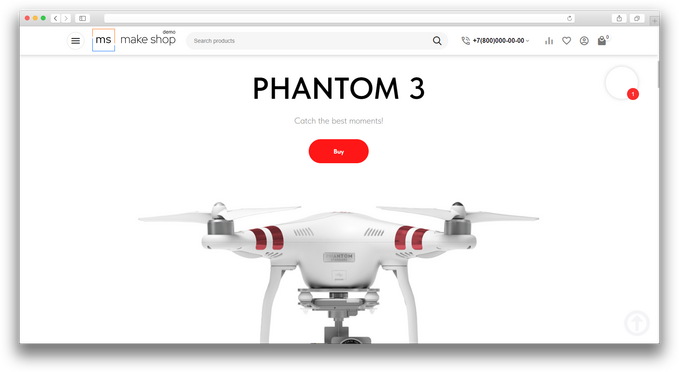
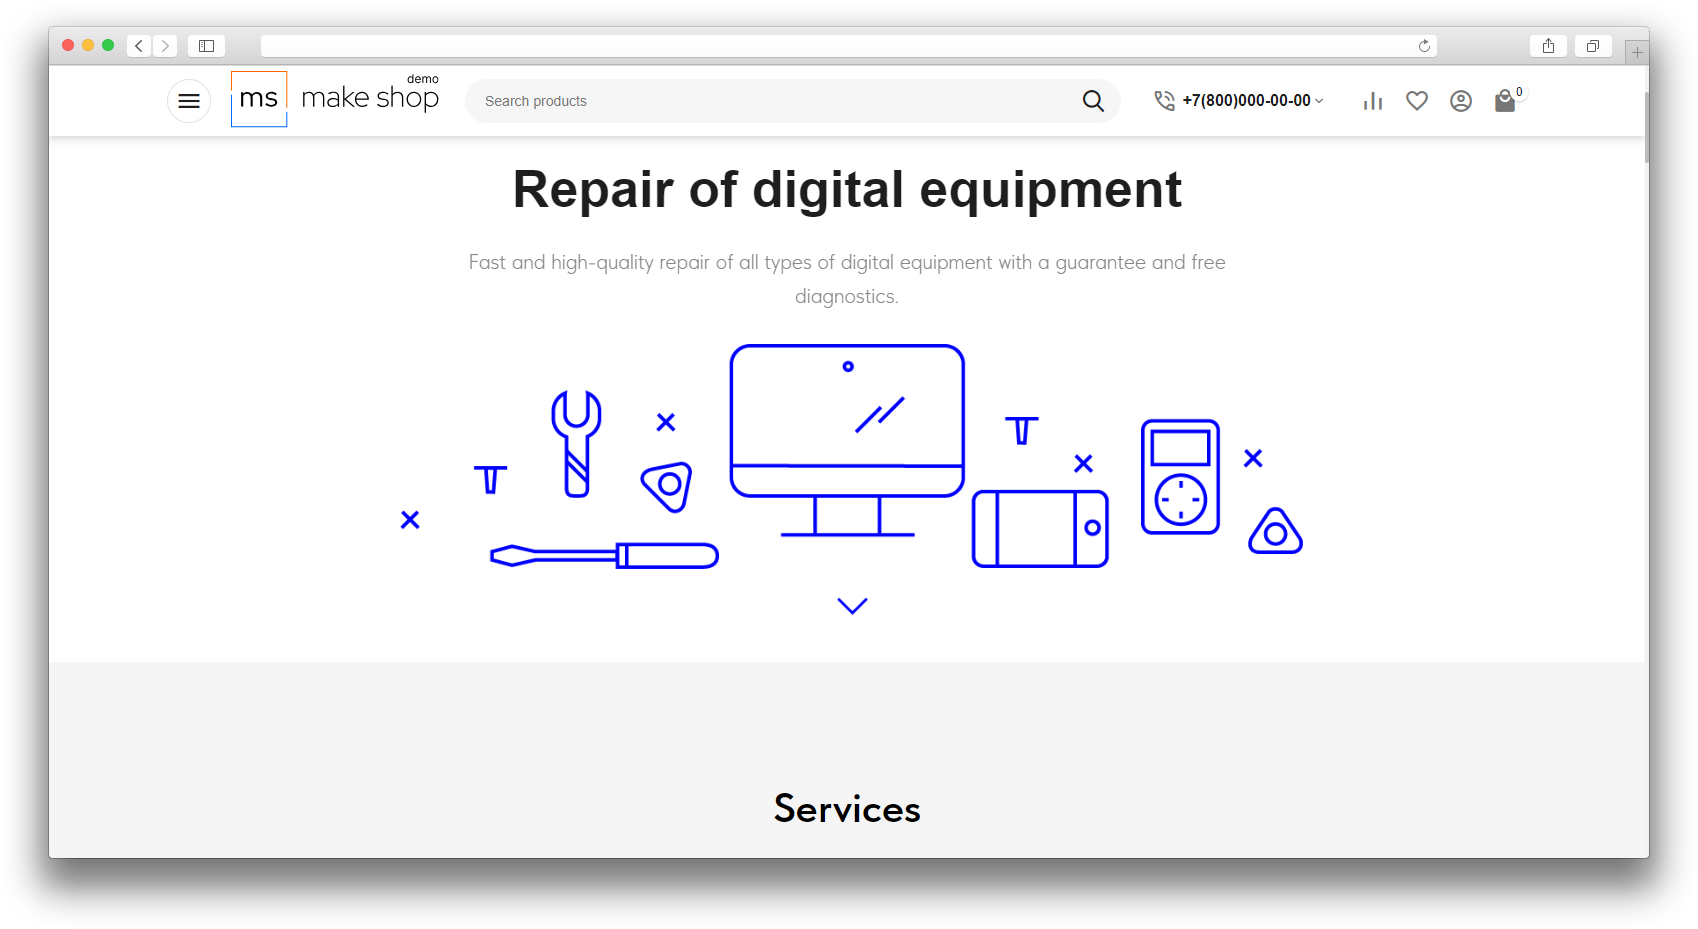
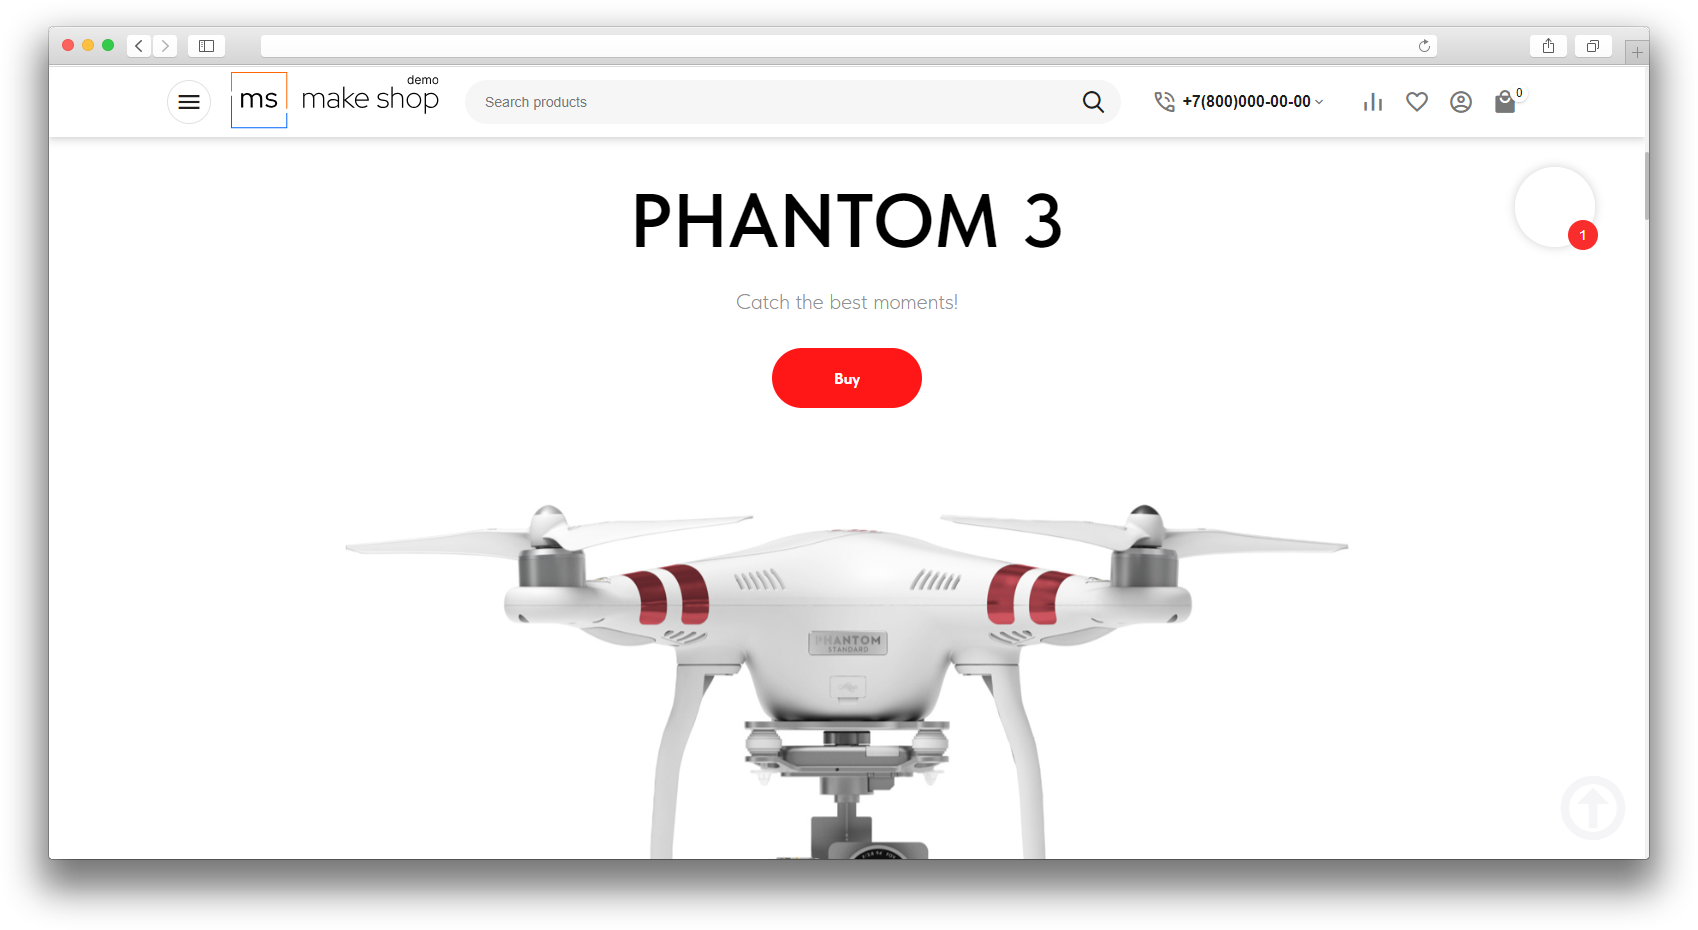
The "Tilda Landing Pages" add-on solves the problem of laborious and time-consuming landing page creation on the CS-Cart platform, especially if you already have ready-made pages on Tilda. Instead of spending time on repetitive development and layout, you can easily import your existing Tilda pages and blocks into CS-Cart, preserving their structure, design, and functionality. This allows you to quickly use your ready-made landing pages on a new platform, saving time, effort, and resources.
Add-on features:
- One-click synchronization;
- Support for multiple languages;
- Ability to change entire pages;
- Ability to embed landings into separate blocks.
- Store Builder
- Store Builder Ultimate
- Multi-Vendor
- Multi-Vendor Plus
- Multi-Vendor Ultimate
- Owners
- Vendors
- English
- Русский
- 4.18.X
- 4.17.X
- 4.16.X
- 4.15.X
- 4.14.X
- 4.13.X
- 4.12.X
Оформление подписки
Мы переходим на новую подписную систему, открывая для вас полный доступ ко всем нашим модулям. Подробную информацию об условиях подписки и часто задаваемых вопросах вы можете найти здесь.
Обратите внимание, что приобретение модулей по отдельности теперь недоступно — воспользоваться ими возможно исключительно в рамках подписки.
За единую стоимость подписки - 2000 руб/мес. Вы получаете доступ ко всем модулям.
Как оформить подписку у нас на сайте
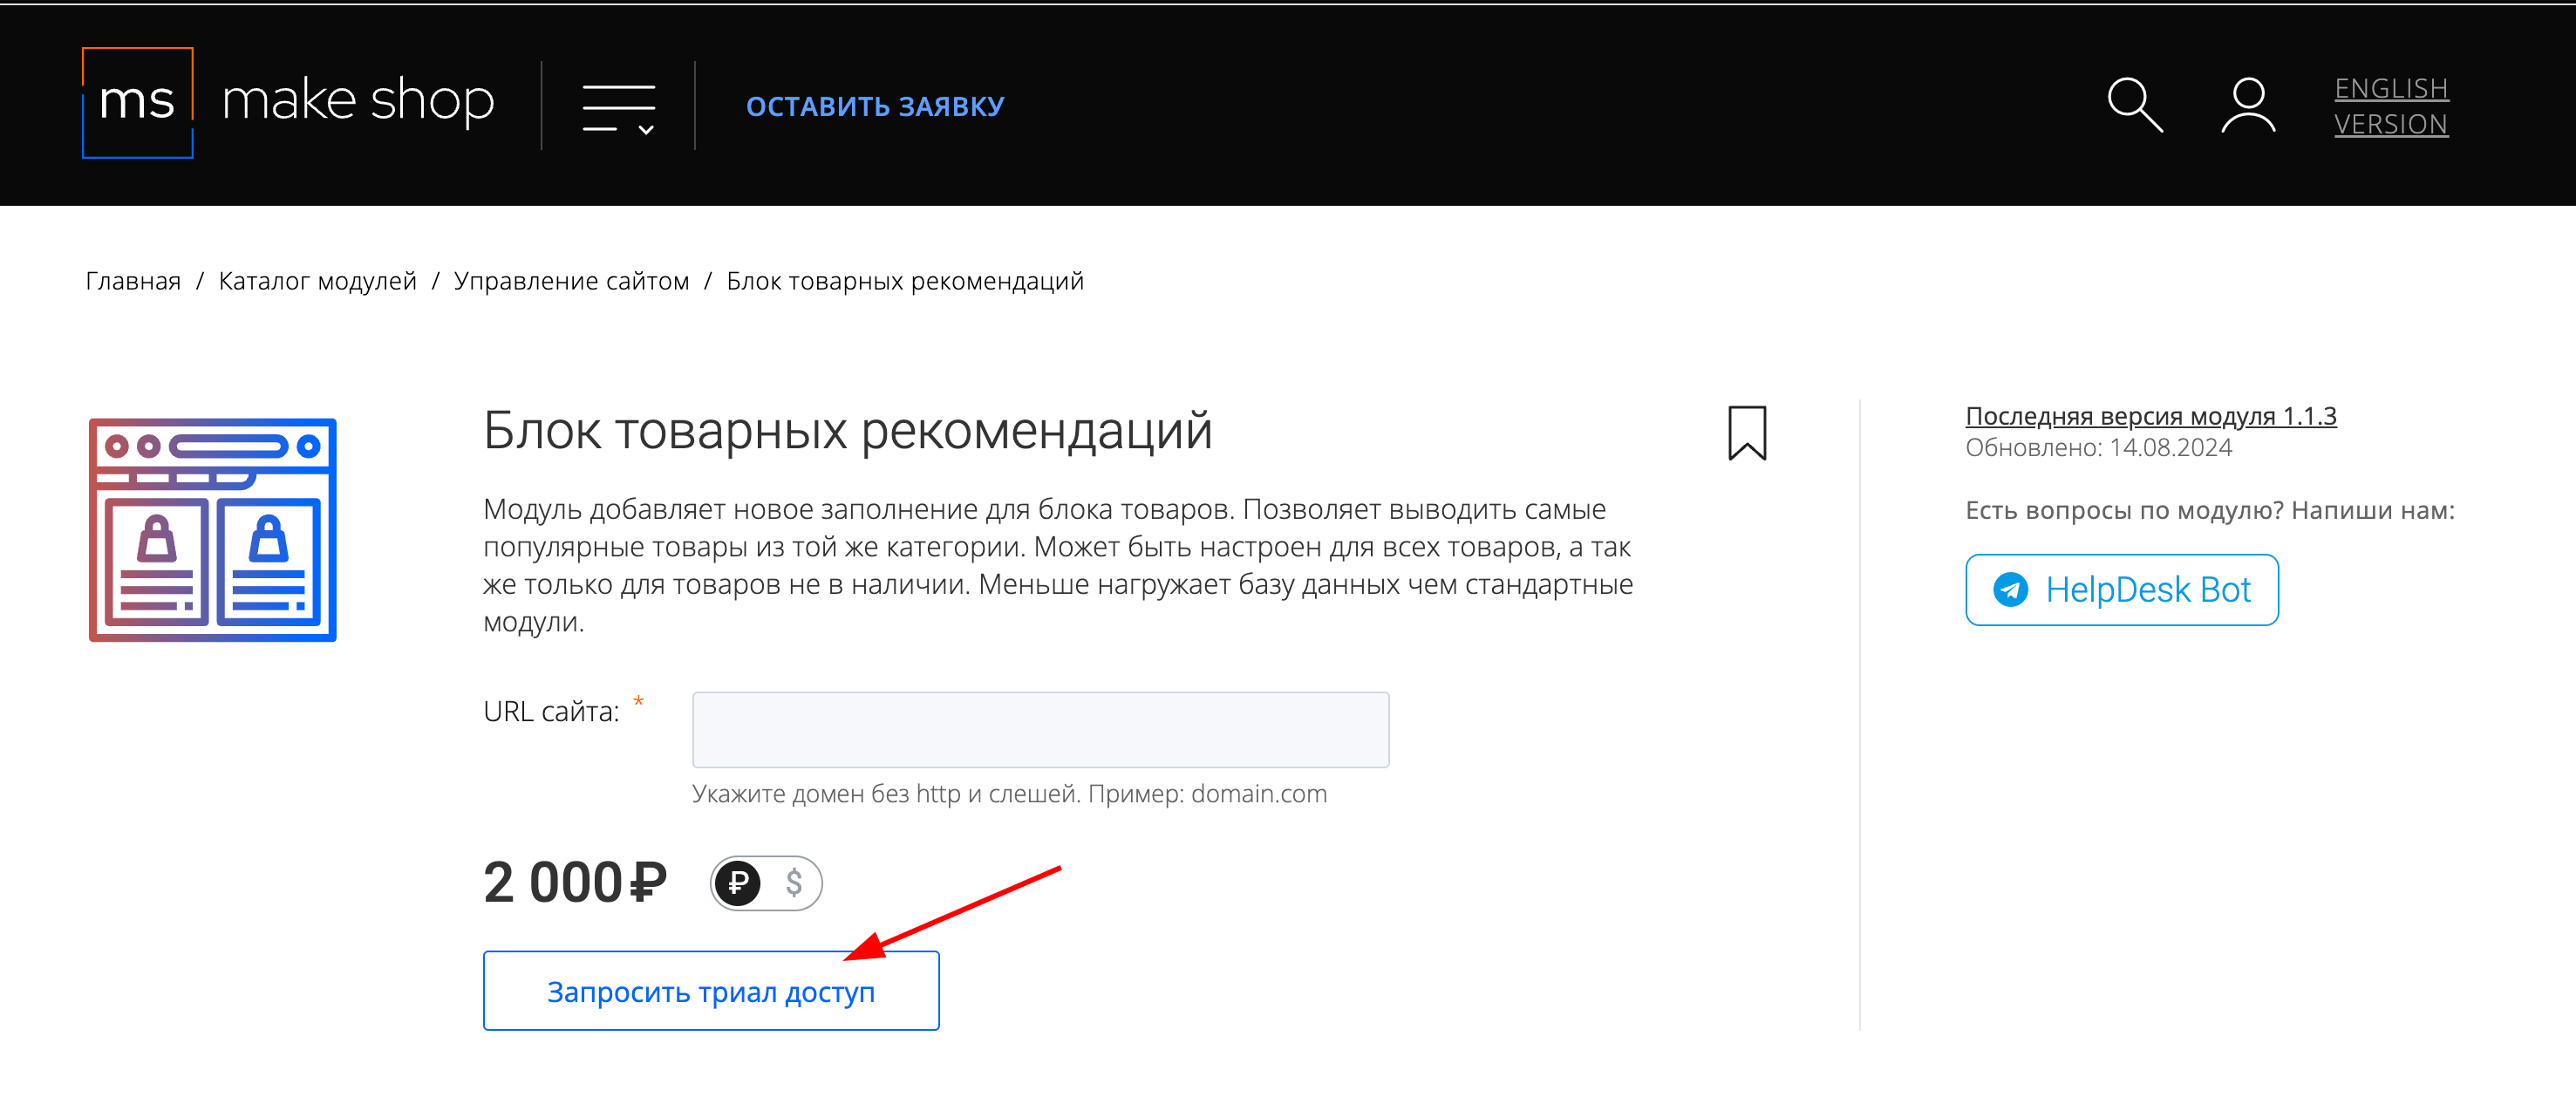
Зарегистрируйтесь или авторизуйтесь на нашем сайте и выберите интересующий вас модуль
Нажмите кнопку Запросить триал доступ
Введите в поле URL сайта ваш домен в формате domain.com, без www и https://
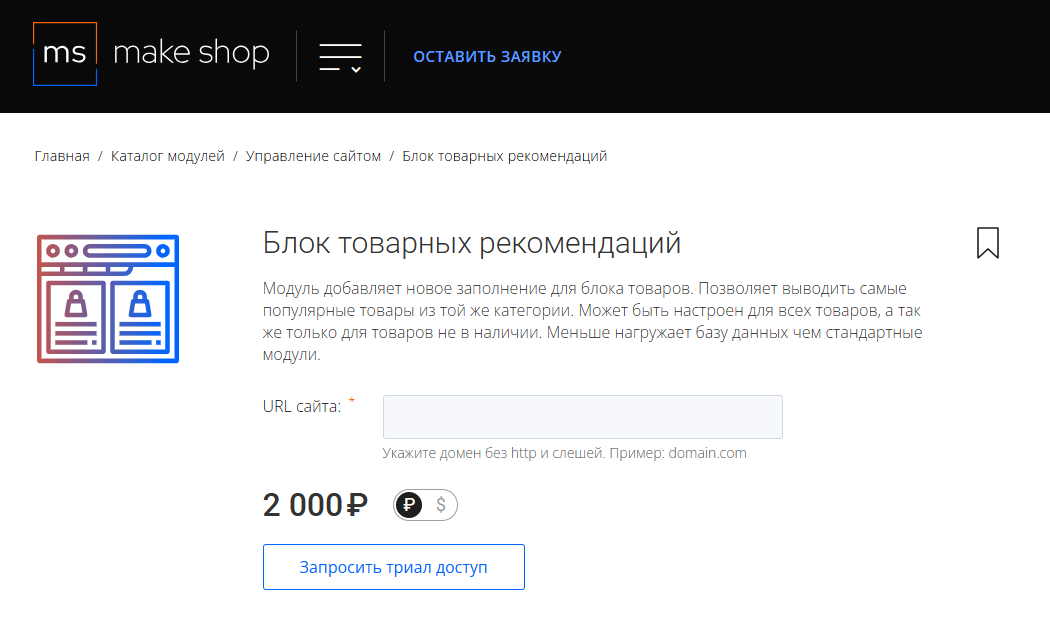
Далее в личном кабинете в разделе загрузки вы сможете скачать нужный вам модуль и менеджер модулей для удобного управления модулями и оформления подписки.
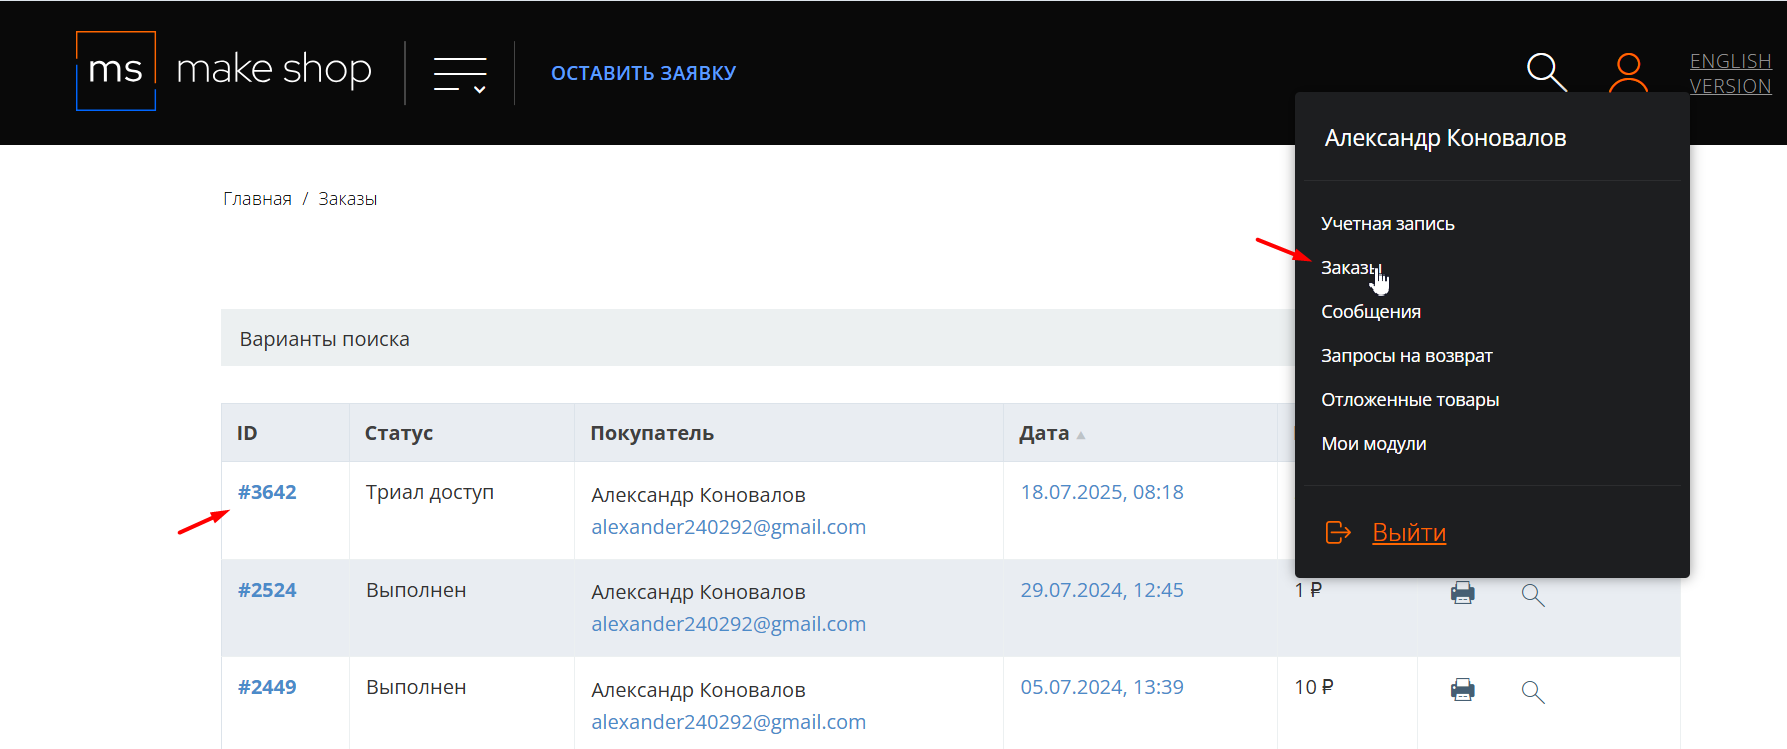
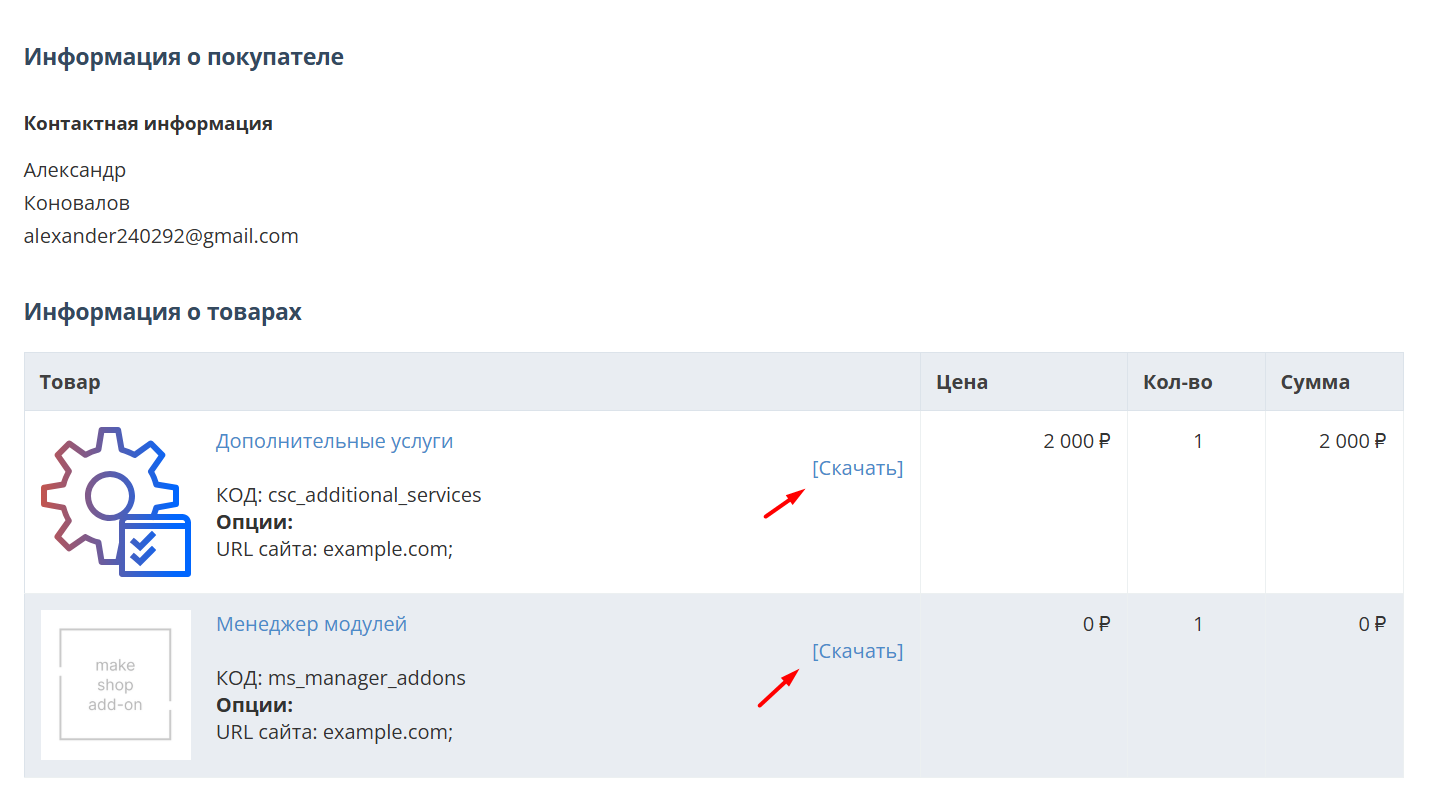
Далее у вас есть 7 дней для тестирования выбранного модуля.
По истечении строка триала, для продолжения работы необходимо оплатить подписку.
Сделать это можно из менеджера модулей.
На выбор вы можете оплатить:
для зарубежных карт - PayPal
для РФ карт - Robokassa
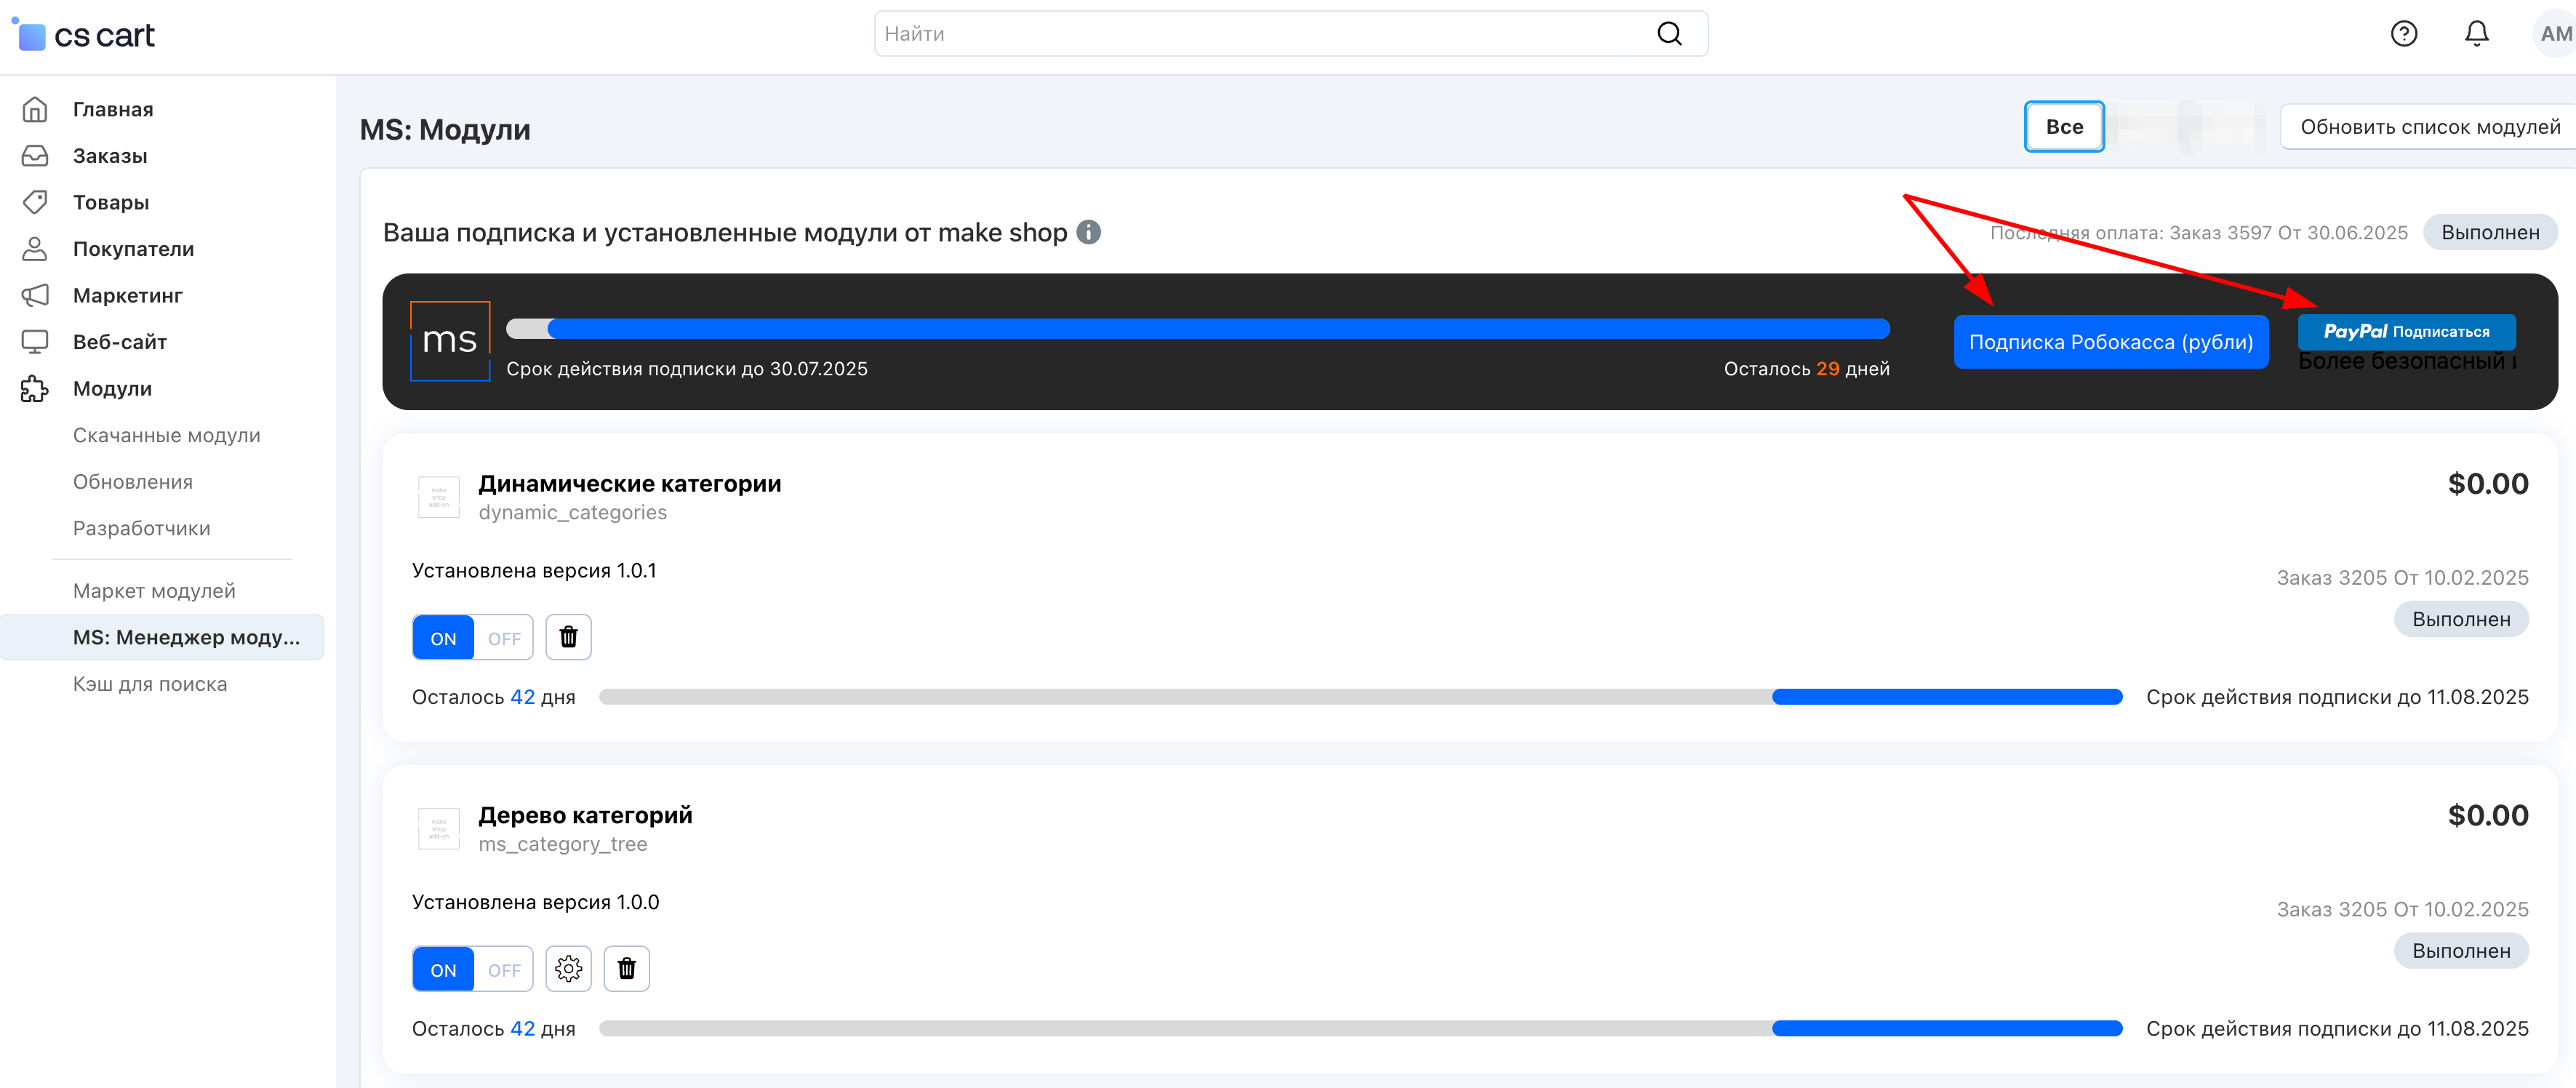
Или на странице на сайте https://makeshop.pro/subscription/
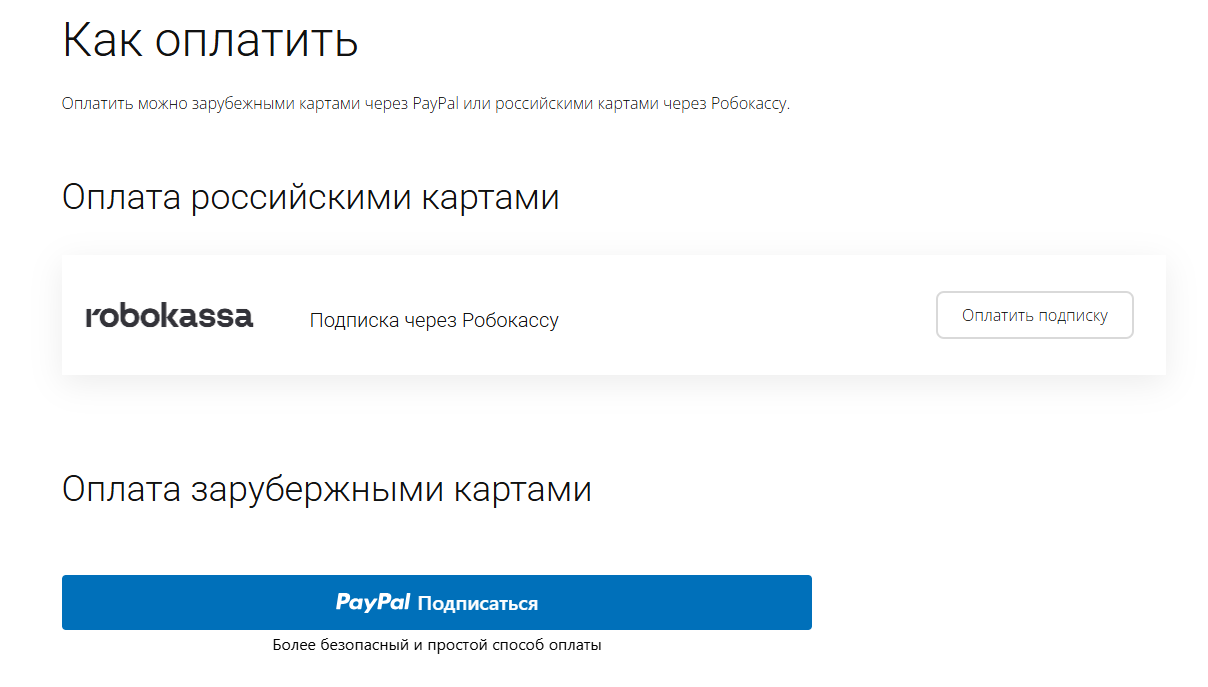
При оплате нужно указать электронную почту с которой вы оформляли триал доступ.
При покупке на маркетплейсе CS-Cart
При покупке любого модуля зарубежной картой или картой РФ
Так как система при оформлении подписки не спрашивает дополнительных вопросов (на какой домен подписка оформляется) желательно вводить электронную почту ту же что и ваша учетная запись у нас на сайте (если она есть), тогда ваши учётки свяжутся между собой.
Выберите интересующий модуль и нажмите кнопку “Оформить подписку“
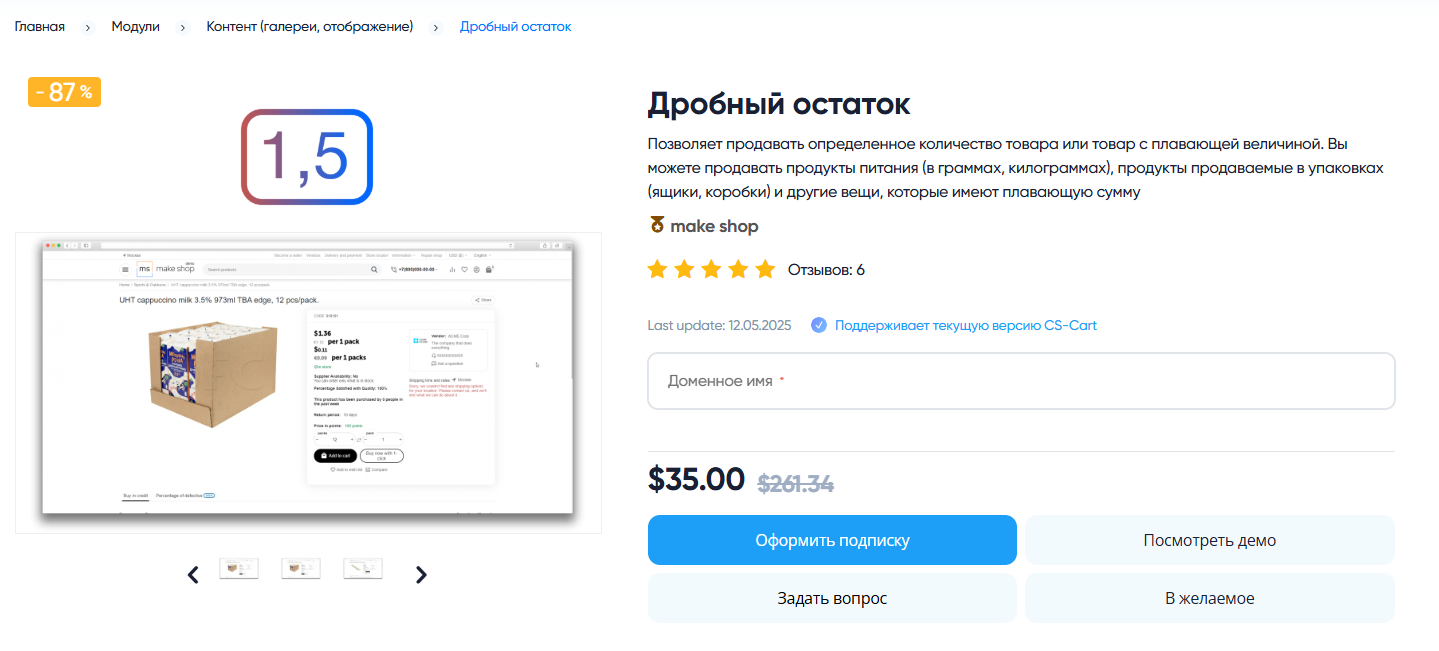
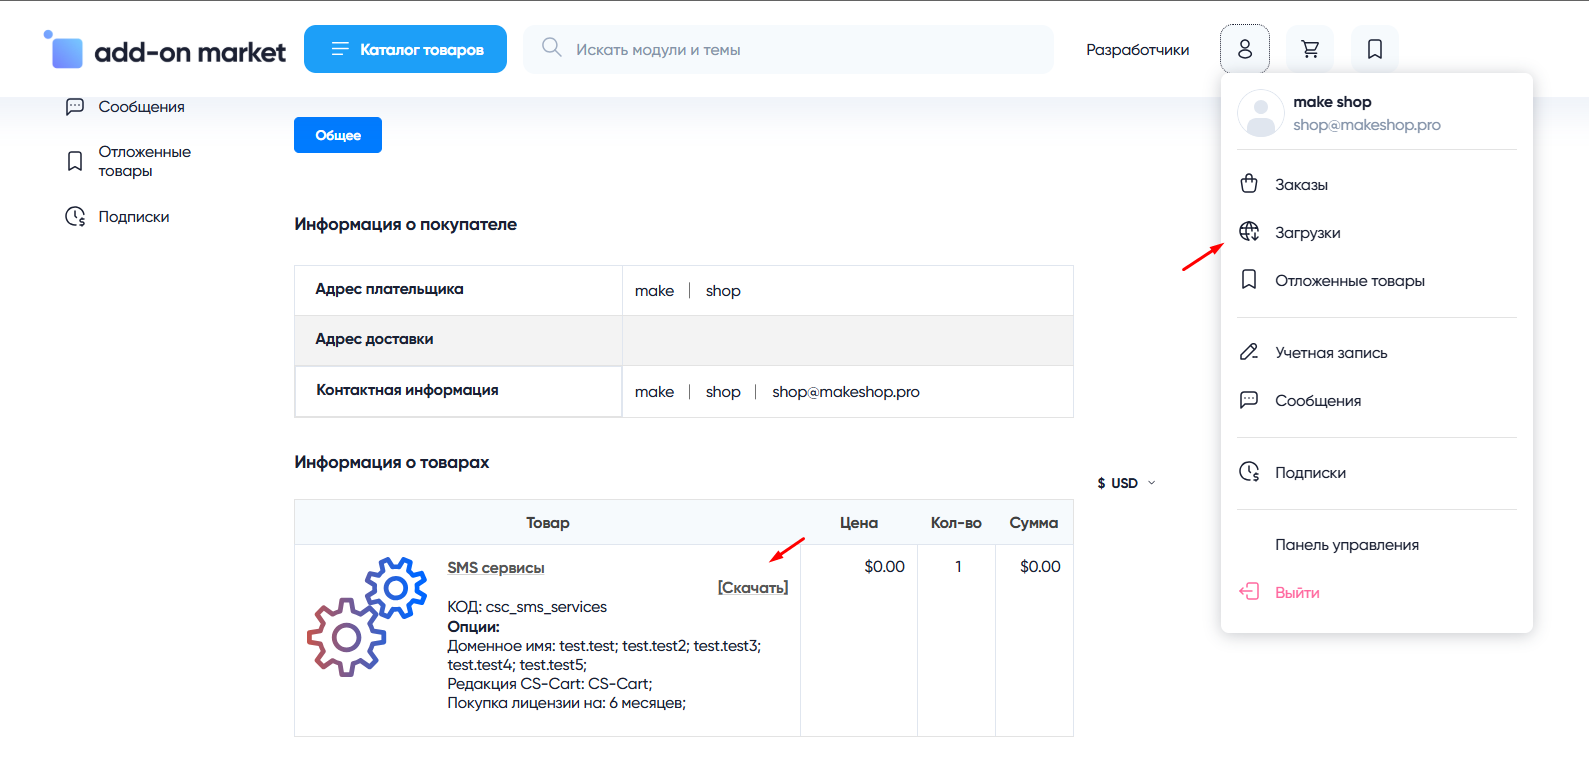
Далее после оплаты подписки вы сможете скачать модуль перейдя в раздел “Загрузки“, там выберите свой заказ и в нем будет ссылка на скачивание.
В дальнейшем, для получения новых модулей по подписке рекомендуем пользоваться нашим сайтом.
Всё что вам будет нужно сделать это на интересующем вас модуле (после авторизации) нажать кнопку “Запросить модуль по подписке“ и после одобрения скачать его в разделе загрузки.
Если что-то пойдет не так - проверьте выписалась ли лицензия
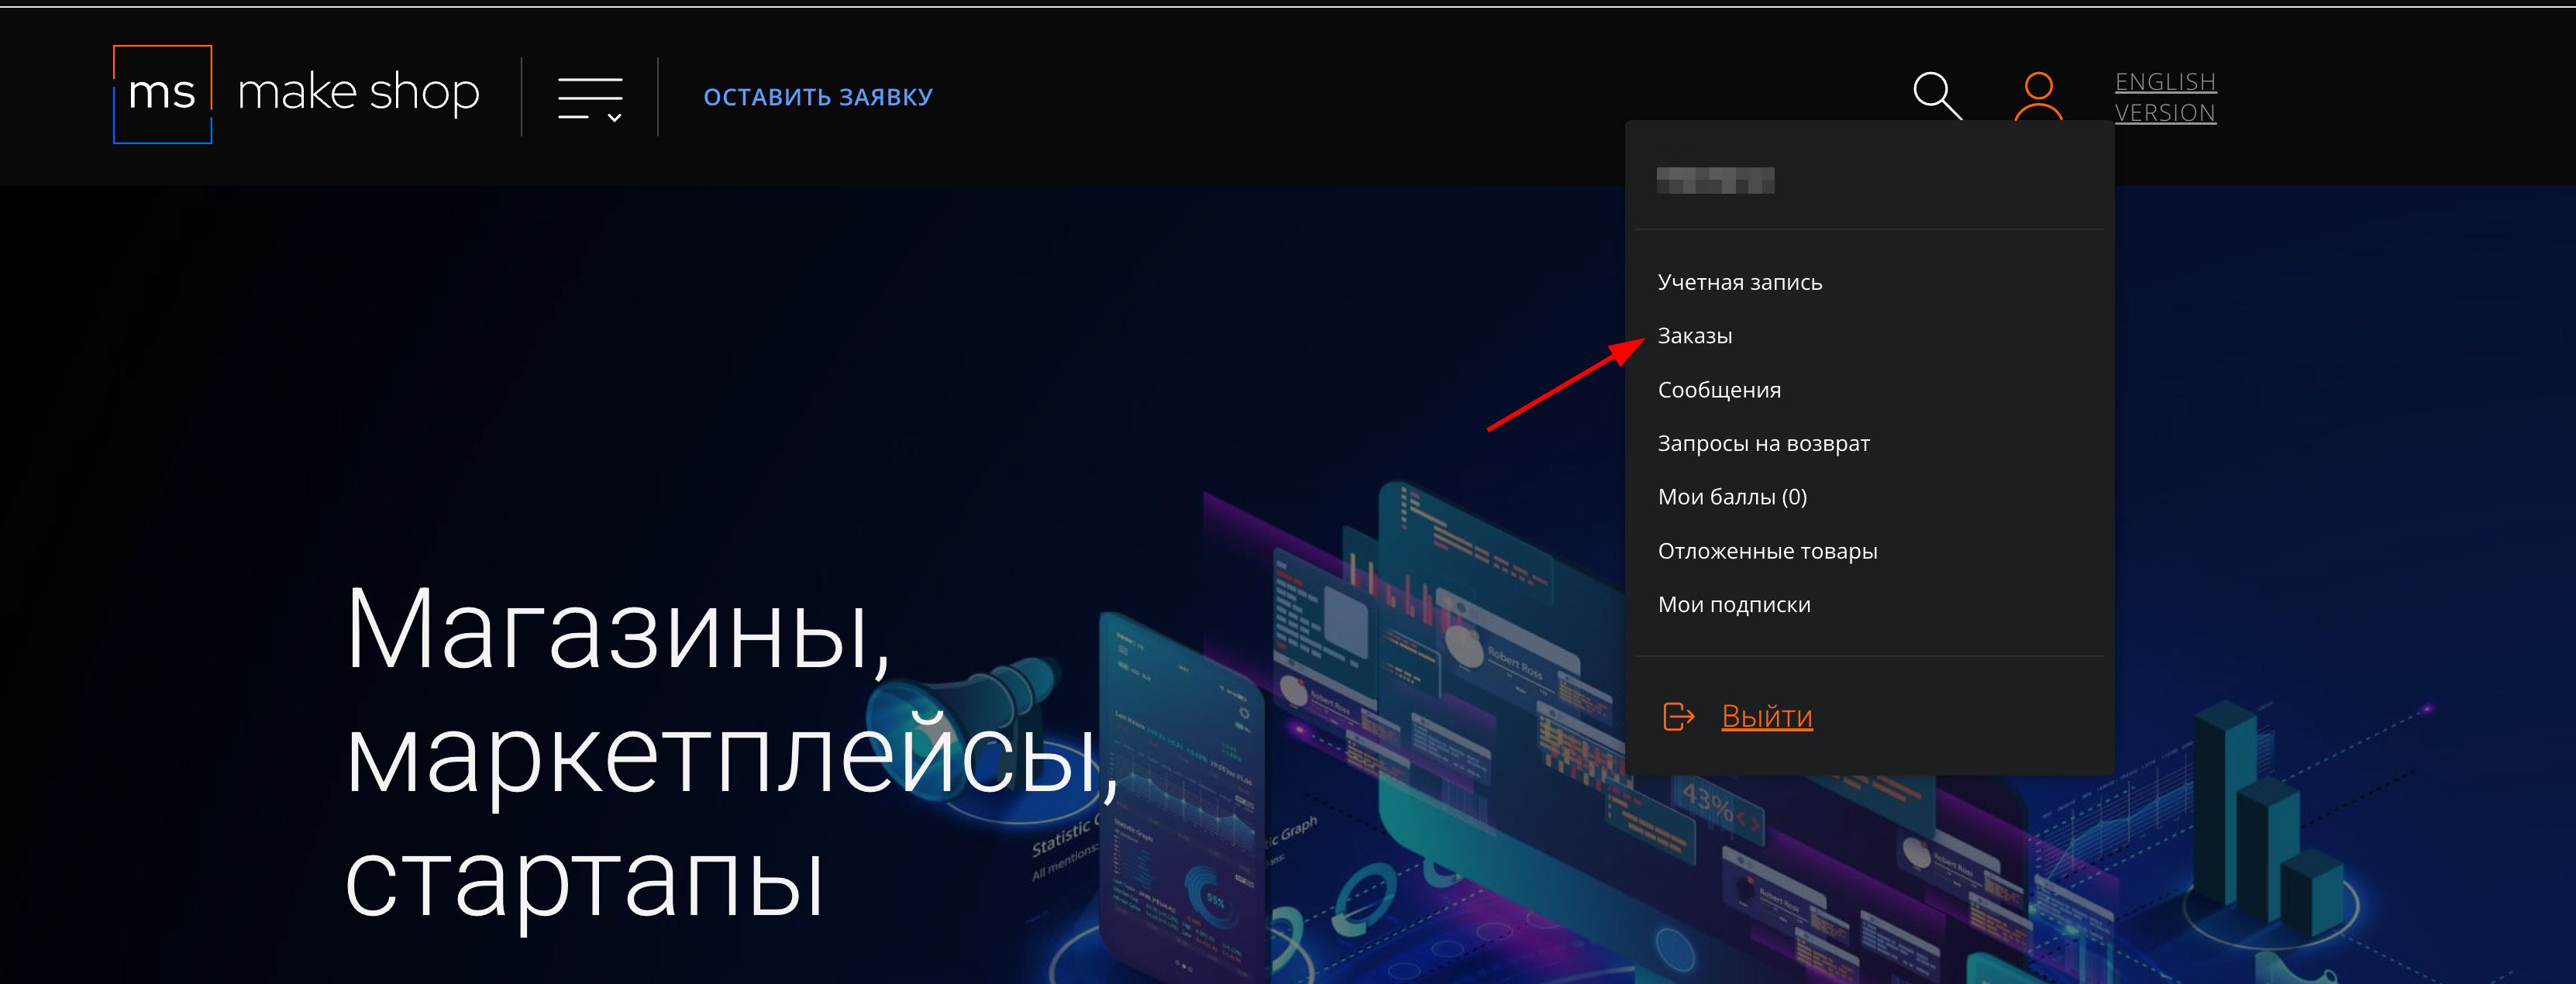
Найдите заказ с датой оформления подписки
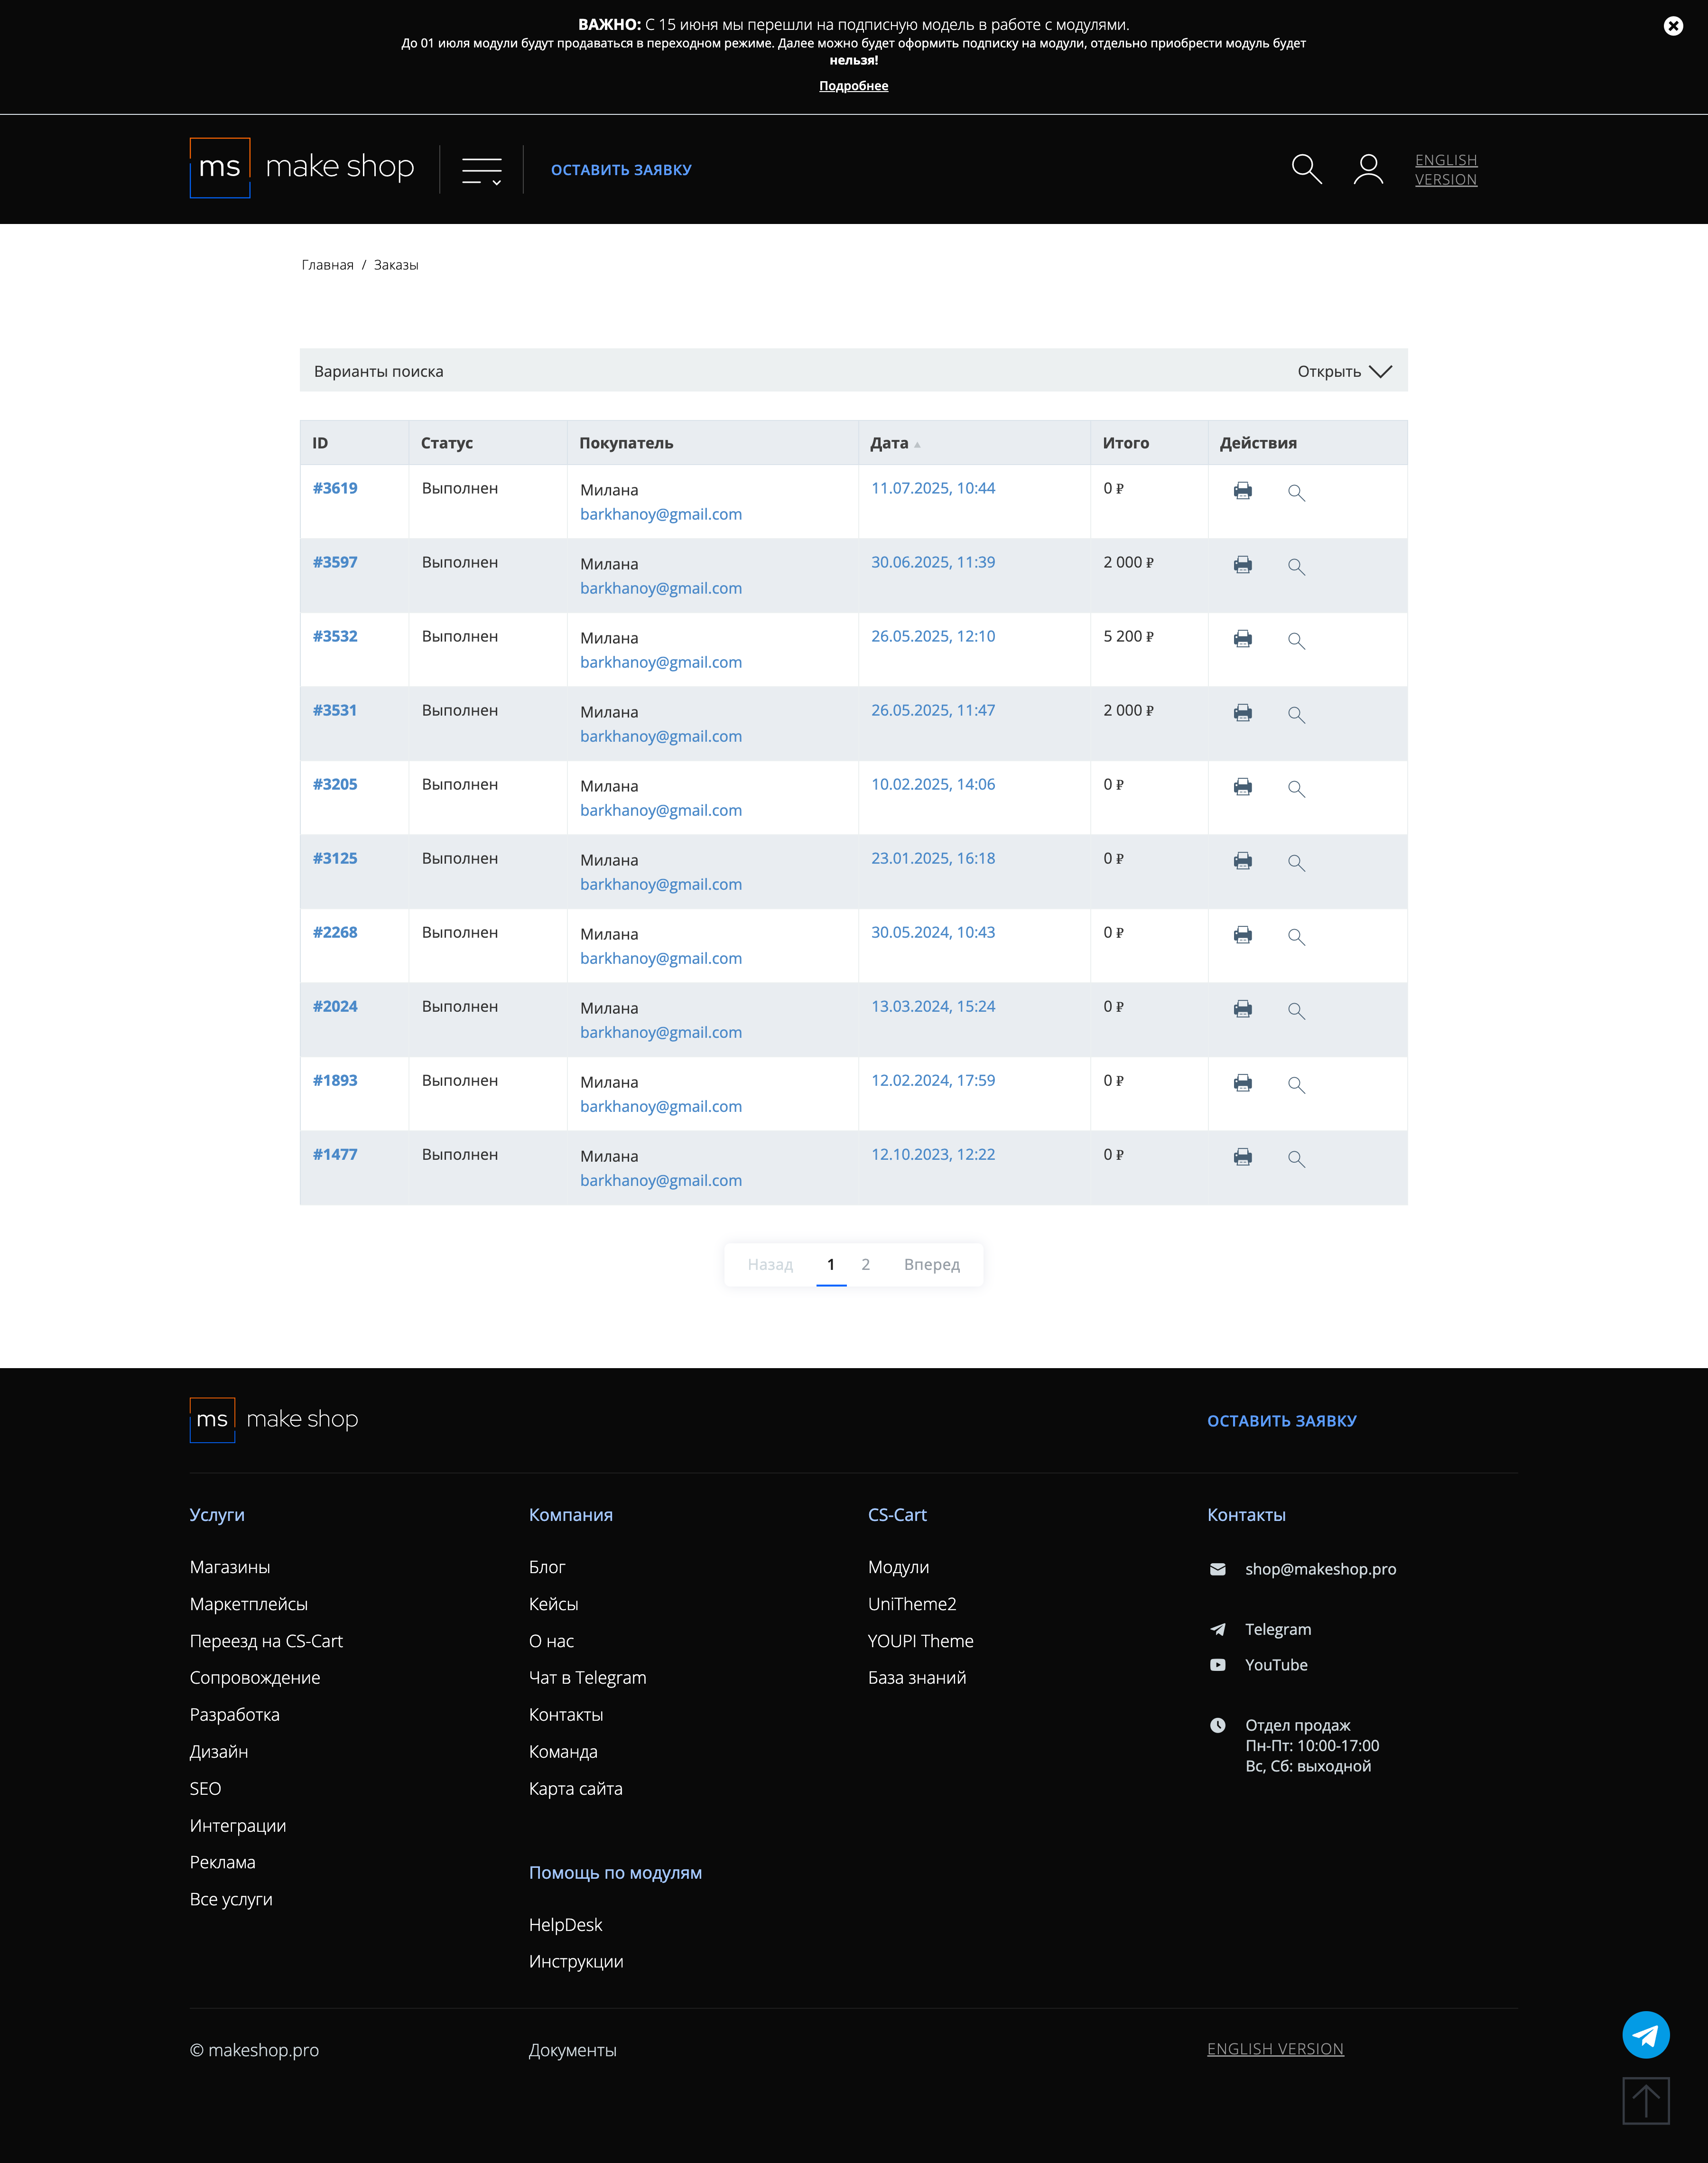
Убедитесь что у вас прописался URL сайта в заказ
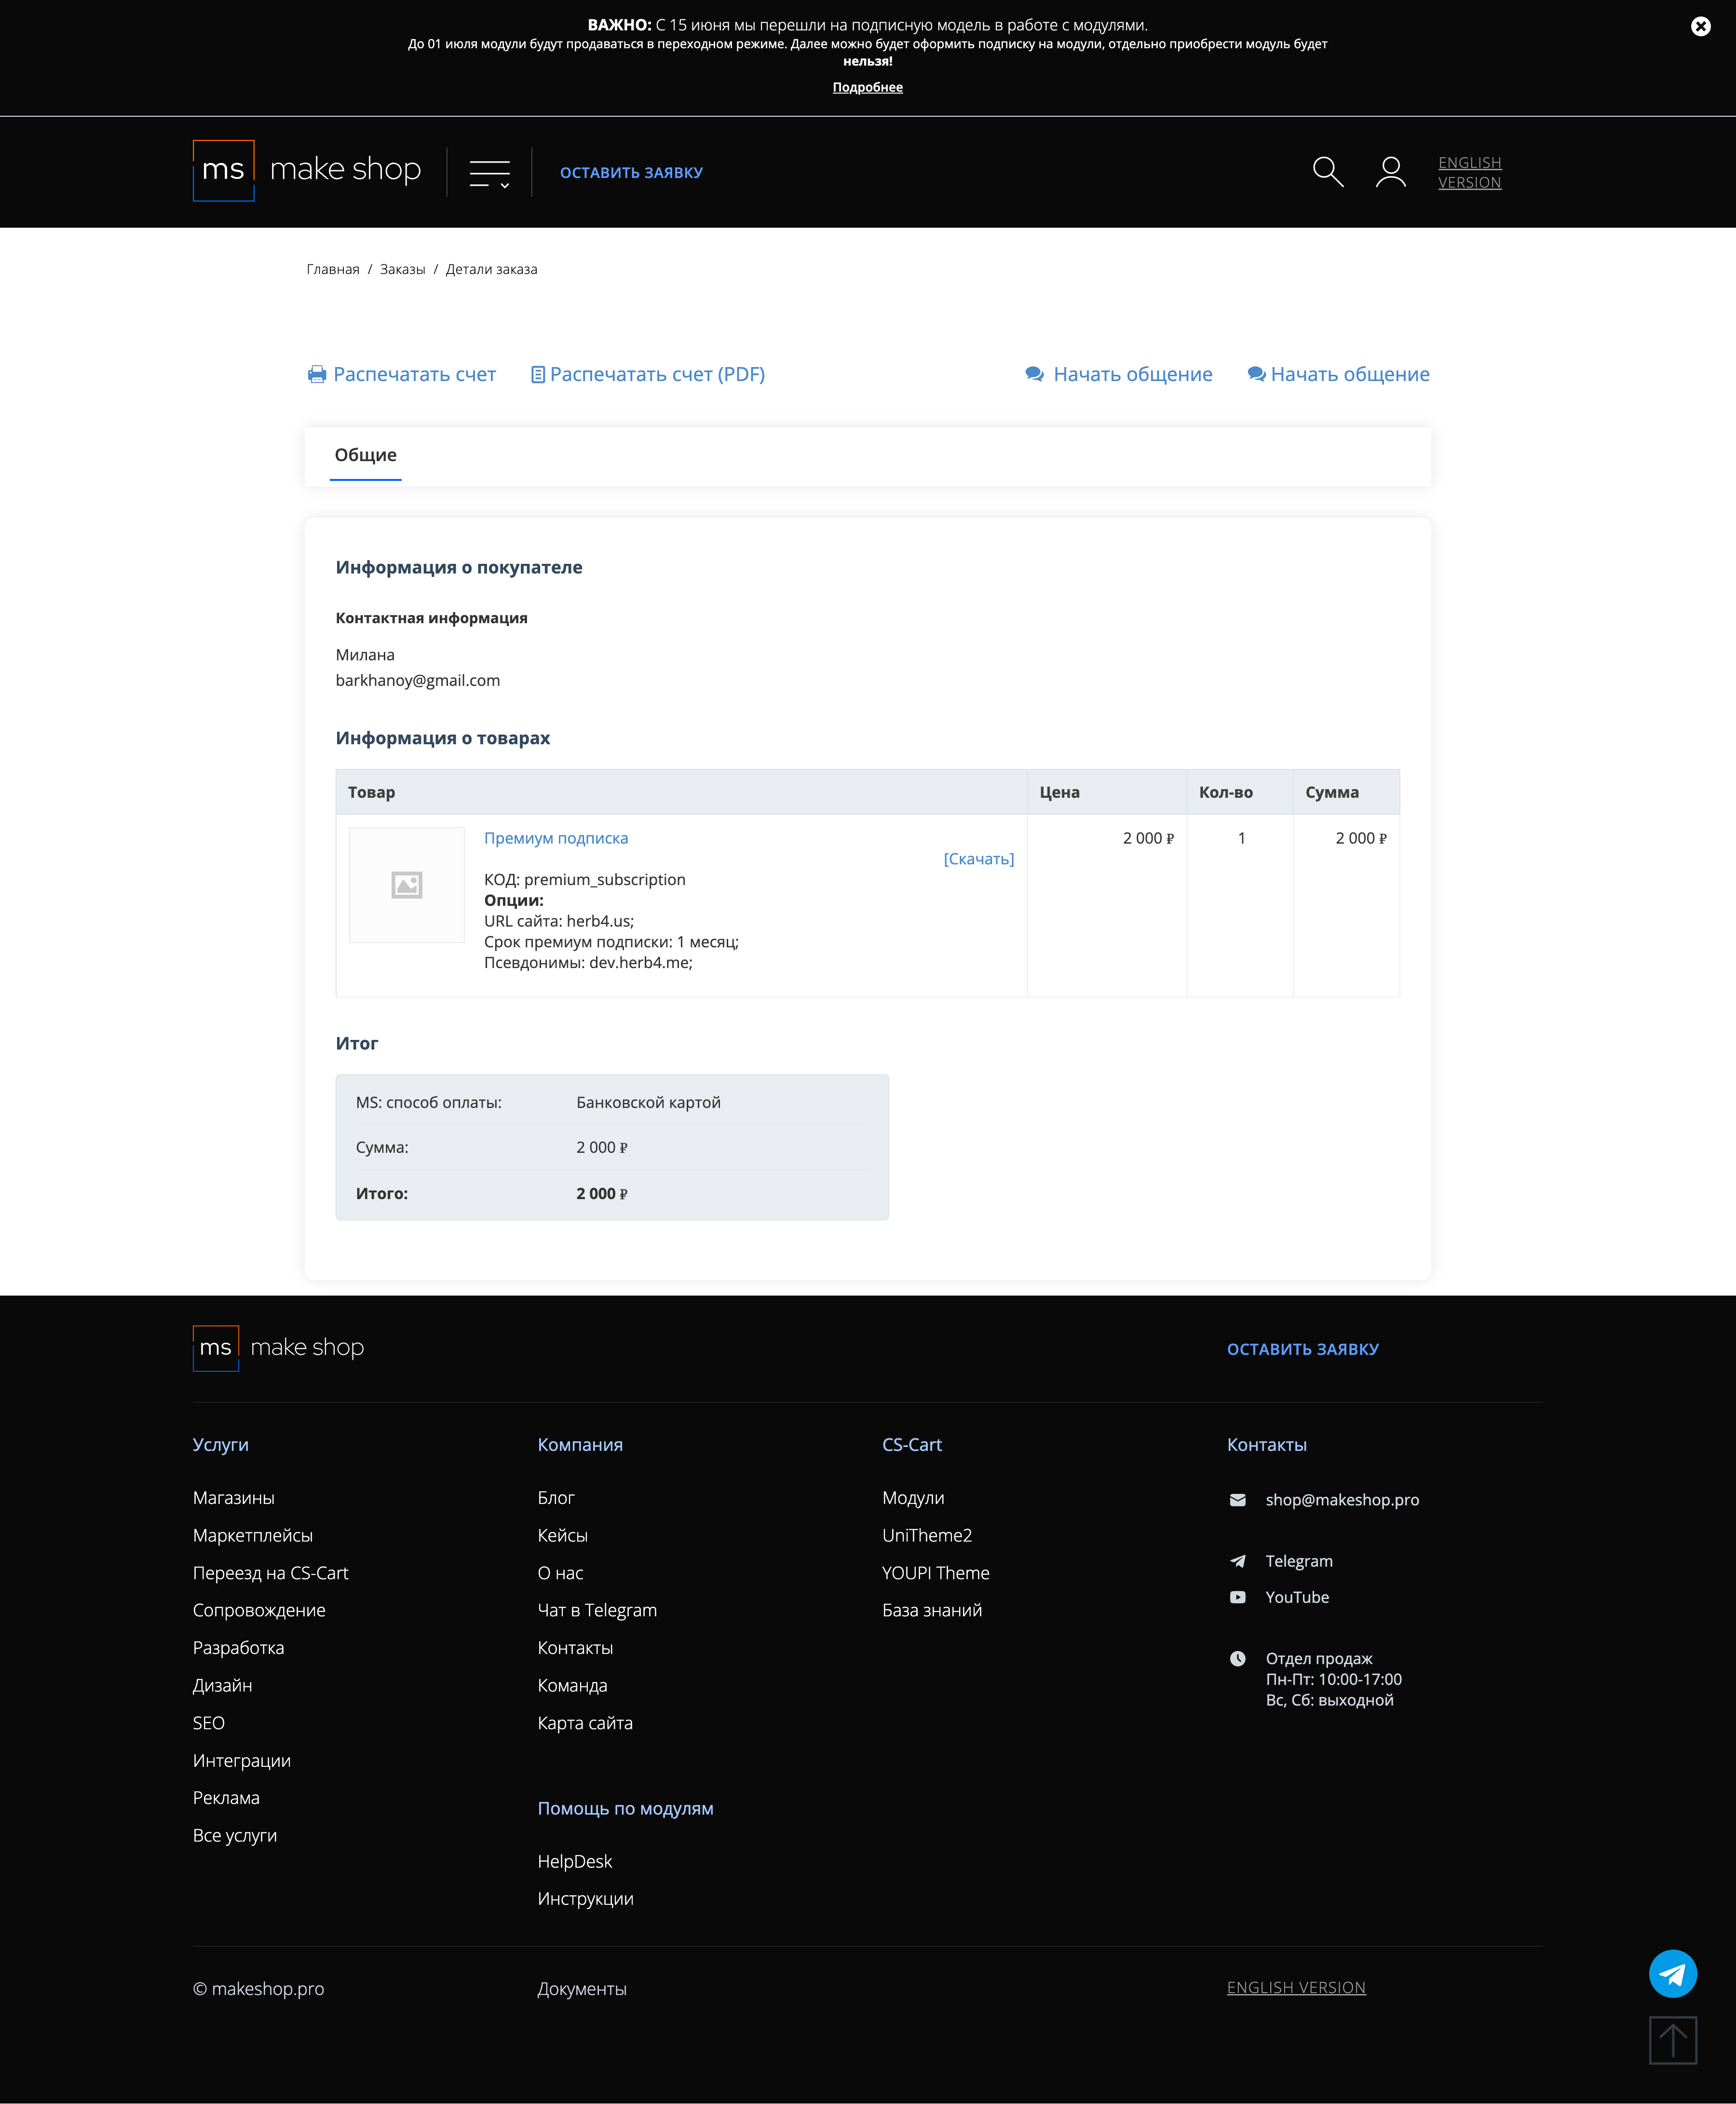
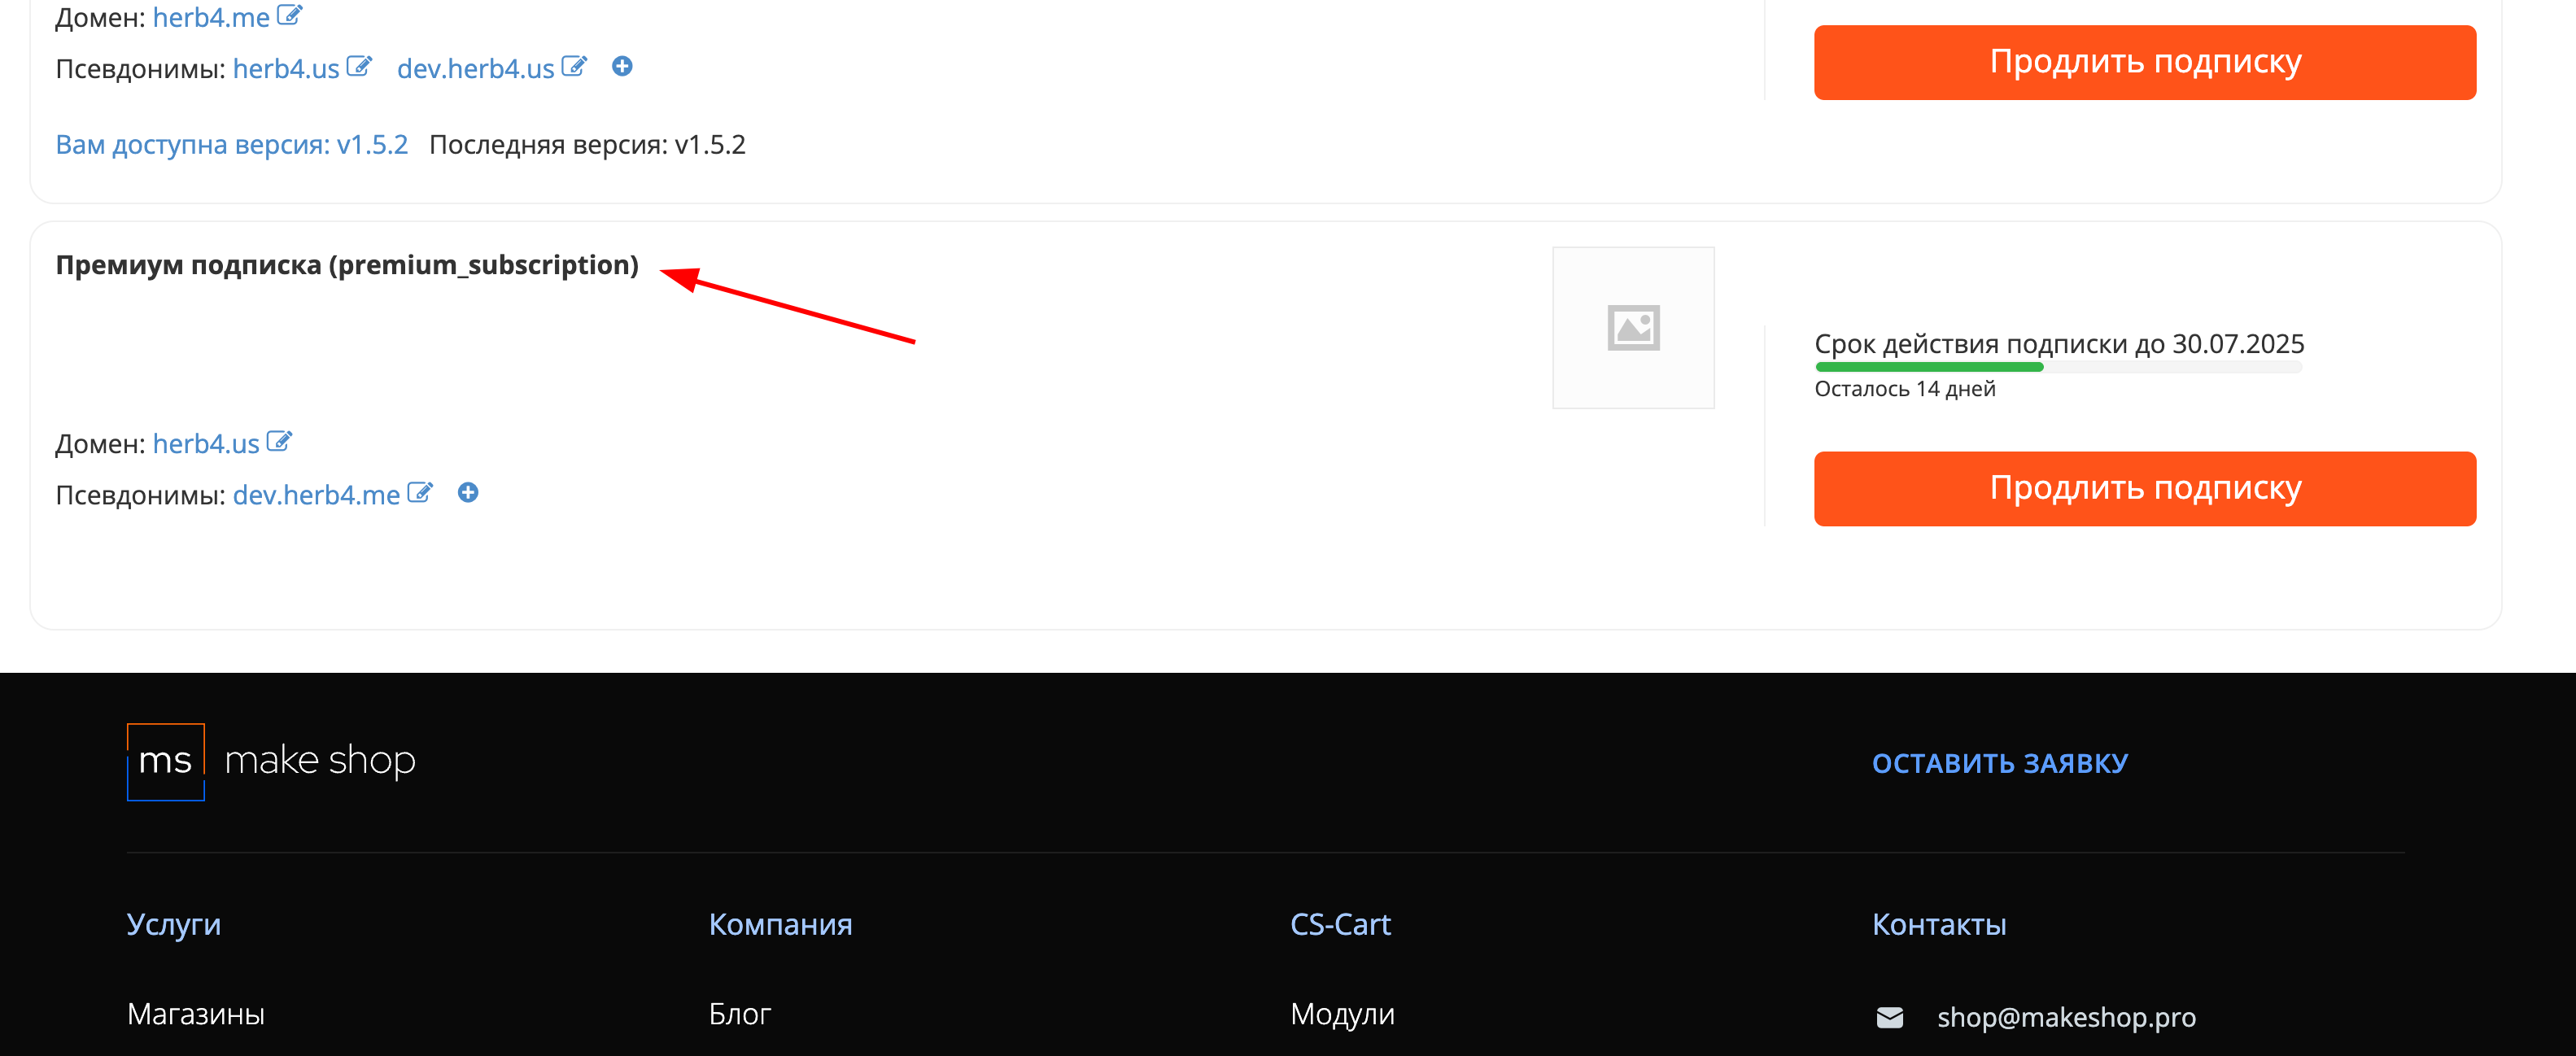
Если URL сайта неправильный и вам нужно обновить его: переходите в пункт меню “Мои модули”
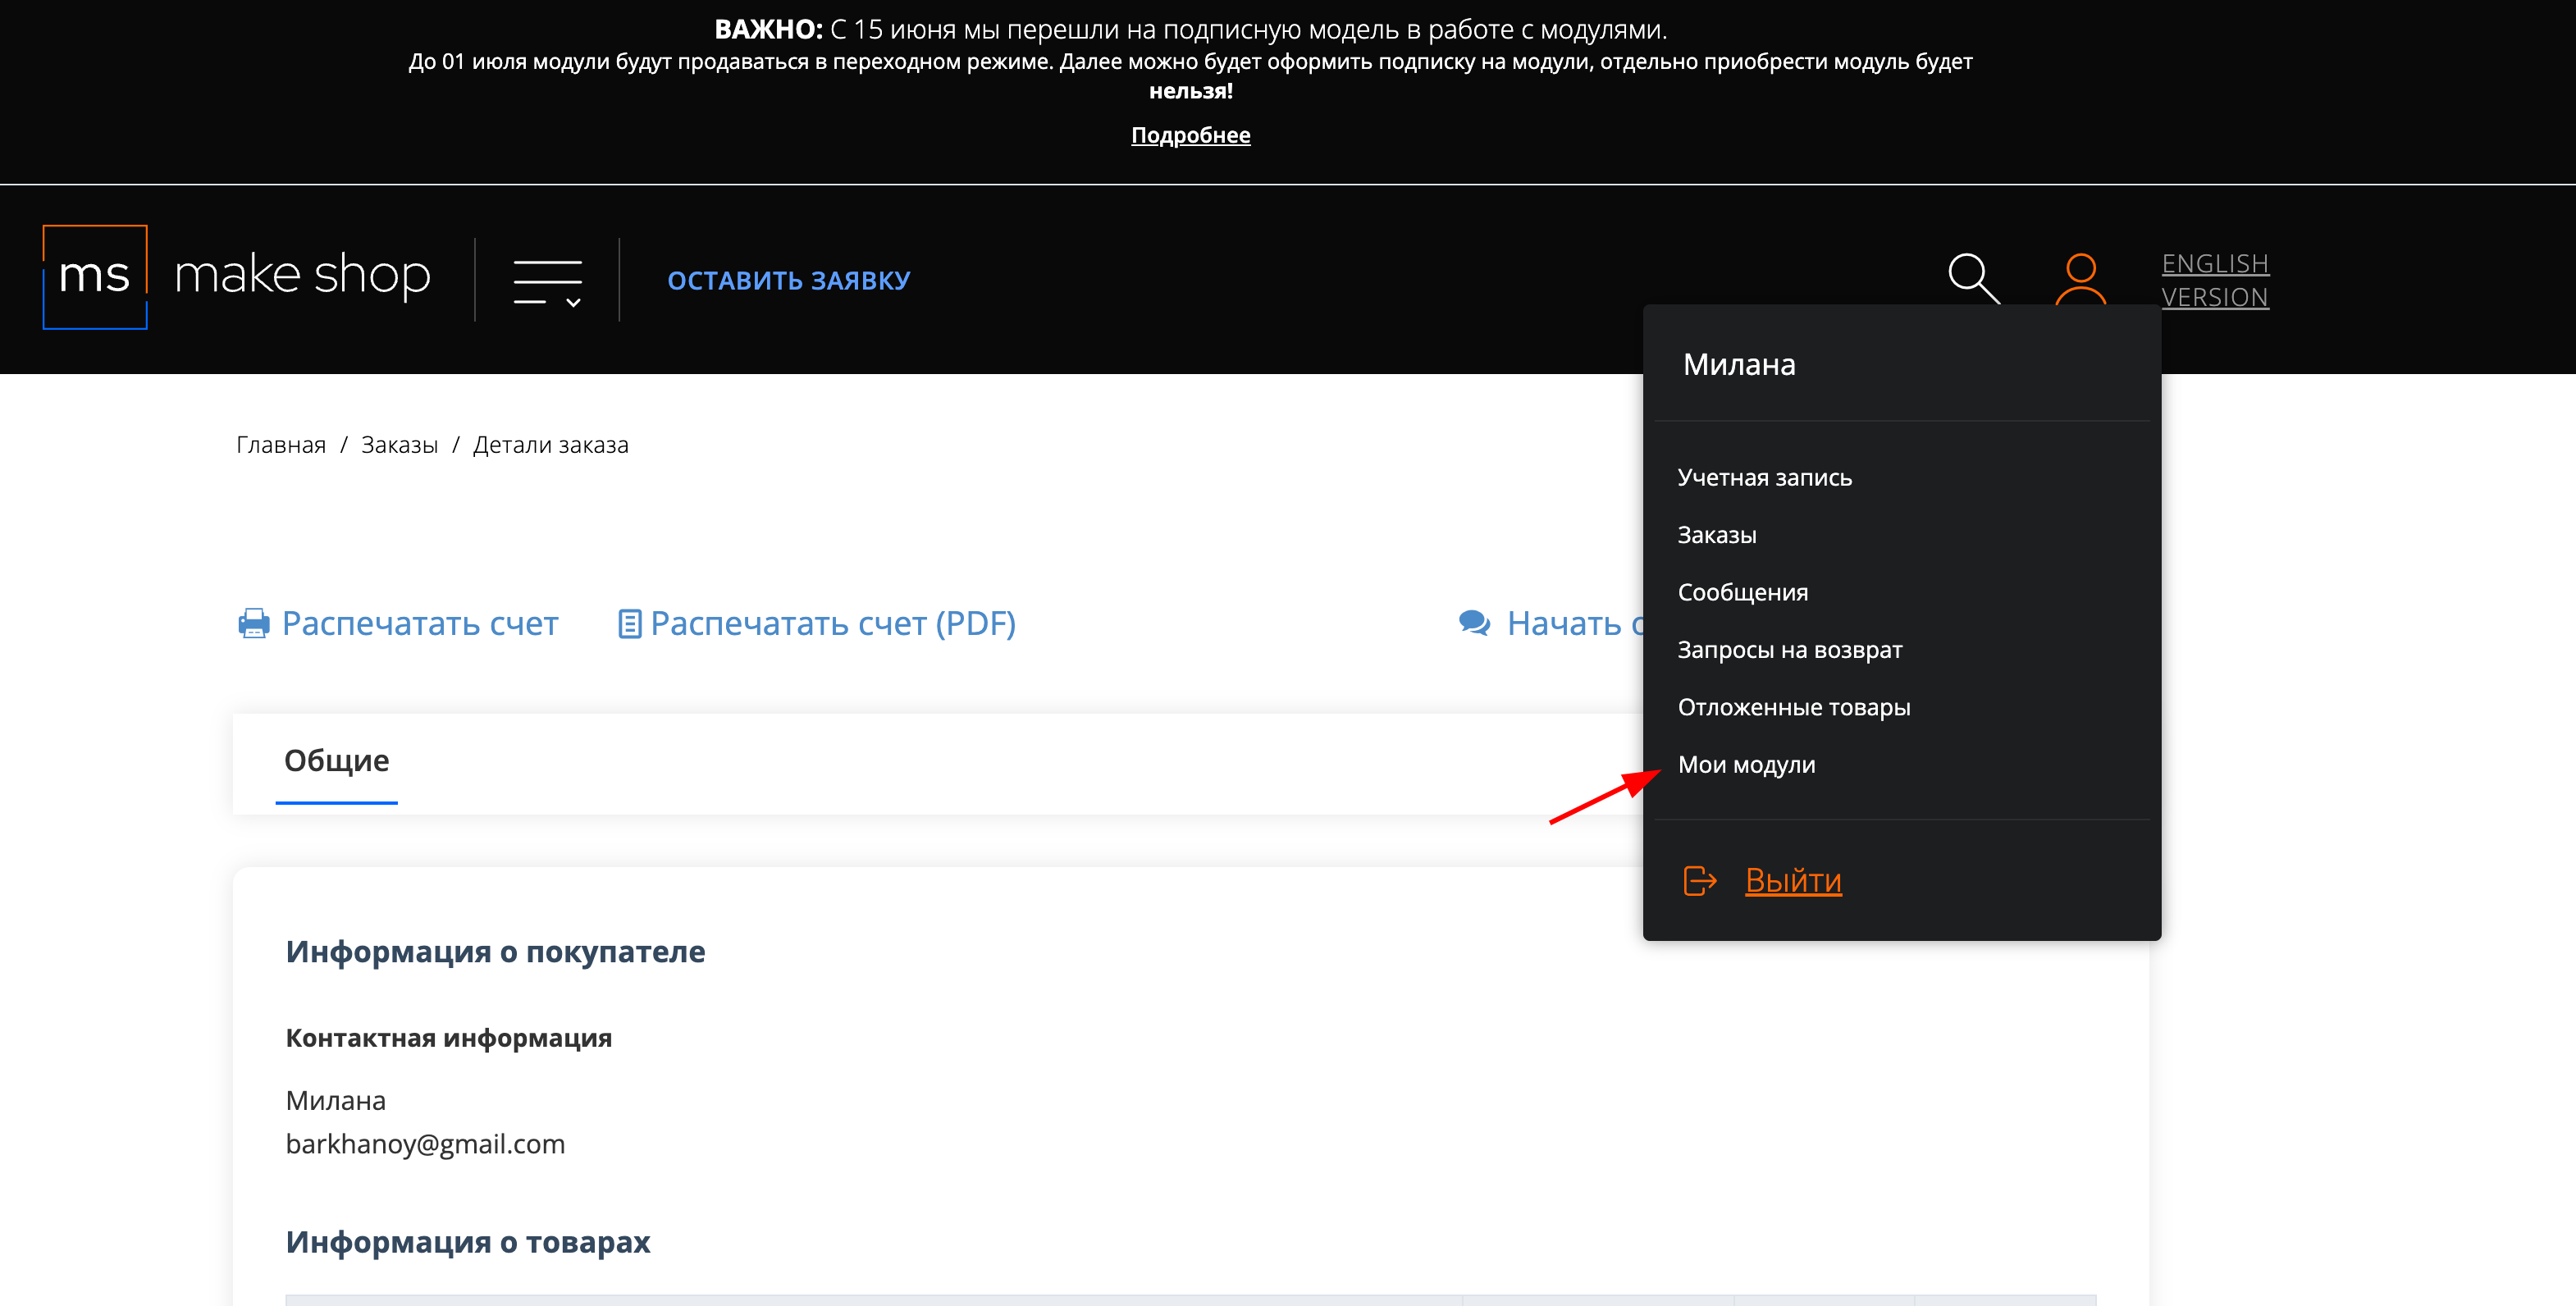
Ищите модуль и проверьте URL магазина для которого выписана подписка
Manual
Installation
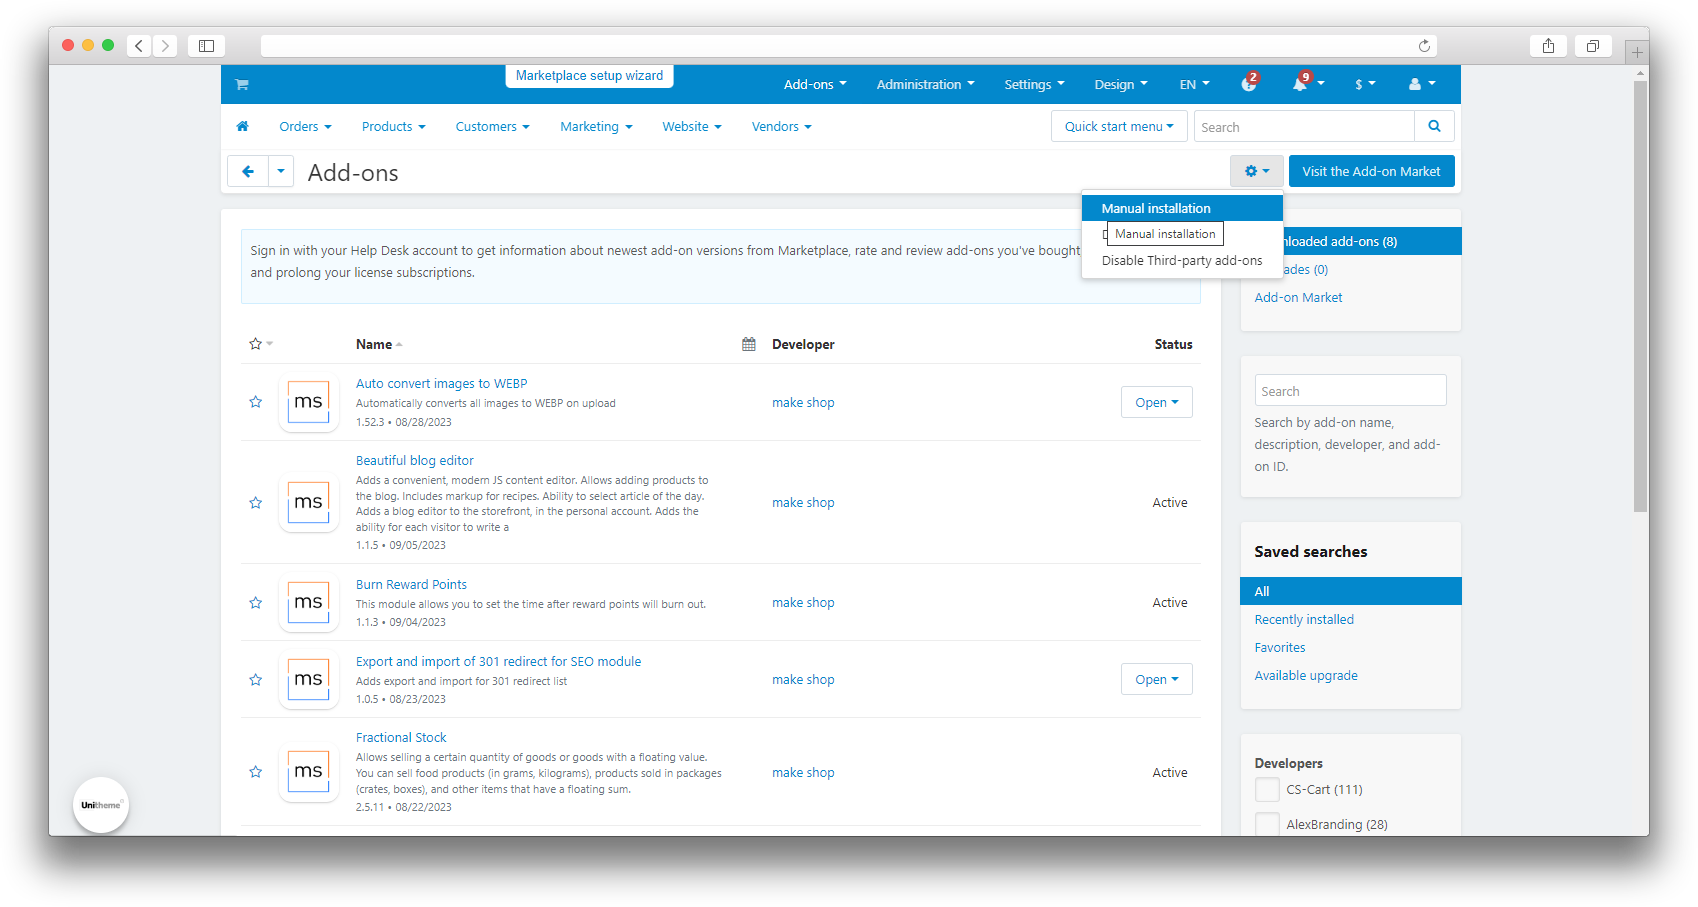
After downloading the add-on , it is installed using the standard CS-Cart tools on the page Admin Panel → Add-ons→ Manage Add-ons→ Upload and Install Add-on(+).
For CS-Cart version 4.13.1 and later, go to Admin Panel → Add-ons→ Manage Add-ons→ Gear Button → Manual Installation.
Synchronization
To start the setup, you need to log in to the Tilda website.
-
Log in to the Tilda website by going to https://tilda.cc/login/;
-
Select an existing project or create a new one;
-
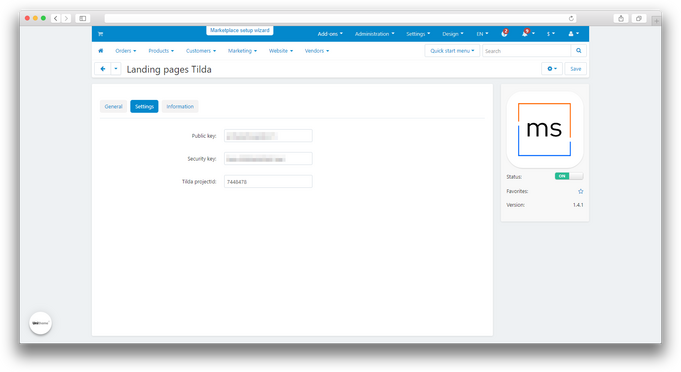
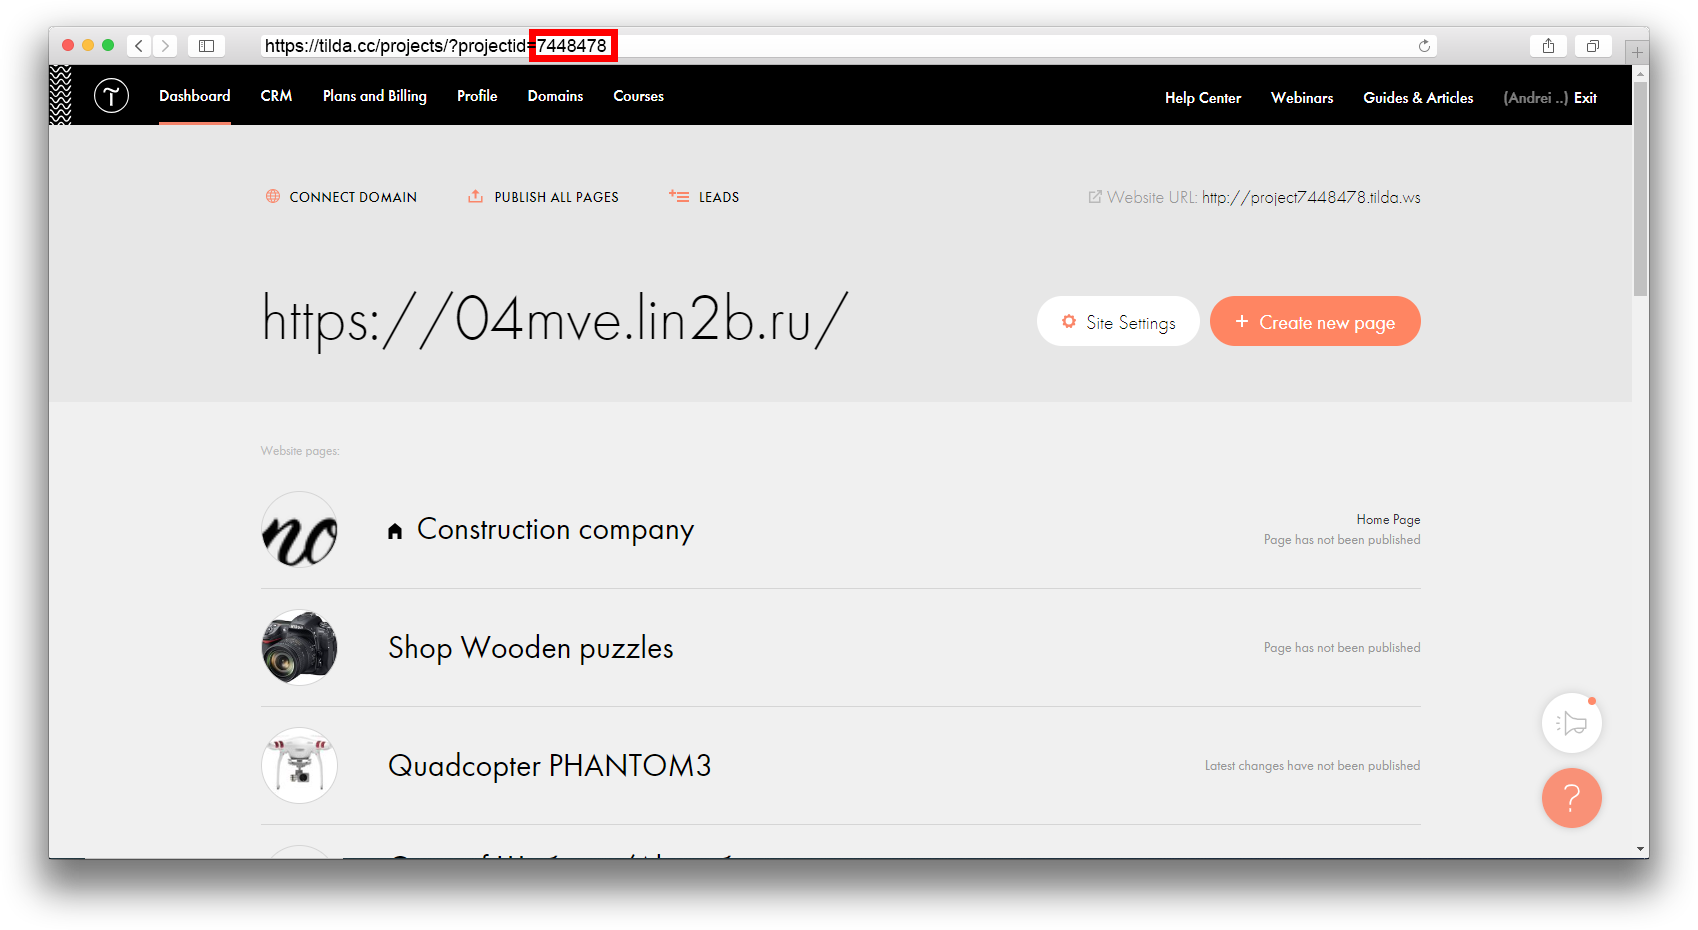
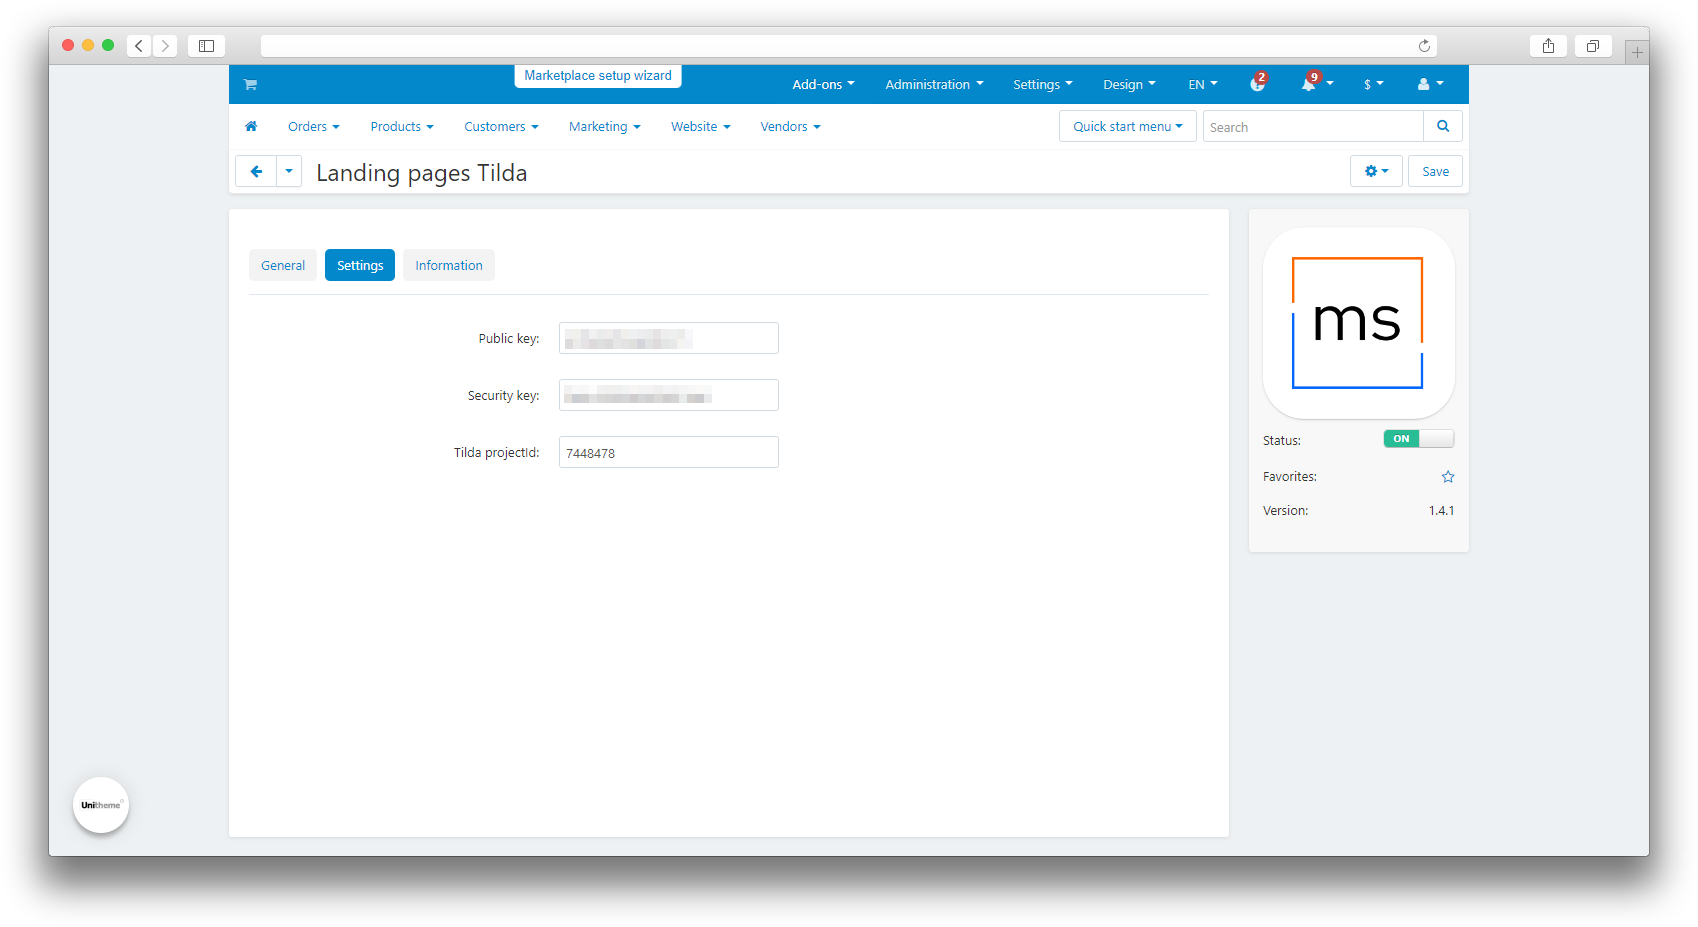
Copy the identifier (ID) from the address bar and paste it into the "Tilda project ID" field on the add-on settings page in CS-Cart;
-
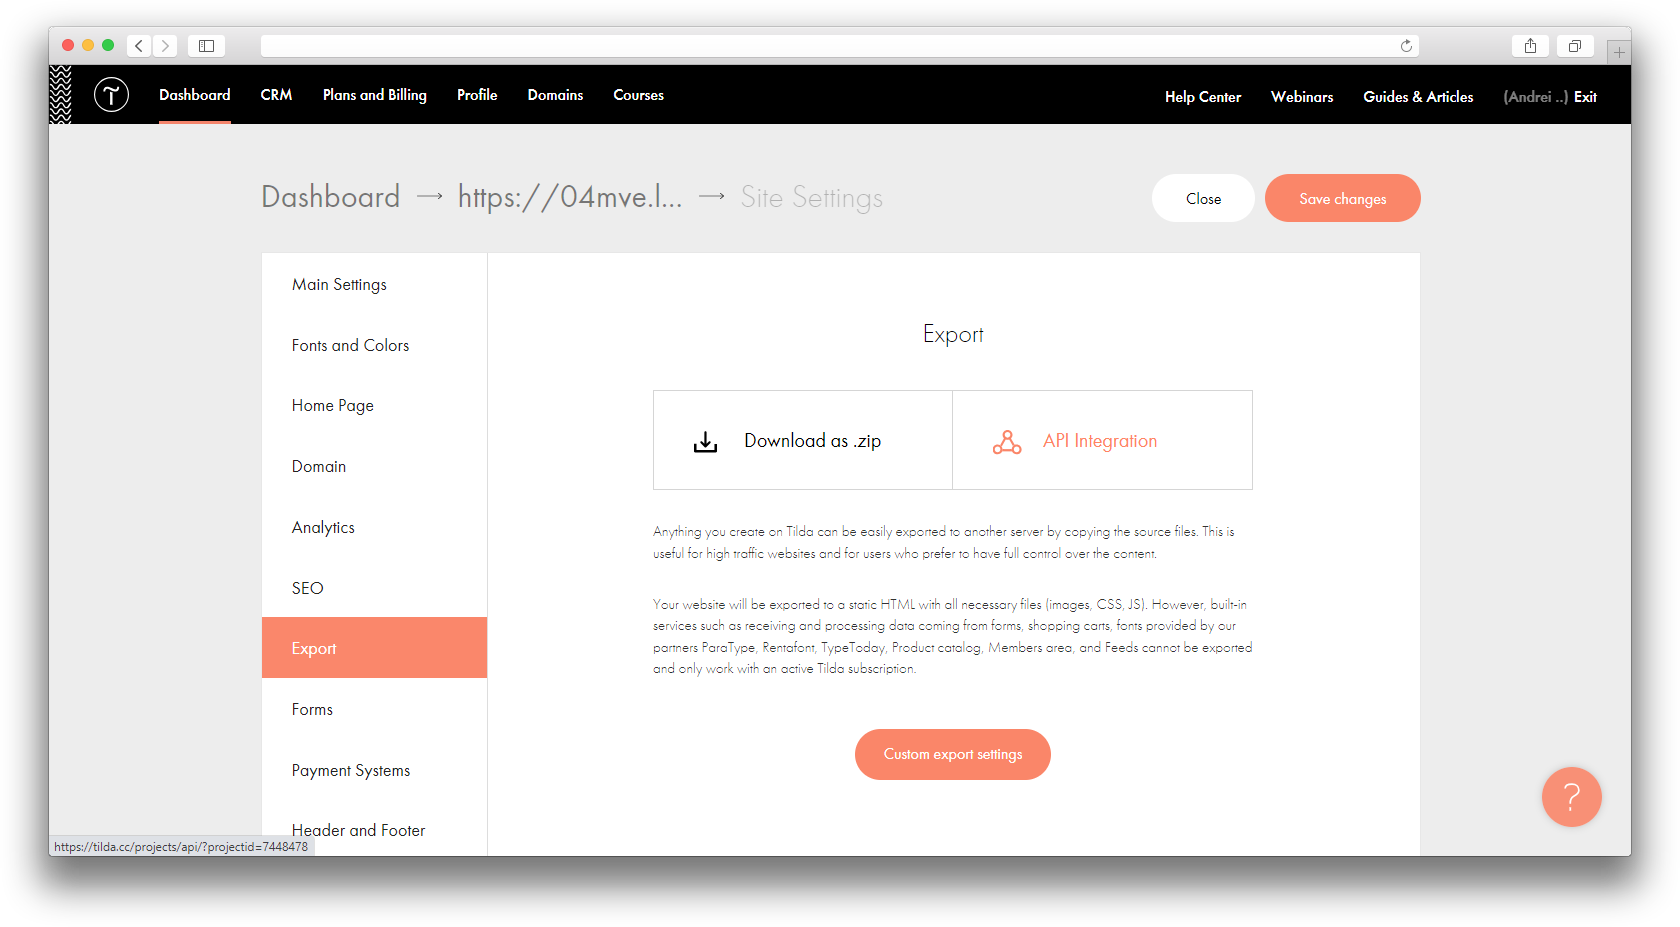
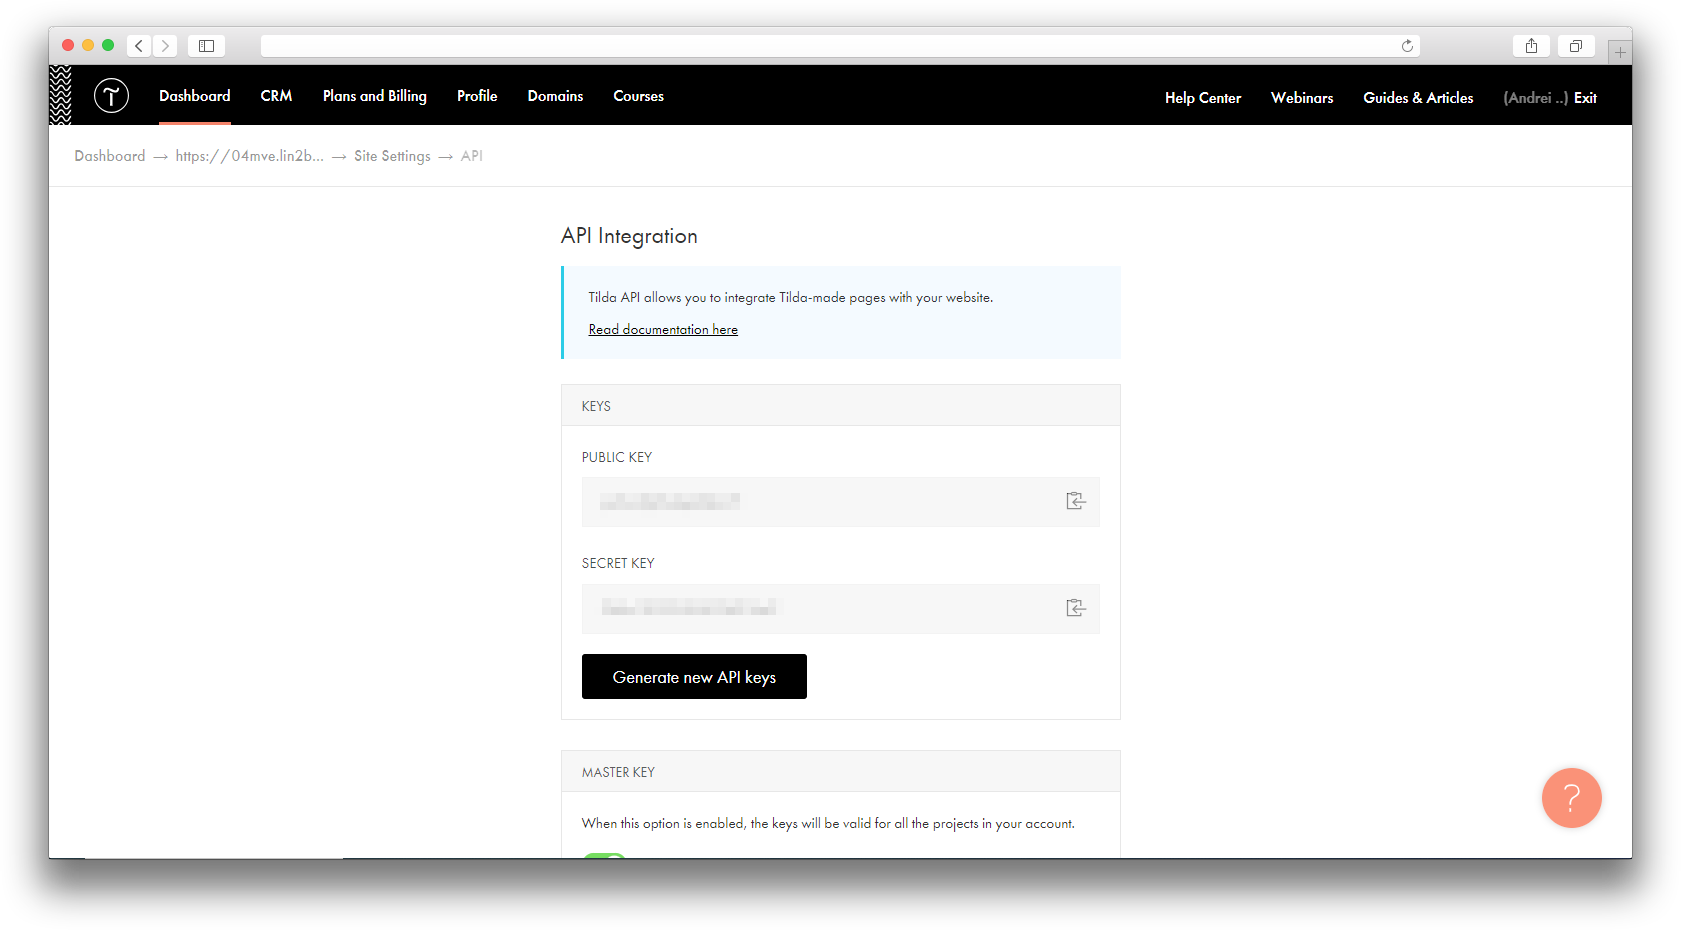
Go to the section "Site settings - Export - API integration" on the Tilda platform;
-
Copy the values of the "Public key" and "Secret key" fields and paste them, respectively, into the add-on settings fields "Public key" and "Security key";
-
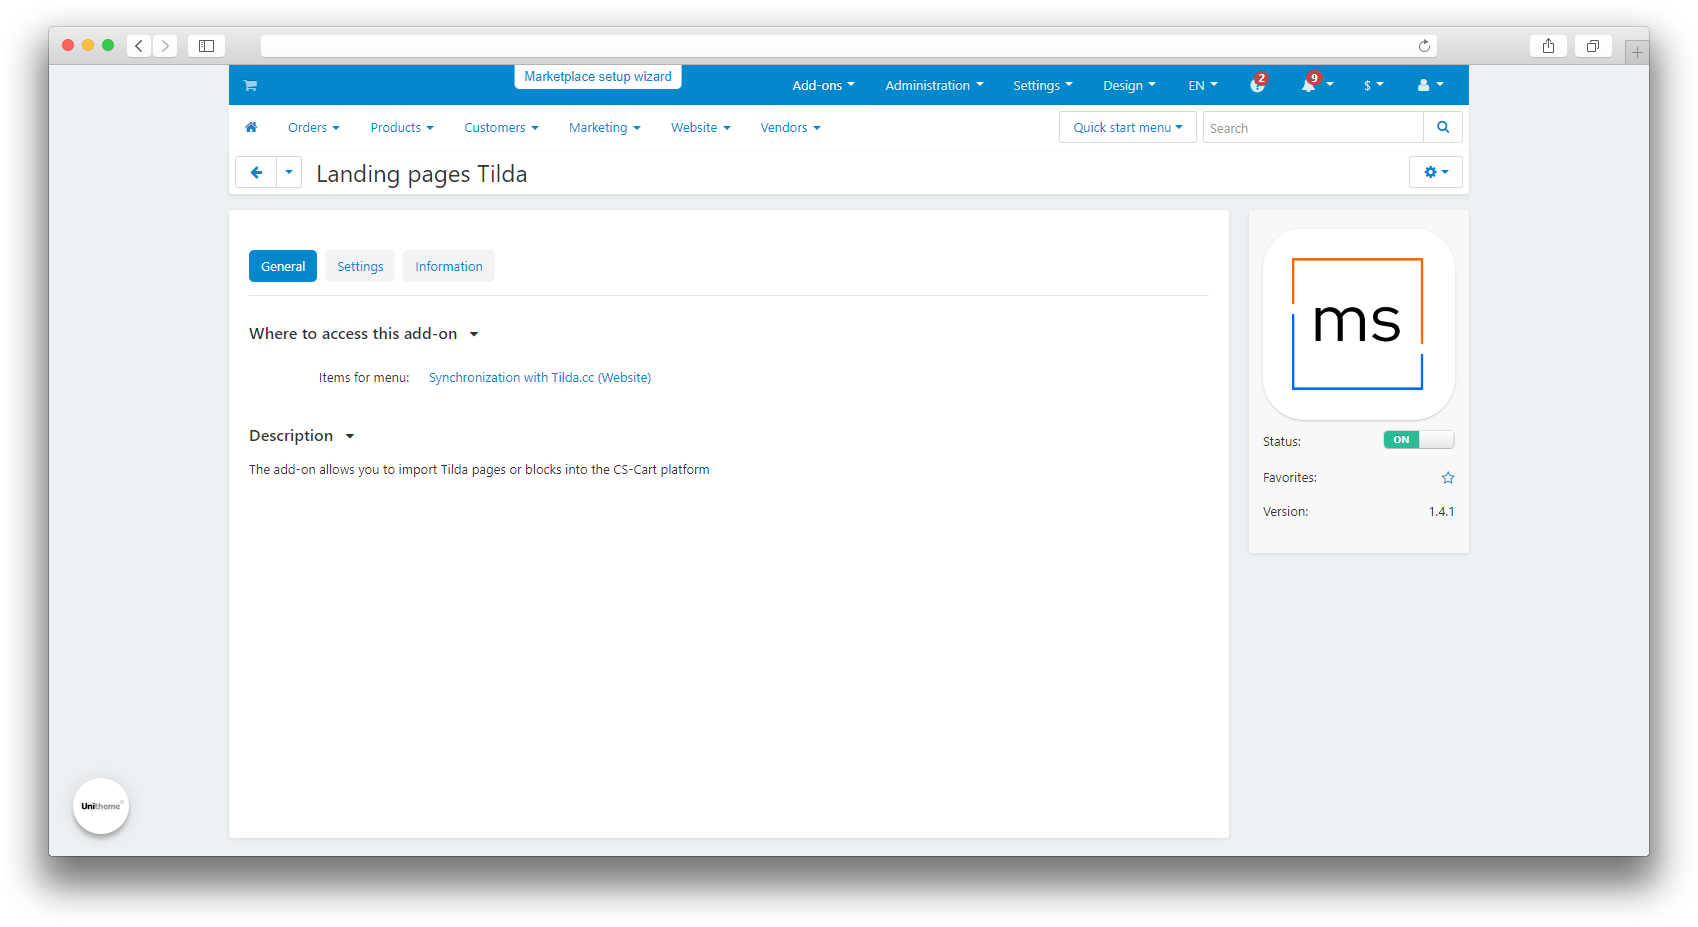
Click the "Save" button and open the "General" tab;
-
Select the menu item "Synchronization with Tilda.cc (Website)";
-
Click the "Update" button;
-
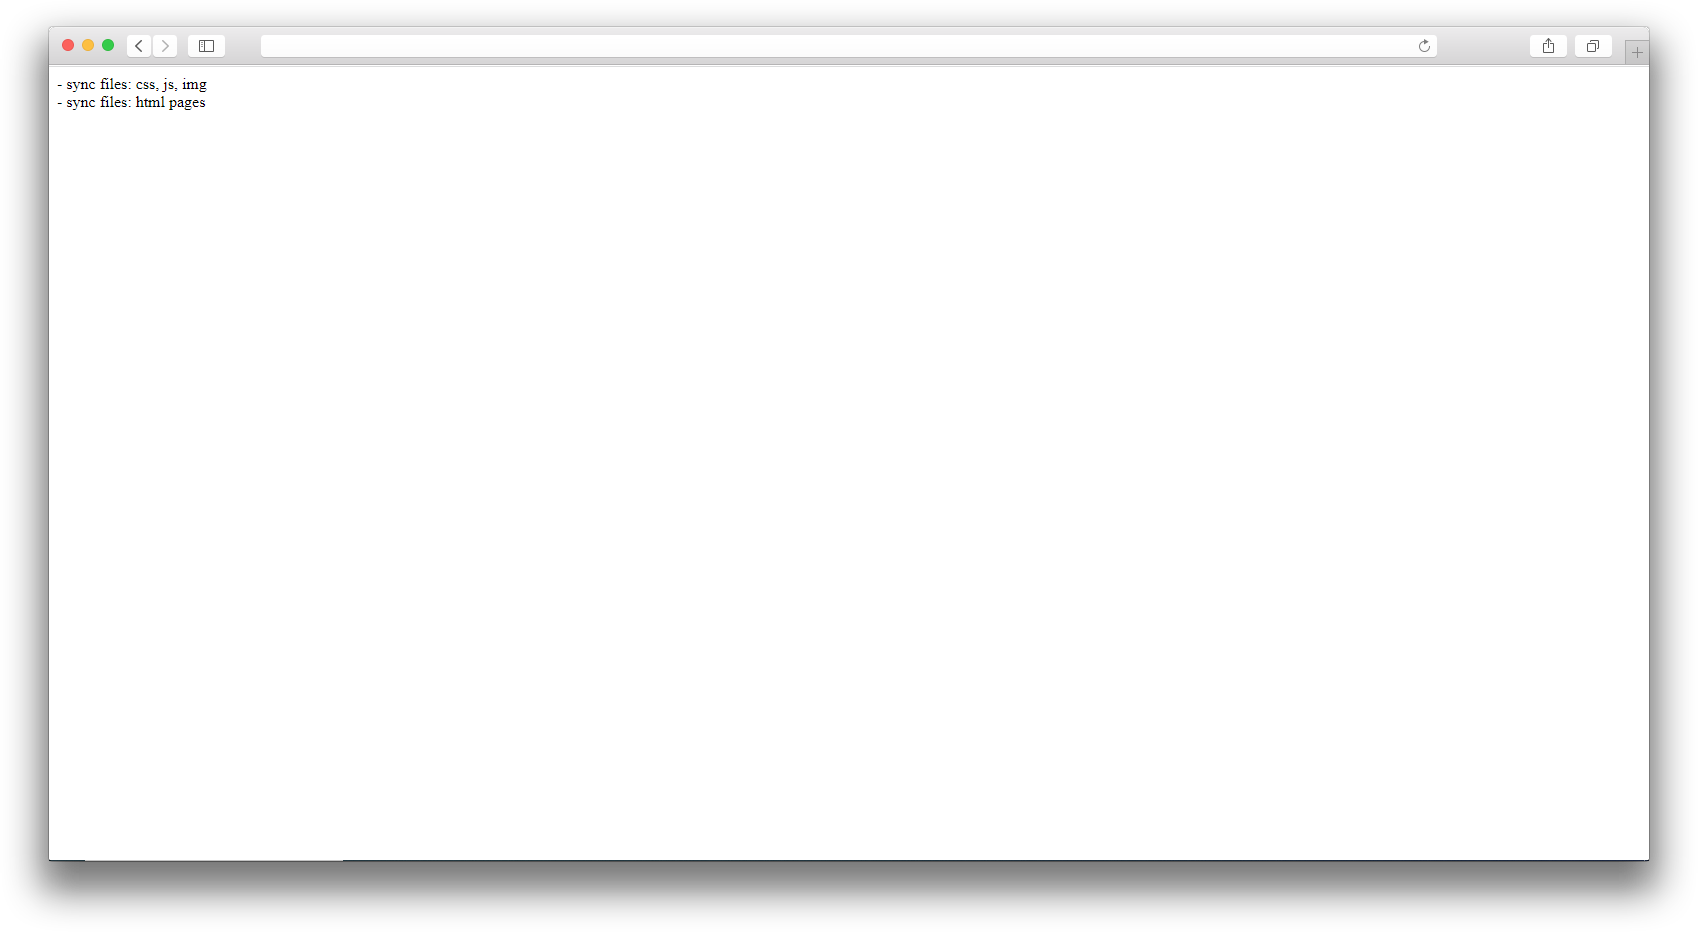
If synchronization is successful, you will see the following message;
-
The pages are now synced and ready to use.
Setting to display on entire page
To display a landing page on a page in CS-Cart, follow these steps:
-
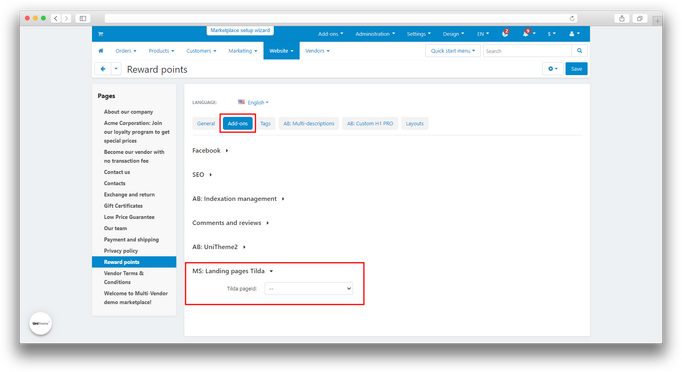
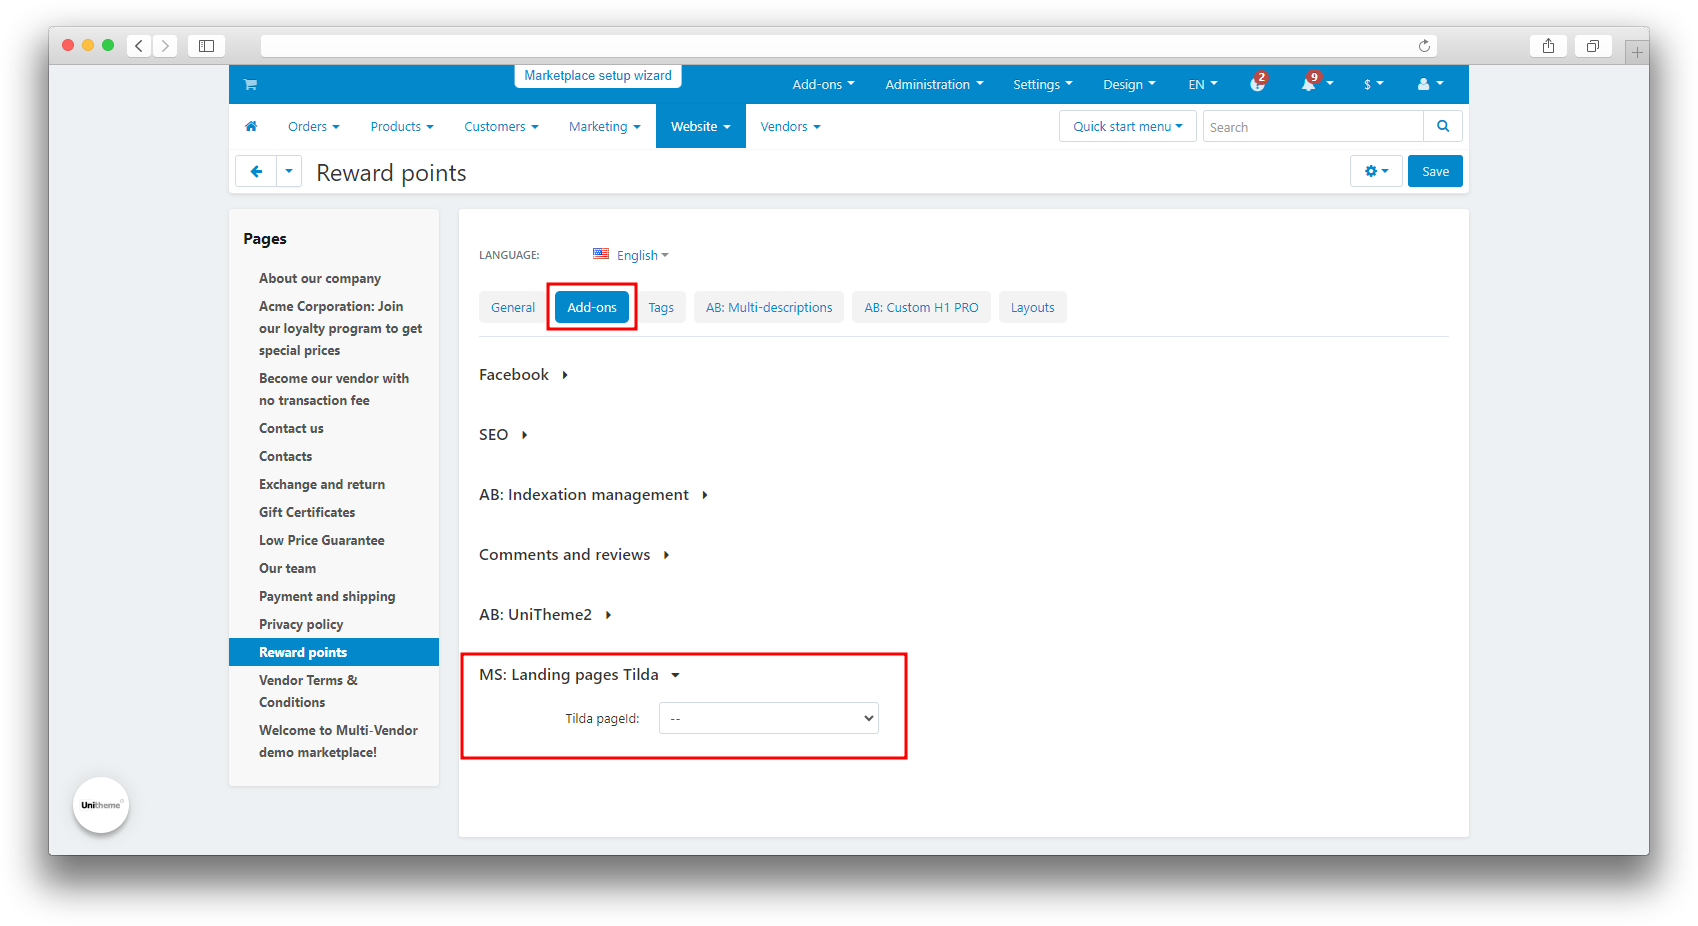
Log in to the CS-Cart administrative panel and go to the "Website - Pages" section;
-
Select the desired page on which you want to place the landing page;
-
Go to the "Add-ons" tab;
-
In the "Tilda page ID" field, indicate the ID of the Tilda page that you want to display on this page in CS-Cart;
-
Click the "Save" button;
-
Refresh your cache and check the page to ensure that the landing page is successfully displayed on the selected page.
If you are using UniTheme and want to remove padding to display the page at full width, you need to add styles in the template of the theme you are using:
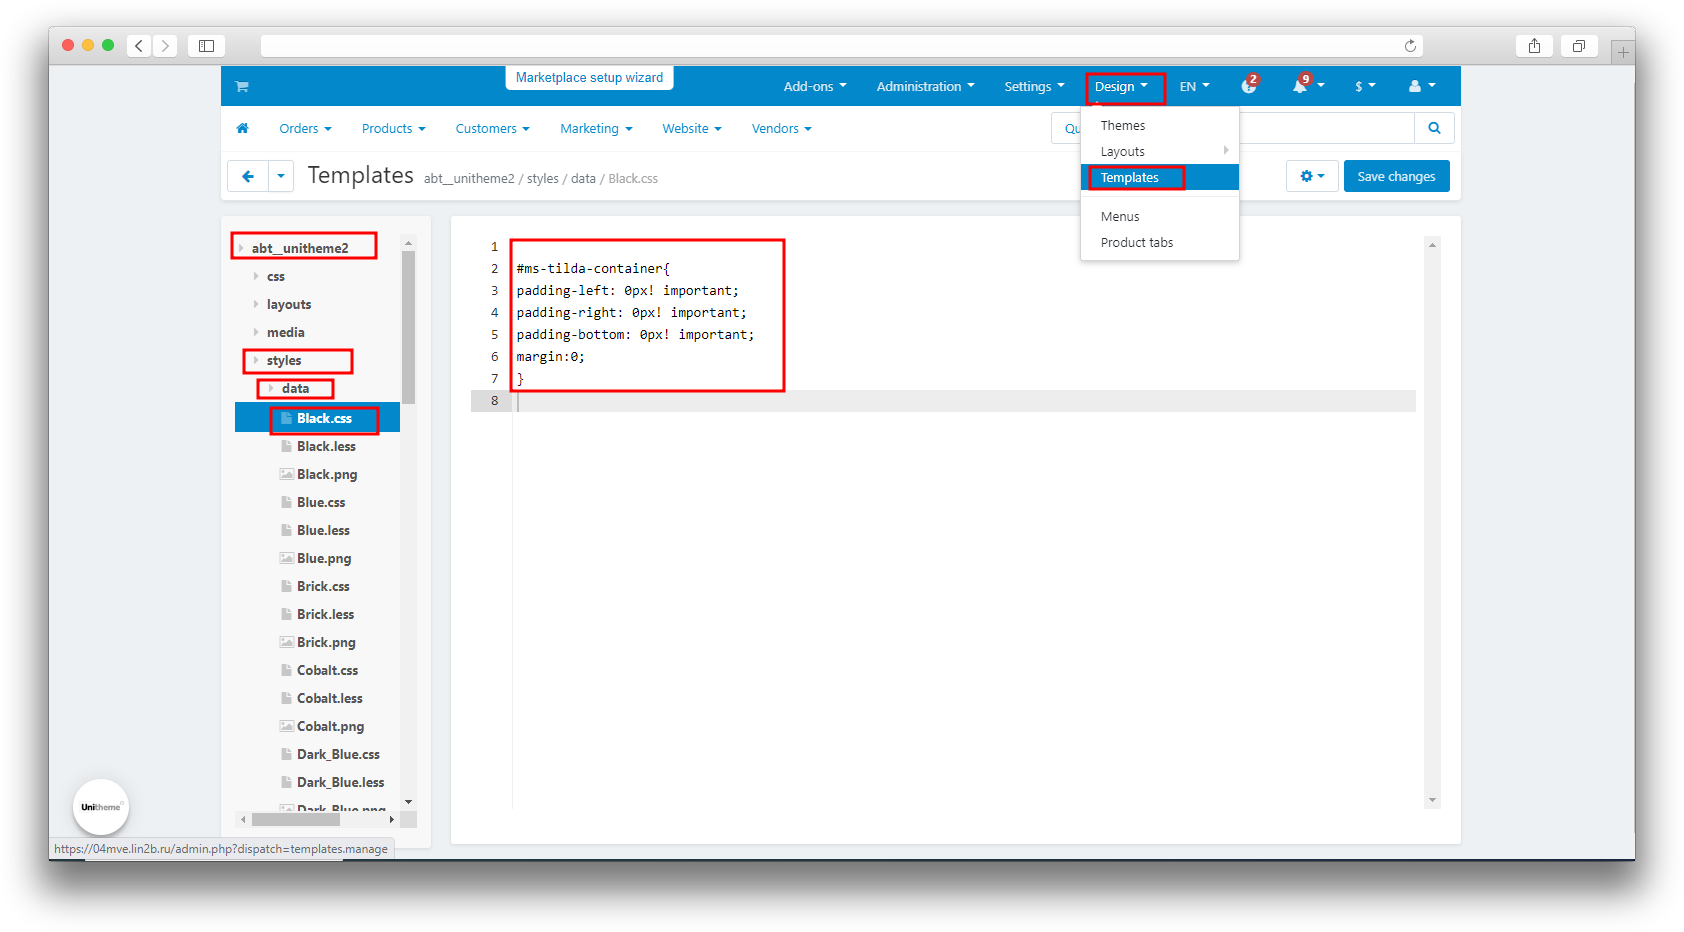
- Open the “Design” - “Templates” section;
- Select the installed theme, in our case it is “abt__unitheme2”;
- Open the “styles” - “data” folder;
- Select a file with the name of the color scheme you are using and with the extension “.css”, in our case it is “Black.css”;
- Paste the following style into the selected file:
#ms-tilda-container
{
padding-left: 0px! important;
padding-right: 0px! important;
padding-bottom: 0px! important;
margin:0;
}
- Click “Save Changes”.
Setting for display in block
-
Open the "Design - Layouts" section;
-
Select the appropriate tab, for example, "Products";
-
Lower the window below to edit the layout;
-
In the "Content" container, add grid using the "+" button and selecting the required width;
-
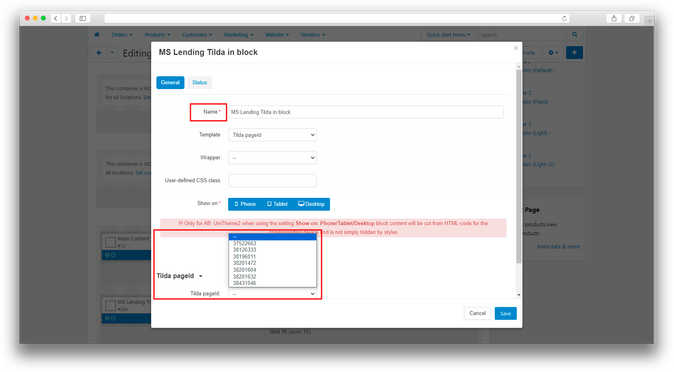
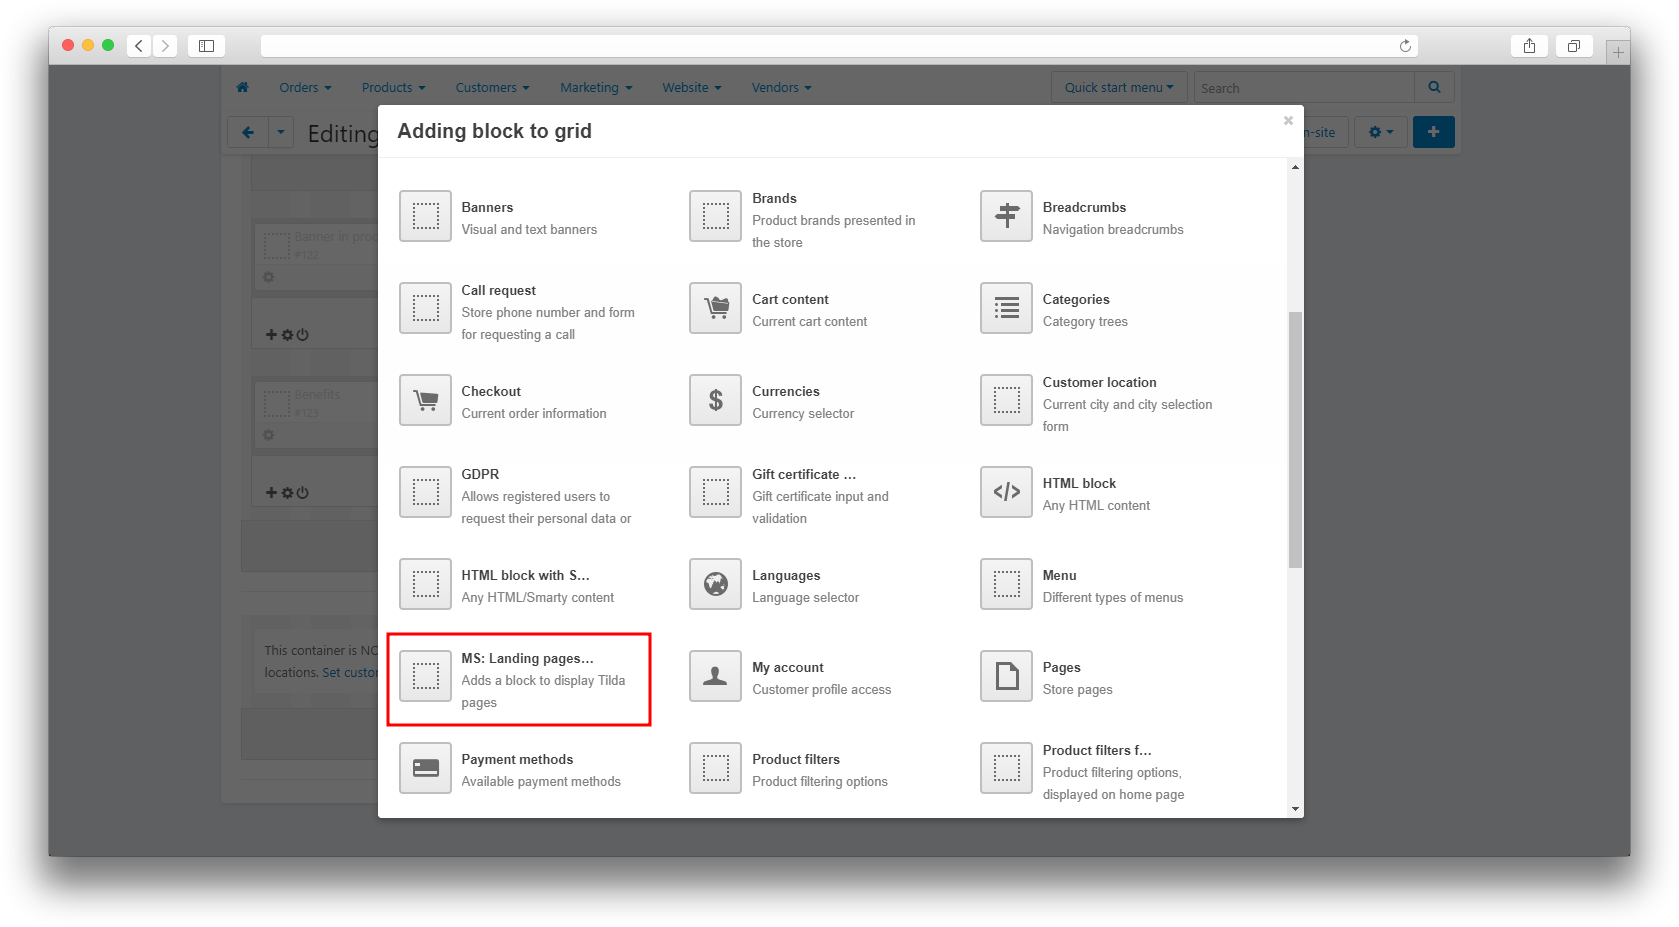
In the created grid, add a new block "MS: Tilda Landings";
-
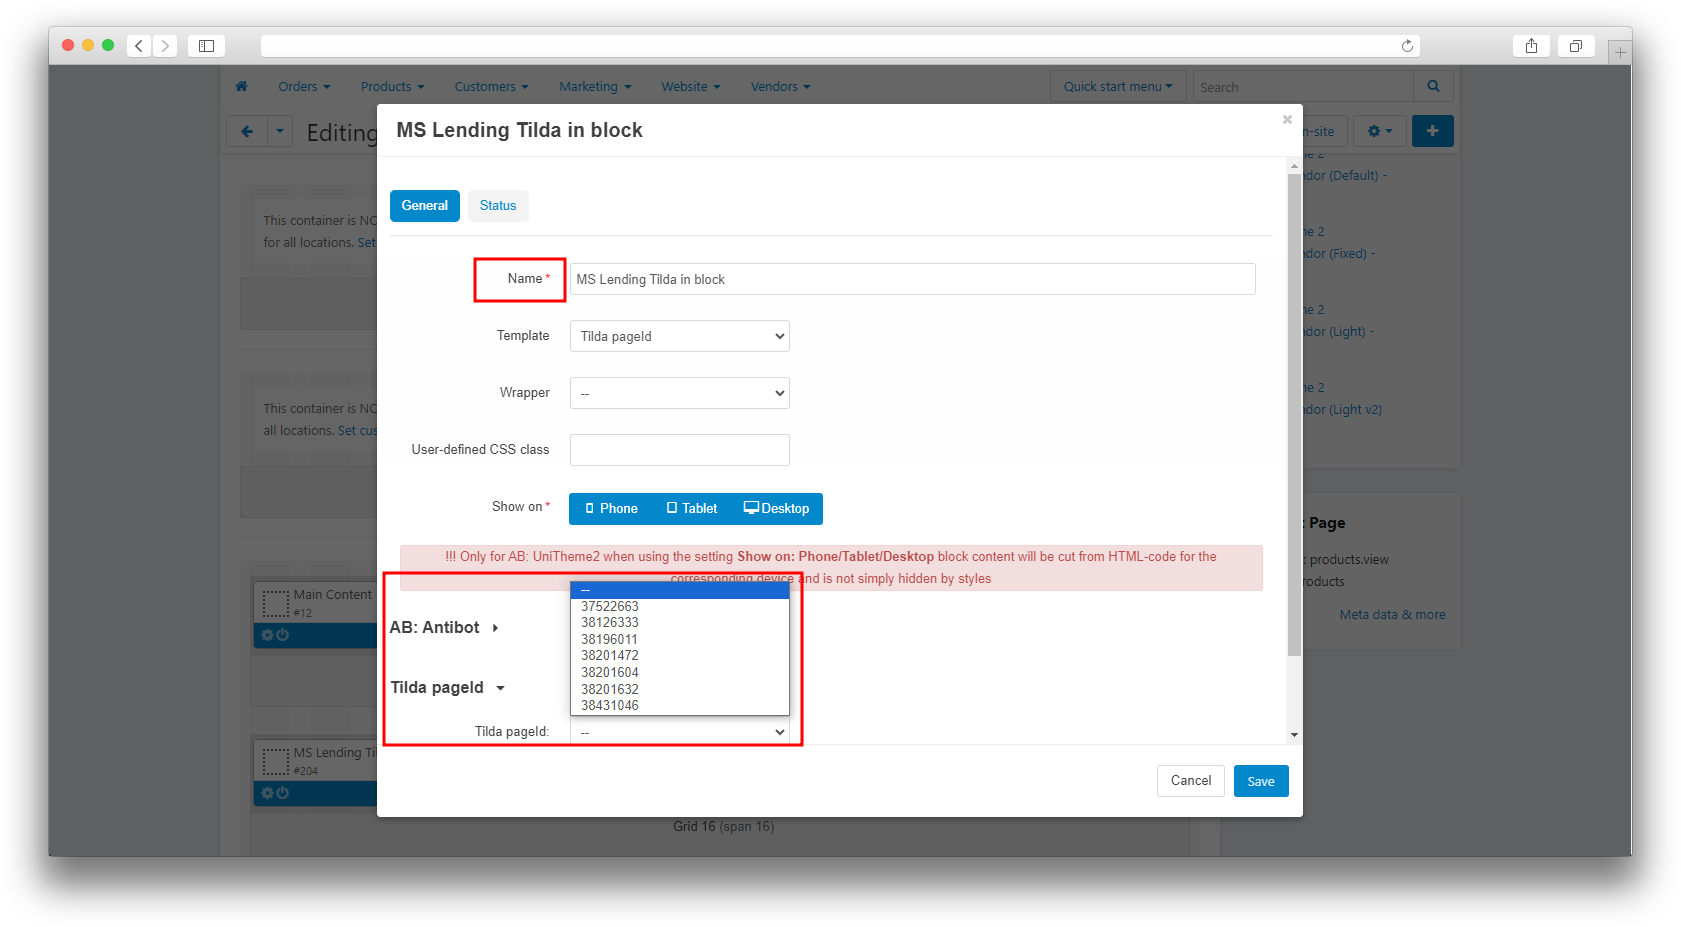
Enter the block name and select the page ID from the list;
- Click the "Save" button;
- Disable global display of these blocks;
- Open the page on which the landing page will be displayed;
- Go to the "Layout" section and enable display of the created "Tilda-page" block;
- You may need to update your cache. To do this, in the site’s administrative panel, add “&cc” to the end of the address bar and open the resulting address.
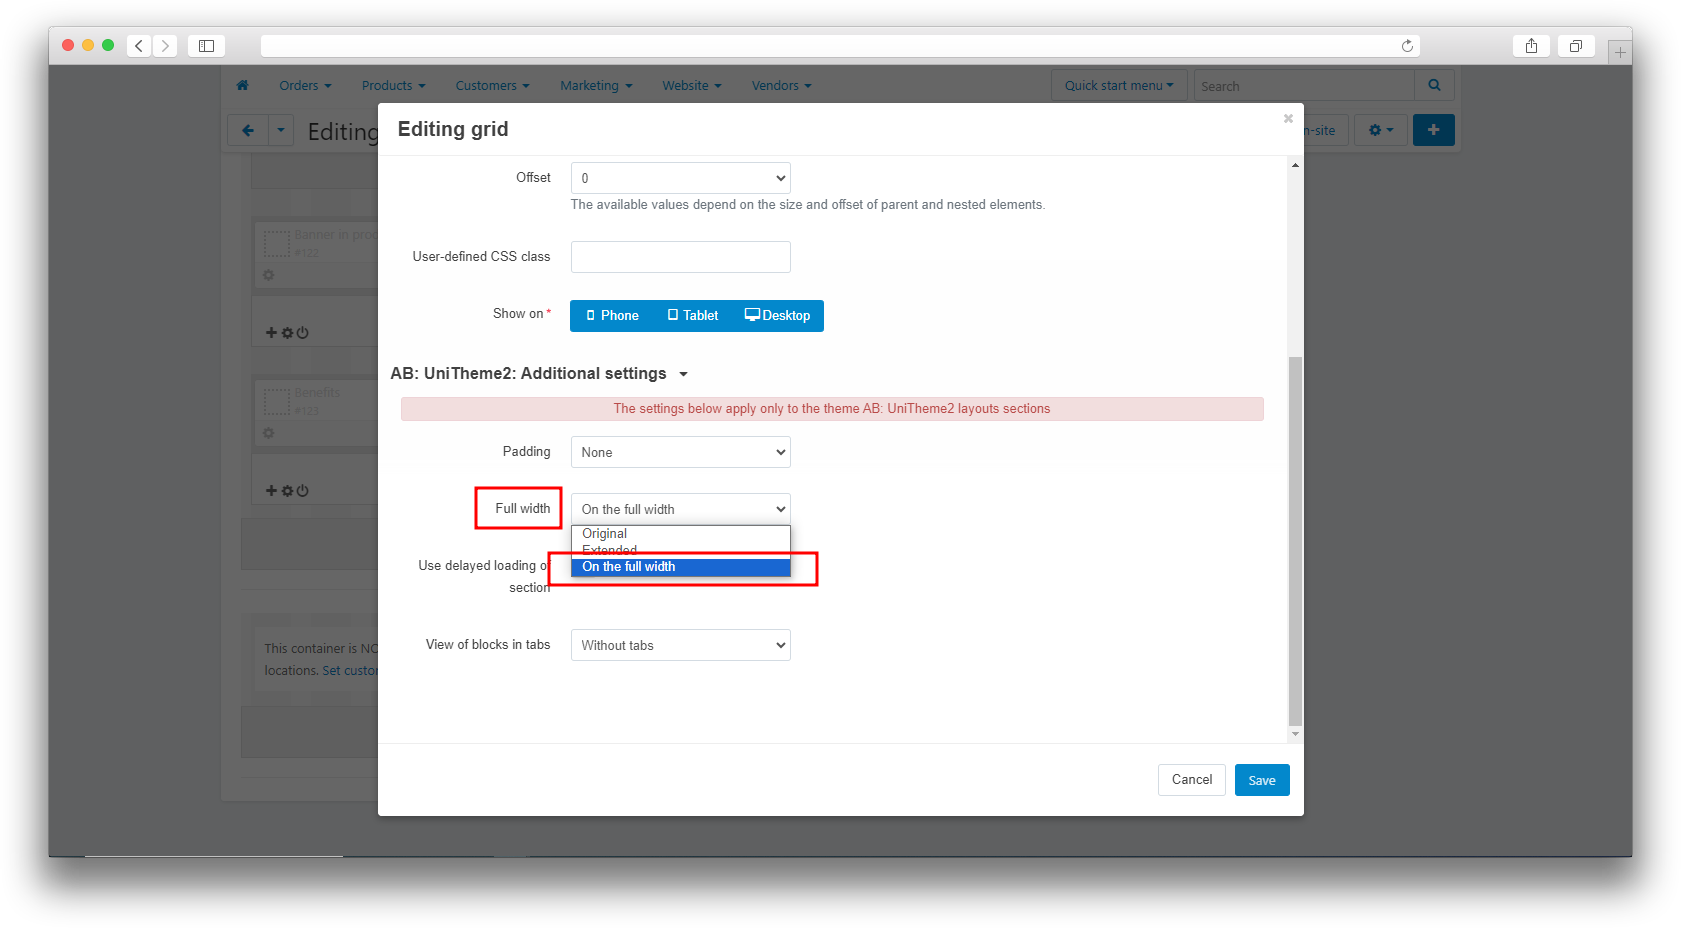
If you are using UniTheme and want to remove padding to display the block in full width, you need to change the display parameter in the section settings:
-
Open the “Design” - “Layouts” section;
-
Select the page in the layout of which your block is located, in our case it is “Products”;
-
Go to the settings of the section where your block is located;
-
In the “AB: UniTheme2: Additional Settings” section, change the values of the “Full width” field to “On the full width”;
-
Save your changes.
Solving a problem with displaying some interactive elements
The intersection of css styles between Tilda and CS-Cart causes problems in displaying some interactive elements. The problem appears when the styles that Tilda uses are similar to those used in CS-Cart in your template.
It is not possible to solve this problem on the add-on side, since the styles are interrupted by the CS-Cart platform itself. Her styles take precedence over Tilda's styles.
The following solutions are possible:
- Pass this information to your developers so that they can make the necessary changes to the styles on the CS-Cart side for the correct display of interactive elements.
- Make changes to styles (in text fonts and headings) on the Tilda side. Or contact Tilda's support team for tips on making changes to page styles on their platform.
Updating
v1.5.1 (coming soon)
[!] In CS-Cart 4.14, incorrect output of Tilda page selection, fixed
v1.5.0 from 20.02.2025
[*] Added display of logo in the block, updated add-on icon
[!] Scripts were loaded after the content, and led to errors, fixed
[!] Files in the directory were not deleted when deleting the add-on, fixed
[!] The main script broke if not set to a certain position, fixed
v1.4.1 from 01.09.2023
[+] Add-on standardization
v1.4.0 from 04.08.2023
[+] Synchronization has been changed, now for each page, individual directories with styles, images and scripts are created
[!] Styles from tilde conflicted with the theme, on some pages, now have a wrapper in the form of a class, fixed
v1.3.1 from 03.08.2023
[*] Changed short tags to regular
v1.3.0 from 24.07.2023
[*] Updated language variables
[*] Moved menu item
v1.2.10 from 09.07.2023
[+] Standardization of the add-on
v1.2.9 from 24.06.2023
[!] Some js scripts did not load if they did not have duplicates in the form of beta, fixed
[!] Initialization of the tilda script was missing, fixed
[*] The addon.xml file has been corrected
v1.2.8 from 26.12.2022
[+] Standardization of the add-on
v1.2.7 from 05.10.2022
[+] Standardization of the add-on
v1.2.5 from 18.05.2022
[!] The jquery script is not duplicated
v1.2.4 from 05/16/2022
[+] Scripts are not duplicated when loading the landing page
[*] Updated add-on icon
v1.2.3 from 05/13/2022
[*] CHANGELOG.md changed
[-] function fn_get_information removed, which is not used by the add-on
v1.2.2 from 01/01/2021
[+] Multilingual
v1.2.1 from 01/01/2020
[+] Support for images with .gif resolution
v1.2.0 from 01/01/2020
[+] Support for images with .jpeg resolution
[+] Processing when exporting individual .js and .css files for project pages
v1.0.0 from 03/01/2022
[+] First edition
Для каждой витрины свой аккаунт Тильда (мультивитринность)
Для каждой витрины свой аккаунт Тильда (мультивитринность)
Доработки модуля Лендинги Tilda
Отображать страницы тильда во всю ширину страницы cs-cart.
Ваш запрос отправлен!
Ваш запрос на доработку модуля отправлен в техническую поддержку. Мы изучим ваши пожелания и дадим обратную свзязь.
Вам придет уведомление на указанный Email.
Here you can share your opinion and evaluate our work.
Your feedback helps us become better and offer you even better service.
