Description
Add an Intelligent Assistant to Your Website. The module integrates ChatGPT into your CS-Cart online store. A customer fills out a questionnaire, and the assistant analyzes the answers to recommend suitable products and provide personalized tips on how to use them.
What is it?
This module integrates ChatGPT into your CS-Cart store. The customer completes a form, and the assistant analyzes the responses to suggest the most relevant products as well as recommendations for their use.

Module Features:
- Create and customize questionnaires for product selection or content generation
- Group questions and fields in the questionnaire
- Support for various field types (checkboxes, lists, radio buttons, text fields)
- Link answer options to specific prompts
- Test prompts and check ChatGPT’s response
- Flexible customization of the assistant’s instructions
- Display the questionnaire on any storefront page via CS-Cart layouts
- Multistore support

Who It’s For:
CS-Cart online stores that want to:
- Provide customers with personalized recommendations
- Automate product selection
- Increase average order value and conversion rates
- Improve the user experience

- English
- Русский
- 4.18.X
Оформление подписки
Мы переходим на новую подписную систему, открывая для вас полный доступ ко всем нашим модулям. Подробную информацию об условиях подписки и часто задаваемых вопросах вы можете найти здесь.
Обратите внимание, что приобретение модулей по отдельности теперь недоступно — воспользоваться ими возможно исключительно в рамках подписки.
За единую стоимость подписки - 2000 руб/мес. Вы получаете доступ ко всем модулям.
Как оформить подписку у нас на сайте
Зарегистрируйтесь или авторизуйтесь на нашем сайте и выберите интересующий вас модуль
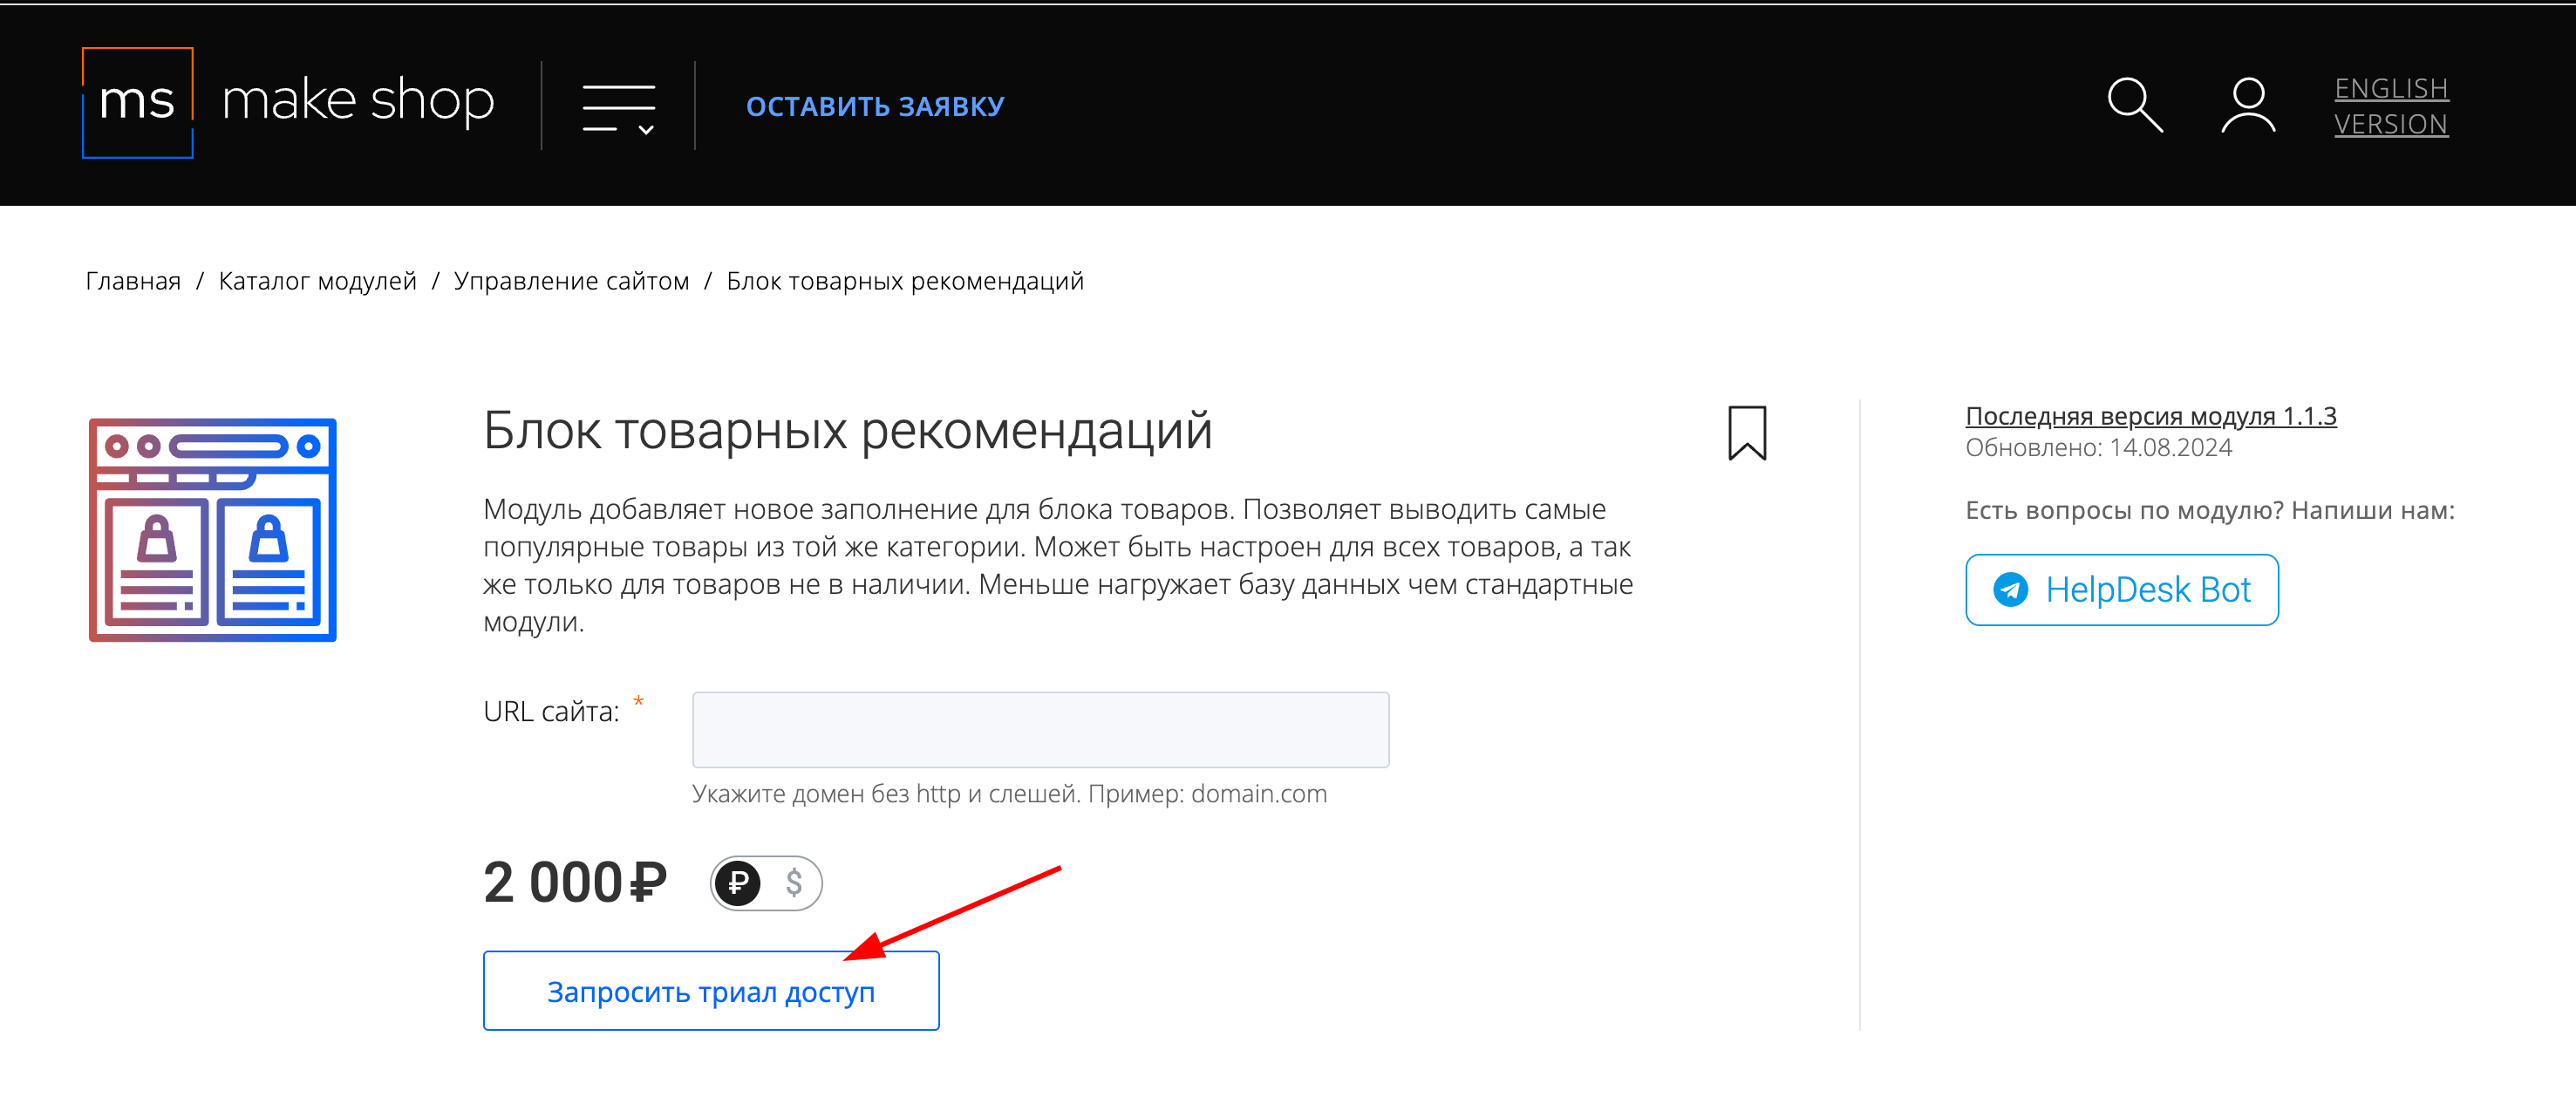
Нажмите кнопку Запросить триал доступ
Введите в поле URL сайта ваш домен в формате domain.com, без www и https://
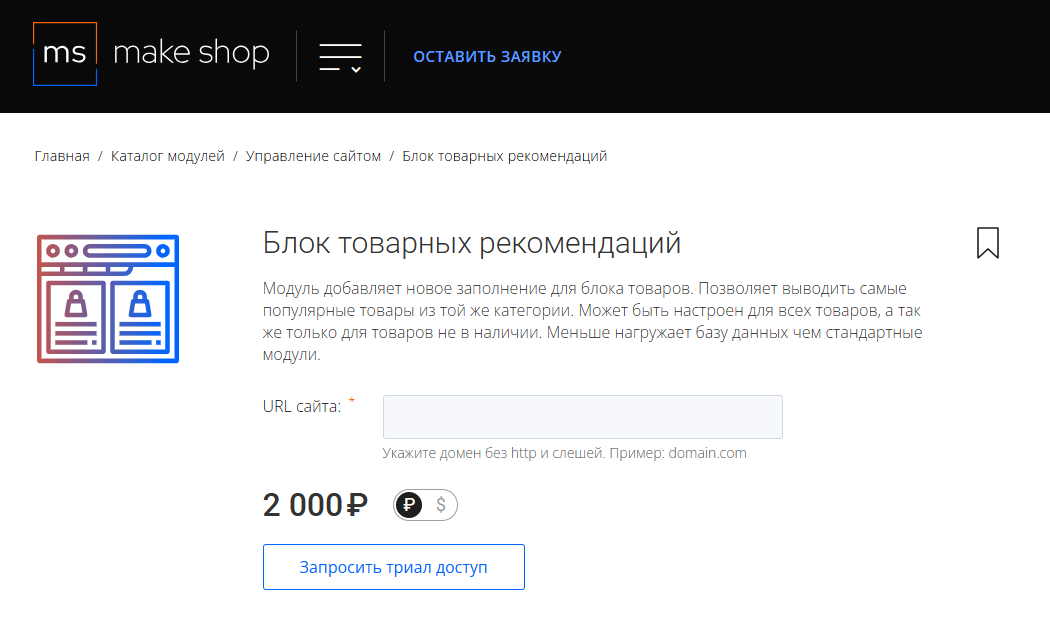
Далее в личном кабинете в разделе загрузки вы сможете скачать нужный вам модуль и менеджер модулей для удобного управления модулями и оформления подписки.
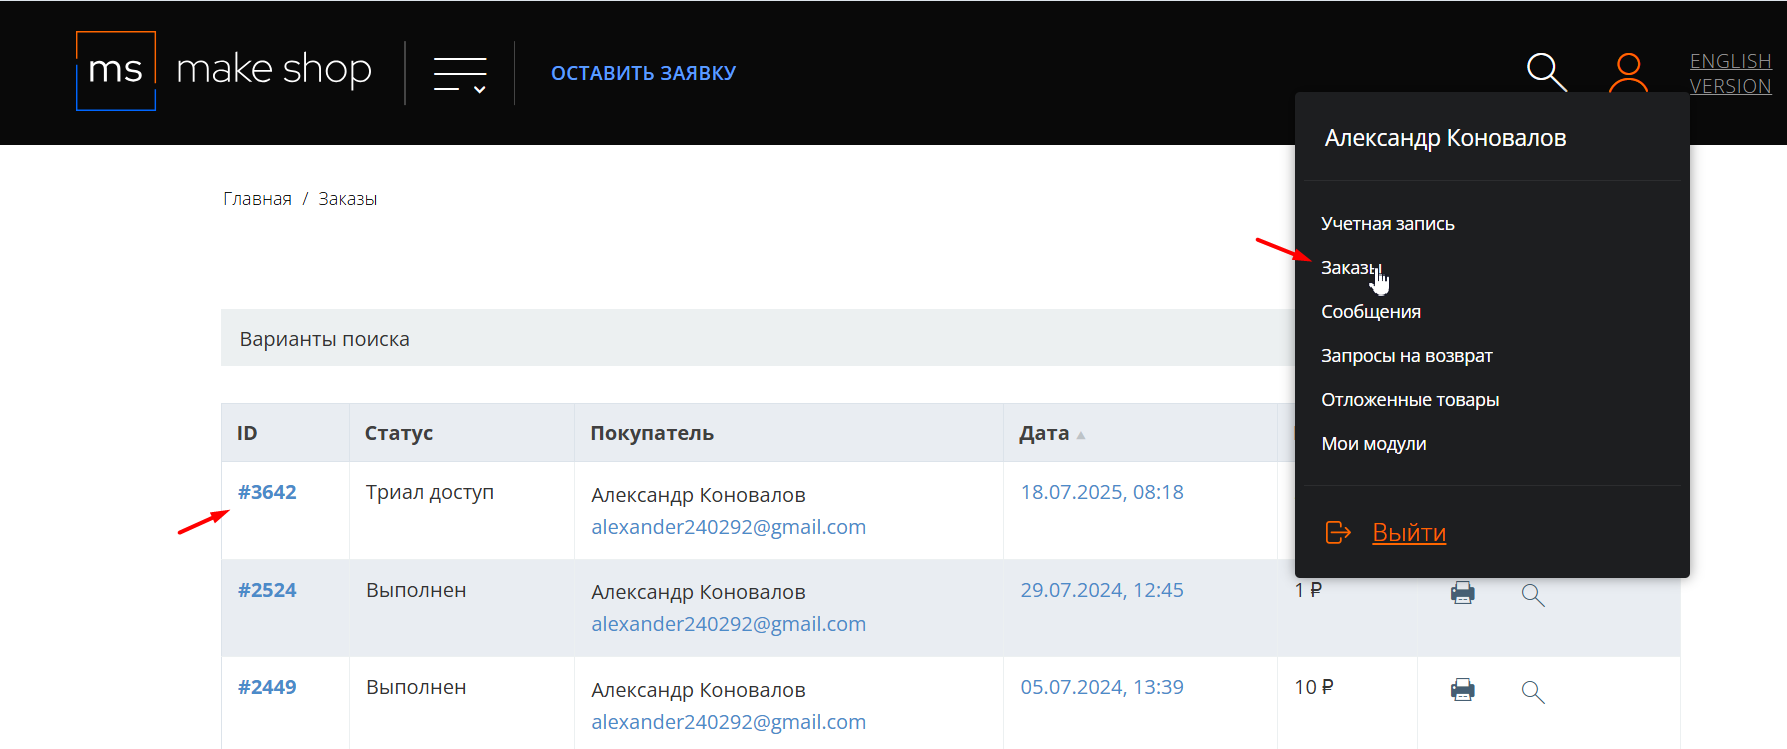
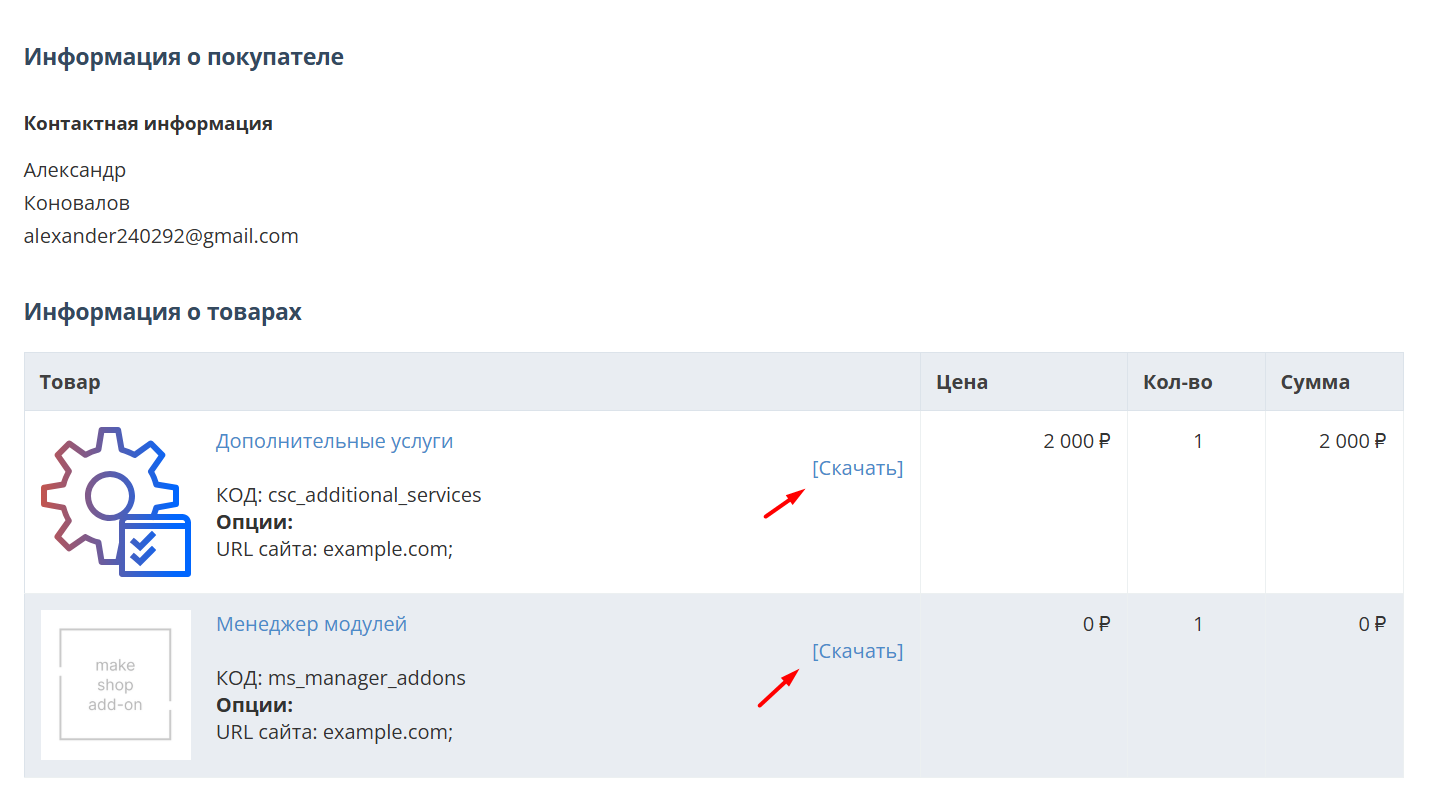
Далее у вас есть 7 дней для тестирования выбранного модуля.
По истечении строка триала, для продолжения работы необходимо оплатить подписку.
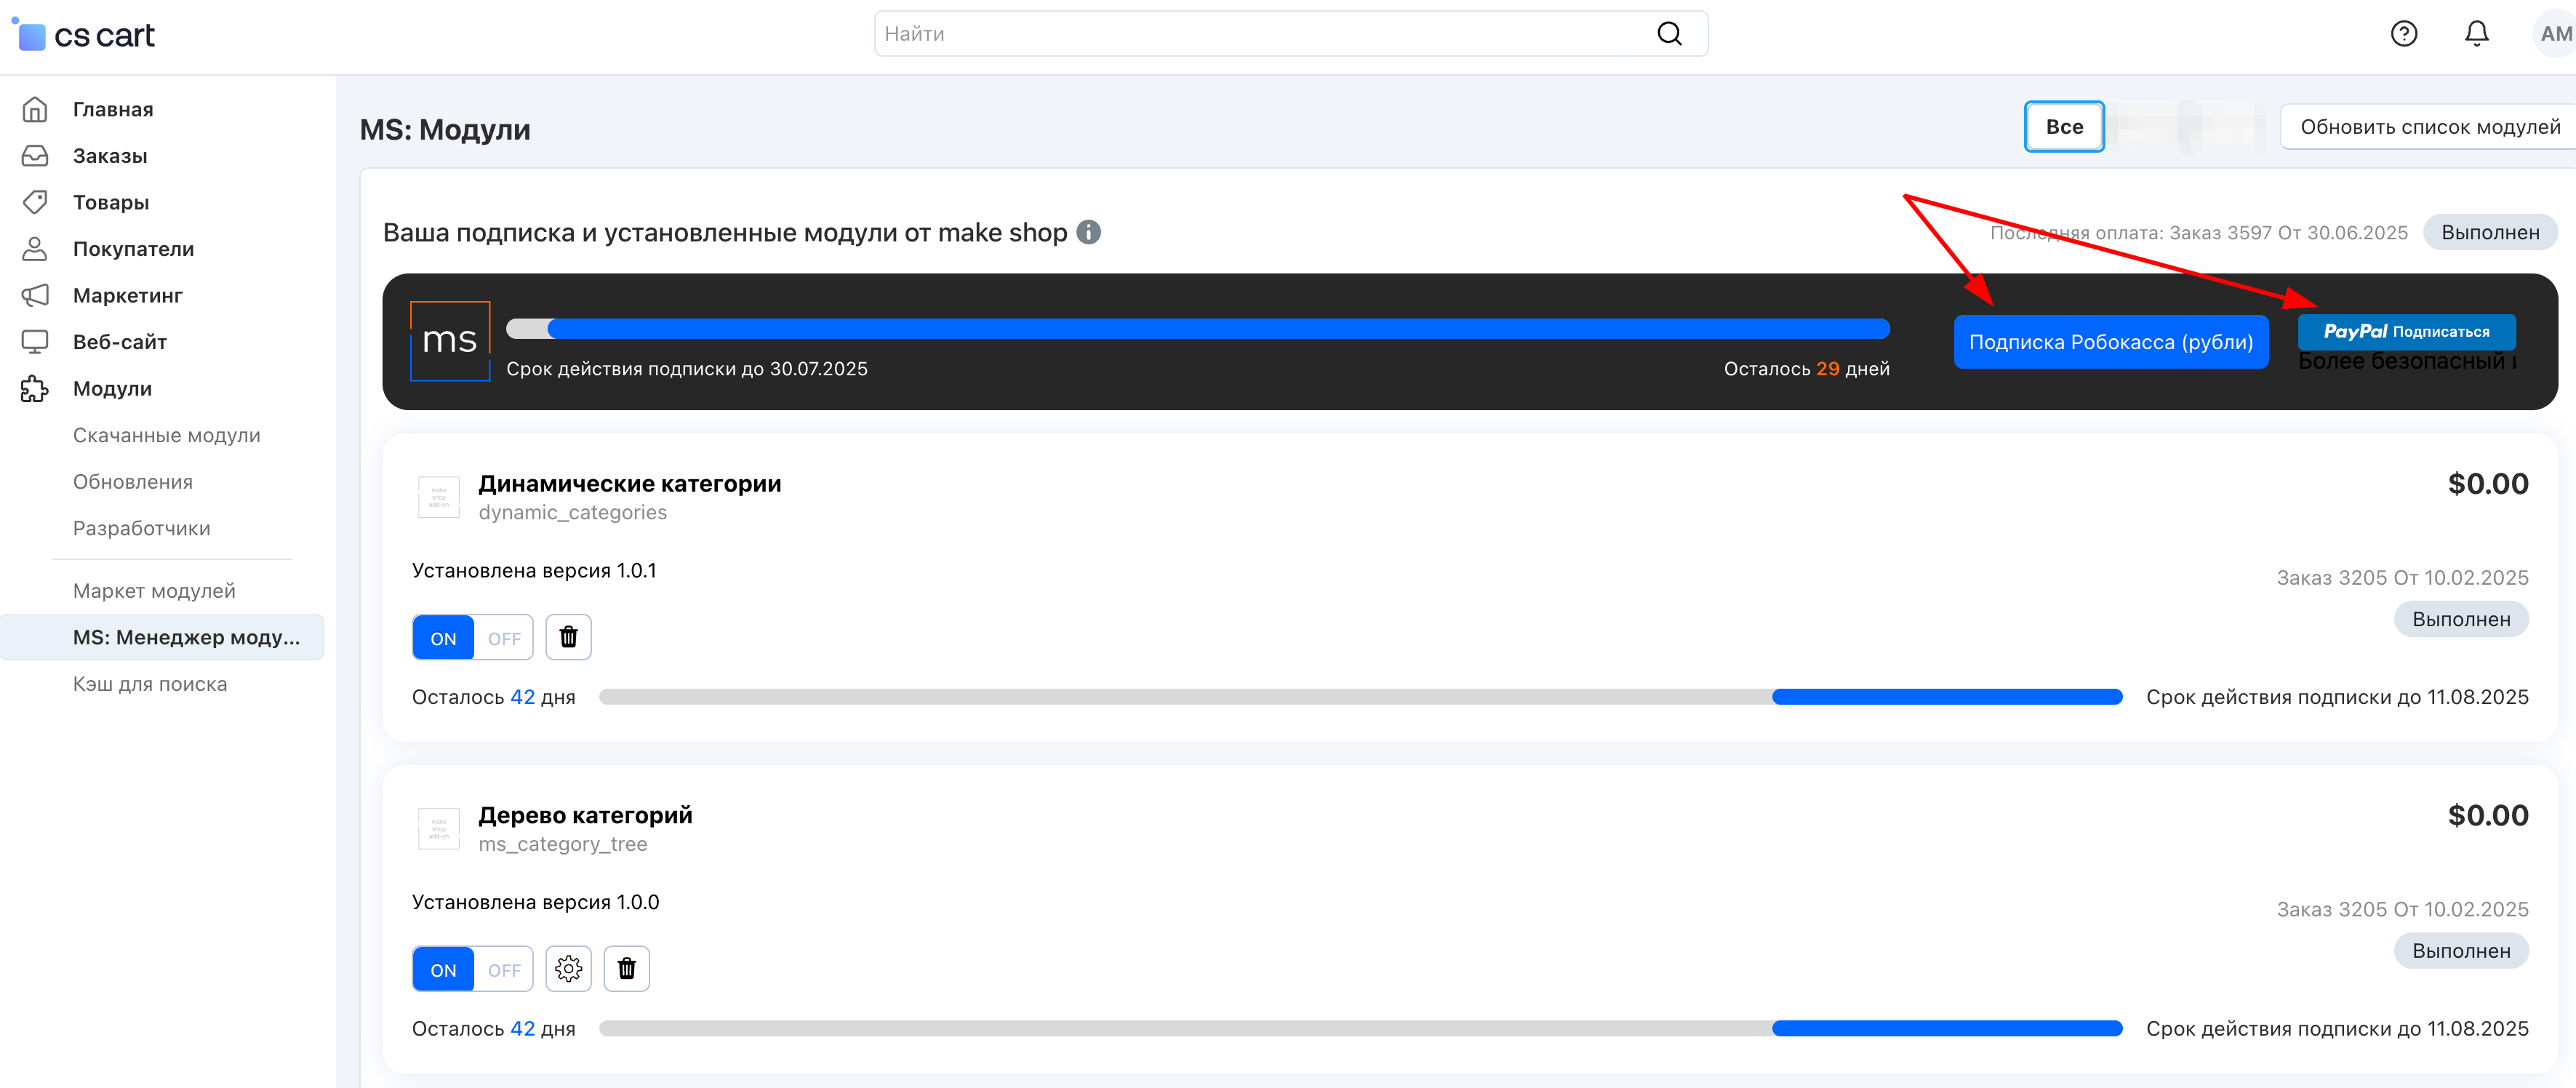
Сделать это можно из менеджера модулей.
На выбор вы можете оплатить:
для зарубежных карт - PayPal
для РФ карт - Robokassa
Или на странице на сайте https://makeshop.pro/subscription/
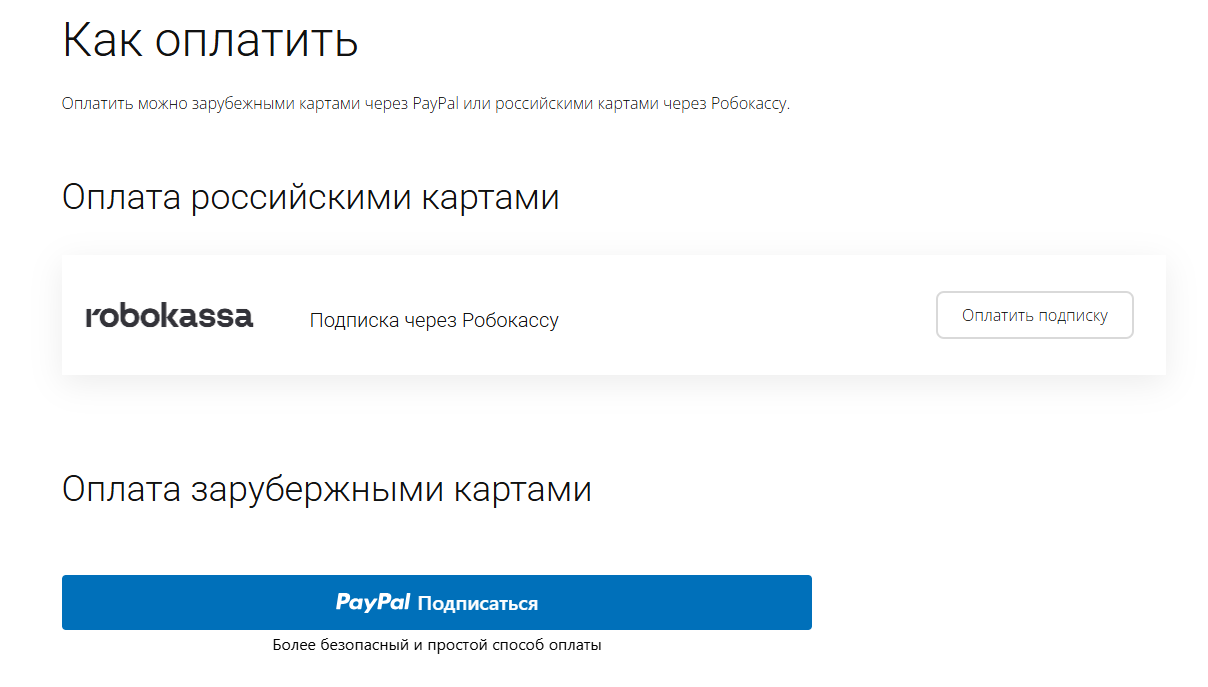
При оплате нужно указать электронную почту с которой вы оформляли триал доступ.
При покупке на маркетплейсе CS-Cart
При покупке любого модуля зарубежной картой или картой РФ
Так как система при оформлении подписки не спрашивает дополнительных вопросов (на какой домен подписка оформляется) желательно вводить электронную почту ту же что и ваша учетная запись у нас на сайте (если она есть), тогда ваши учётки свяжутся между собой.
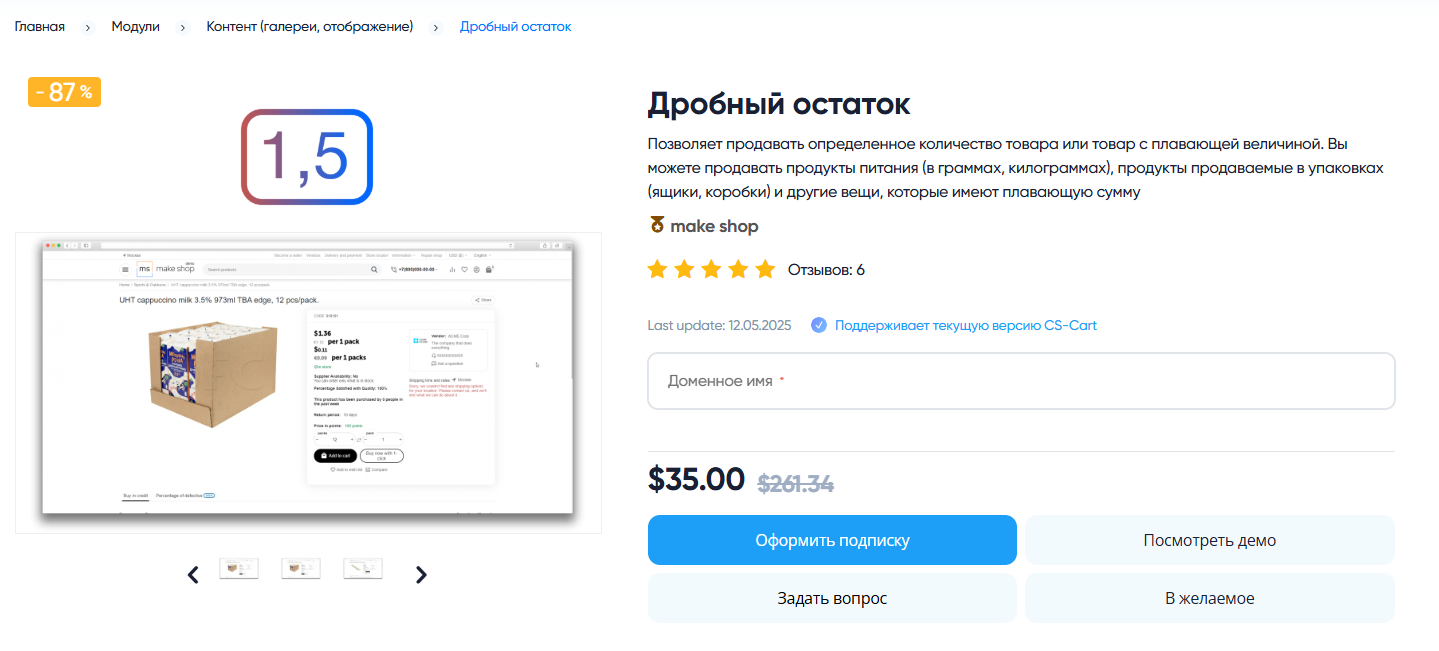
Выберите интересующий модуль и нажмите кнопку “Оформить подписку“
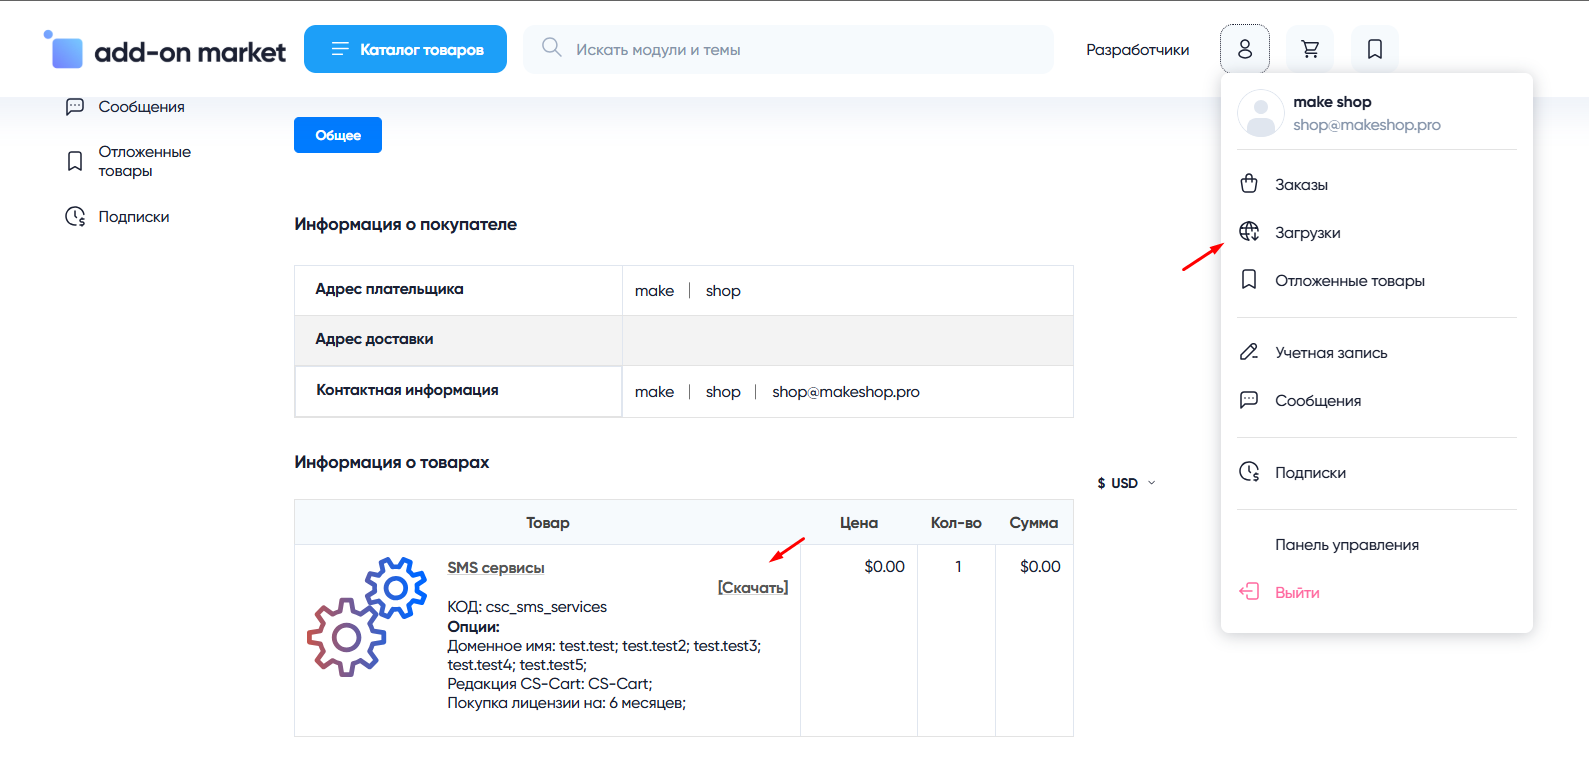
Далее после оплаты подписки вы сможете скачать модуль перейдя в раздел “Загрузки“, там выберите свой заказ и в нем будет ссылка на скачивание.
В дальнейшем, для получения новых модулей по подписке рекомендуем пользоваться нашим сайтом.
Всё что вам будет нужно сделать это на интересующем вас модуле (после авторизации) нажать кнопку “Запросить модуль по подписке“ и после одобрения скачать его в разделе загрузки.
Если что-то пойдет не так - проверьте выписалась ли лицензия
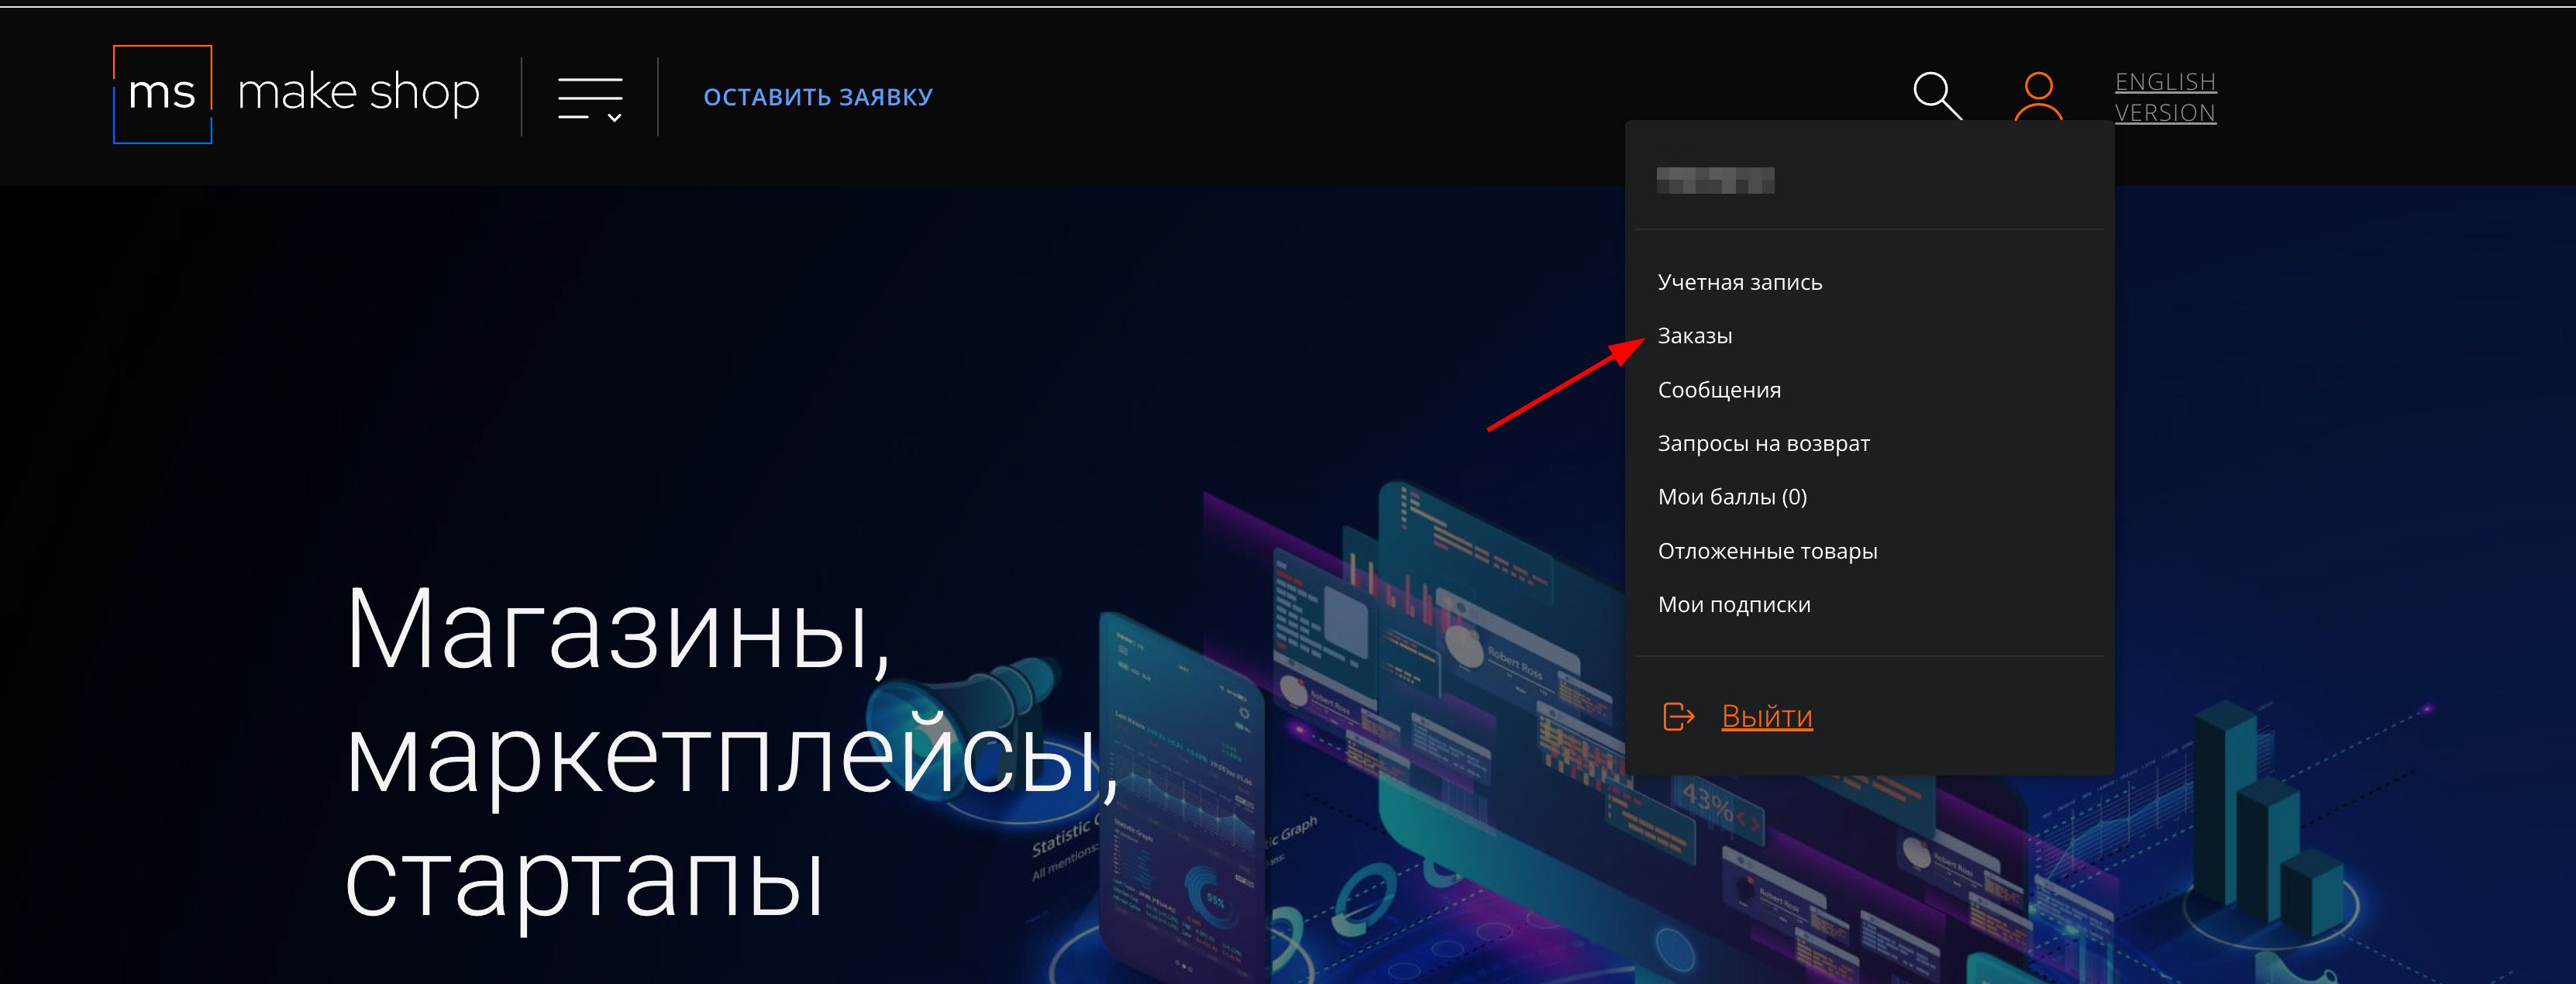
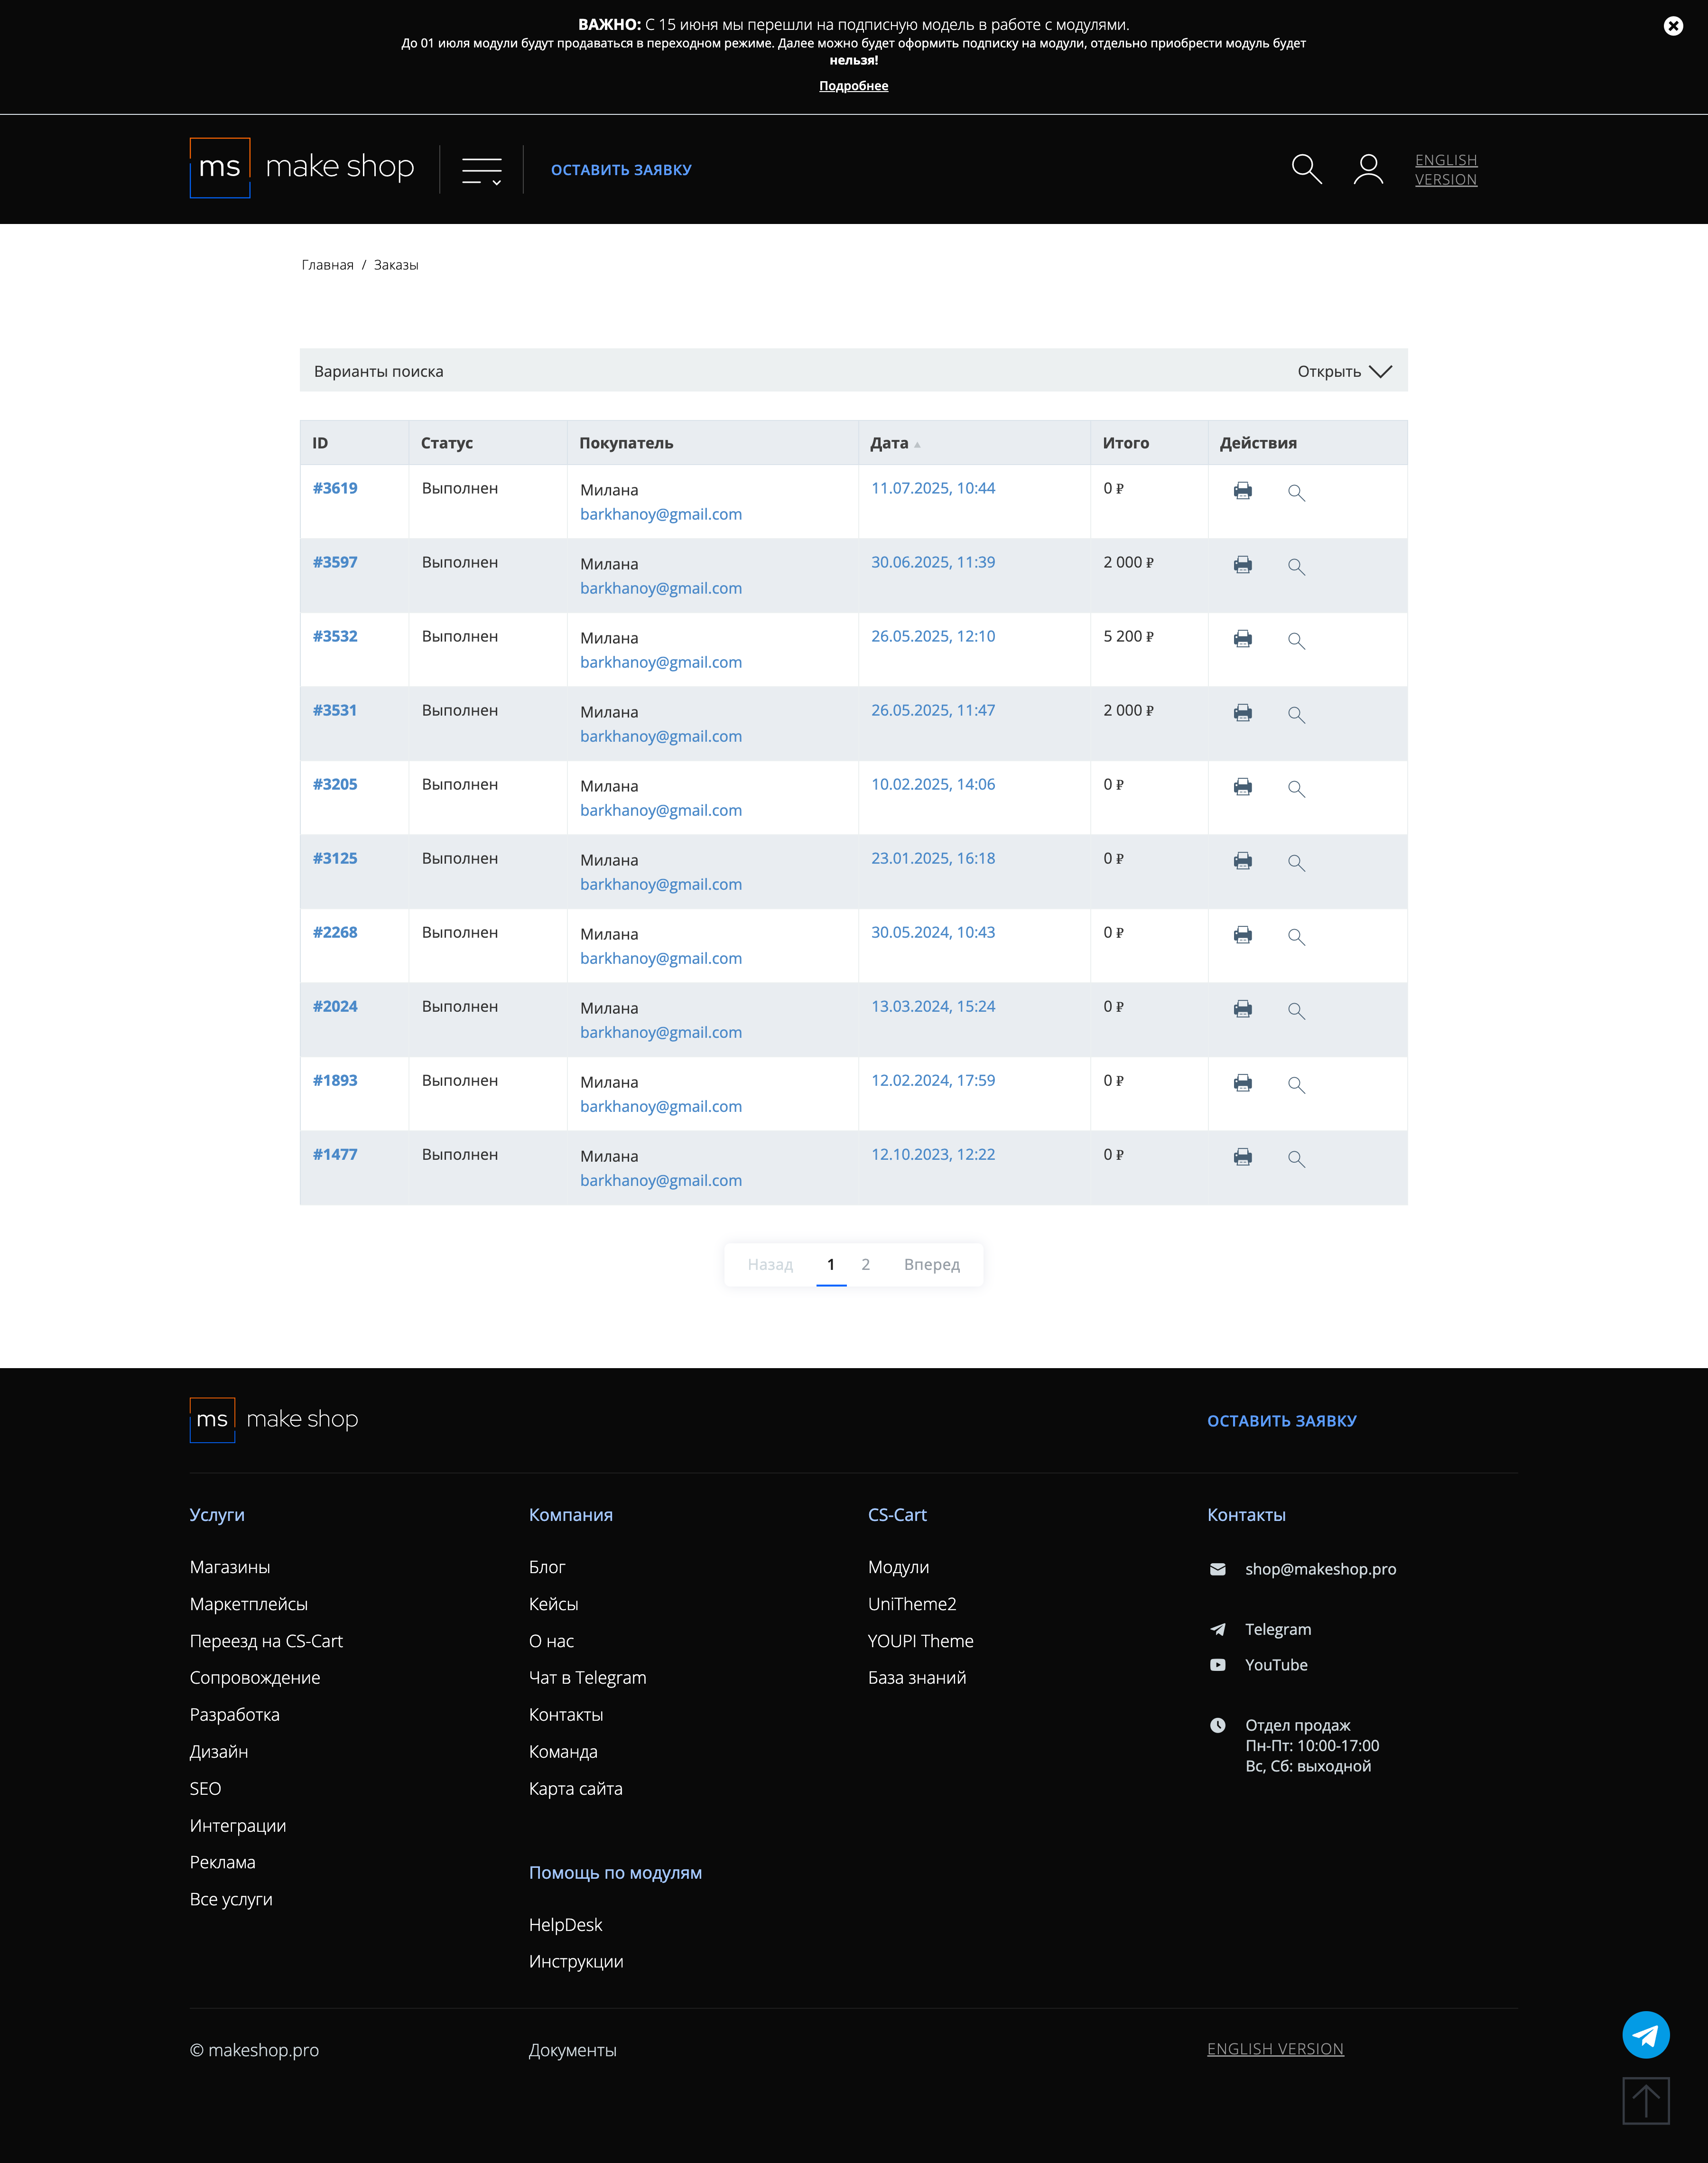
Найдите заказ с датой оформления подписки
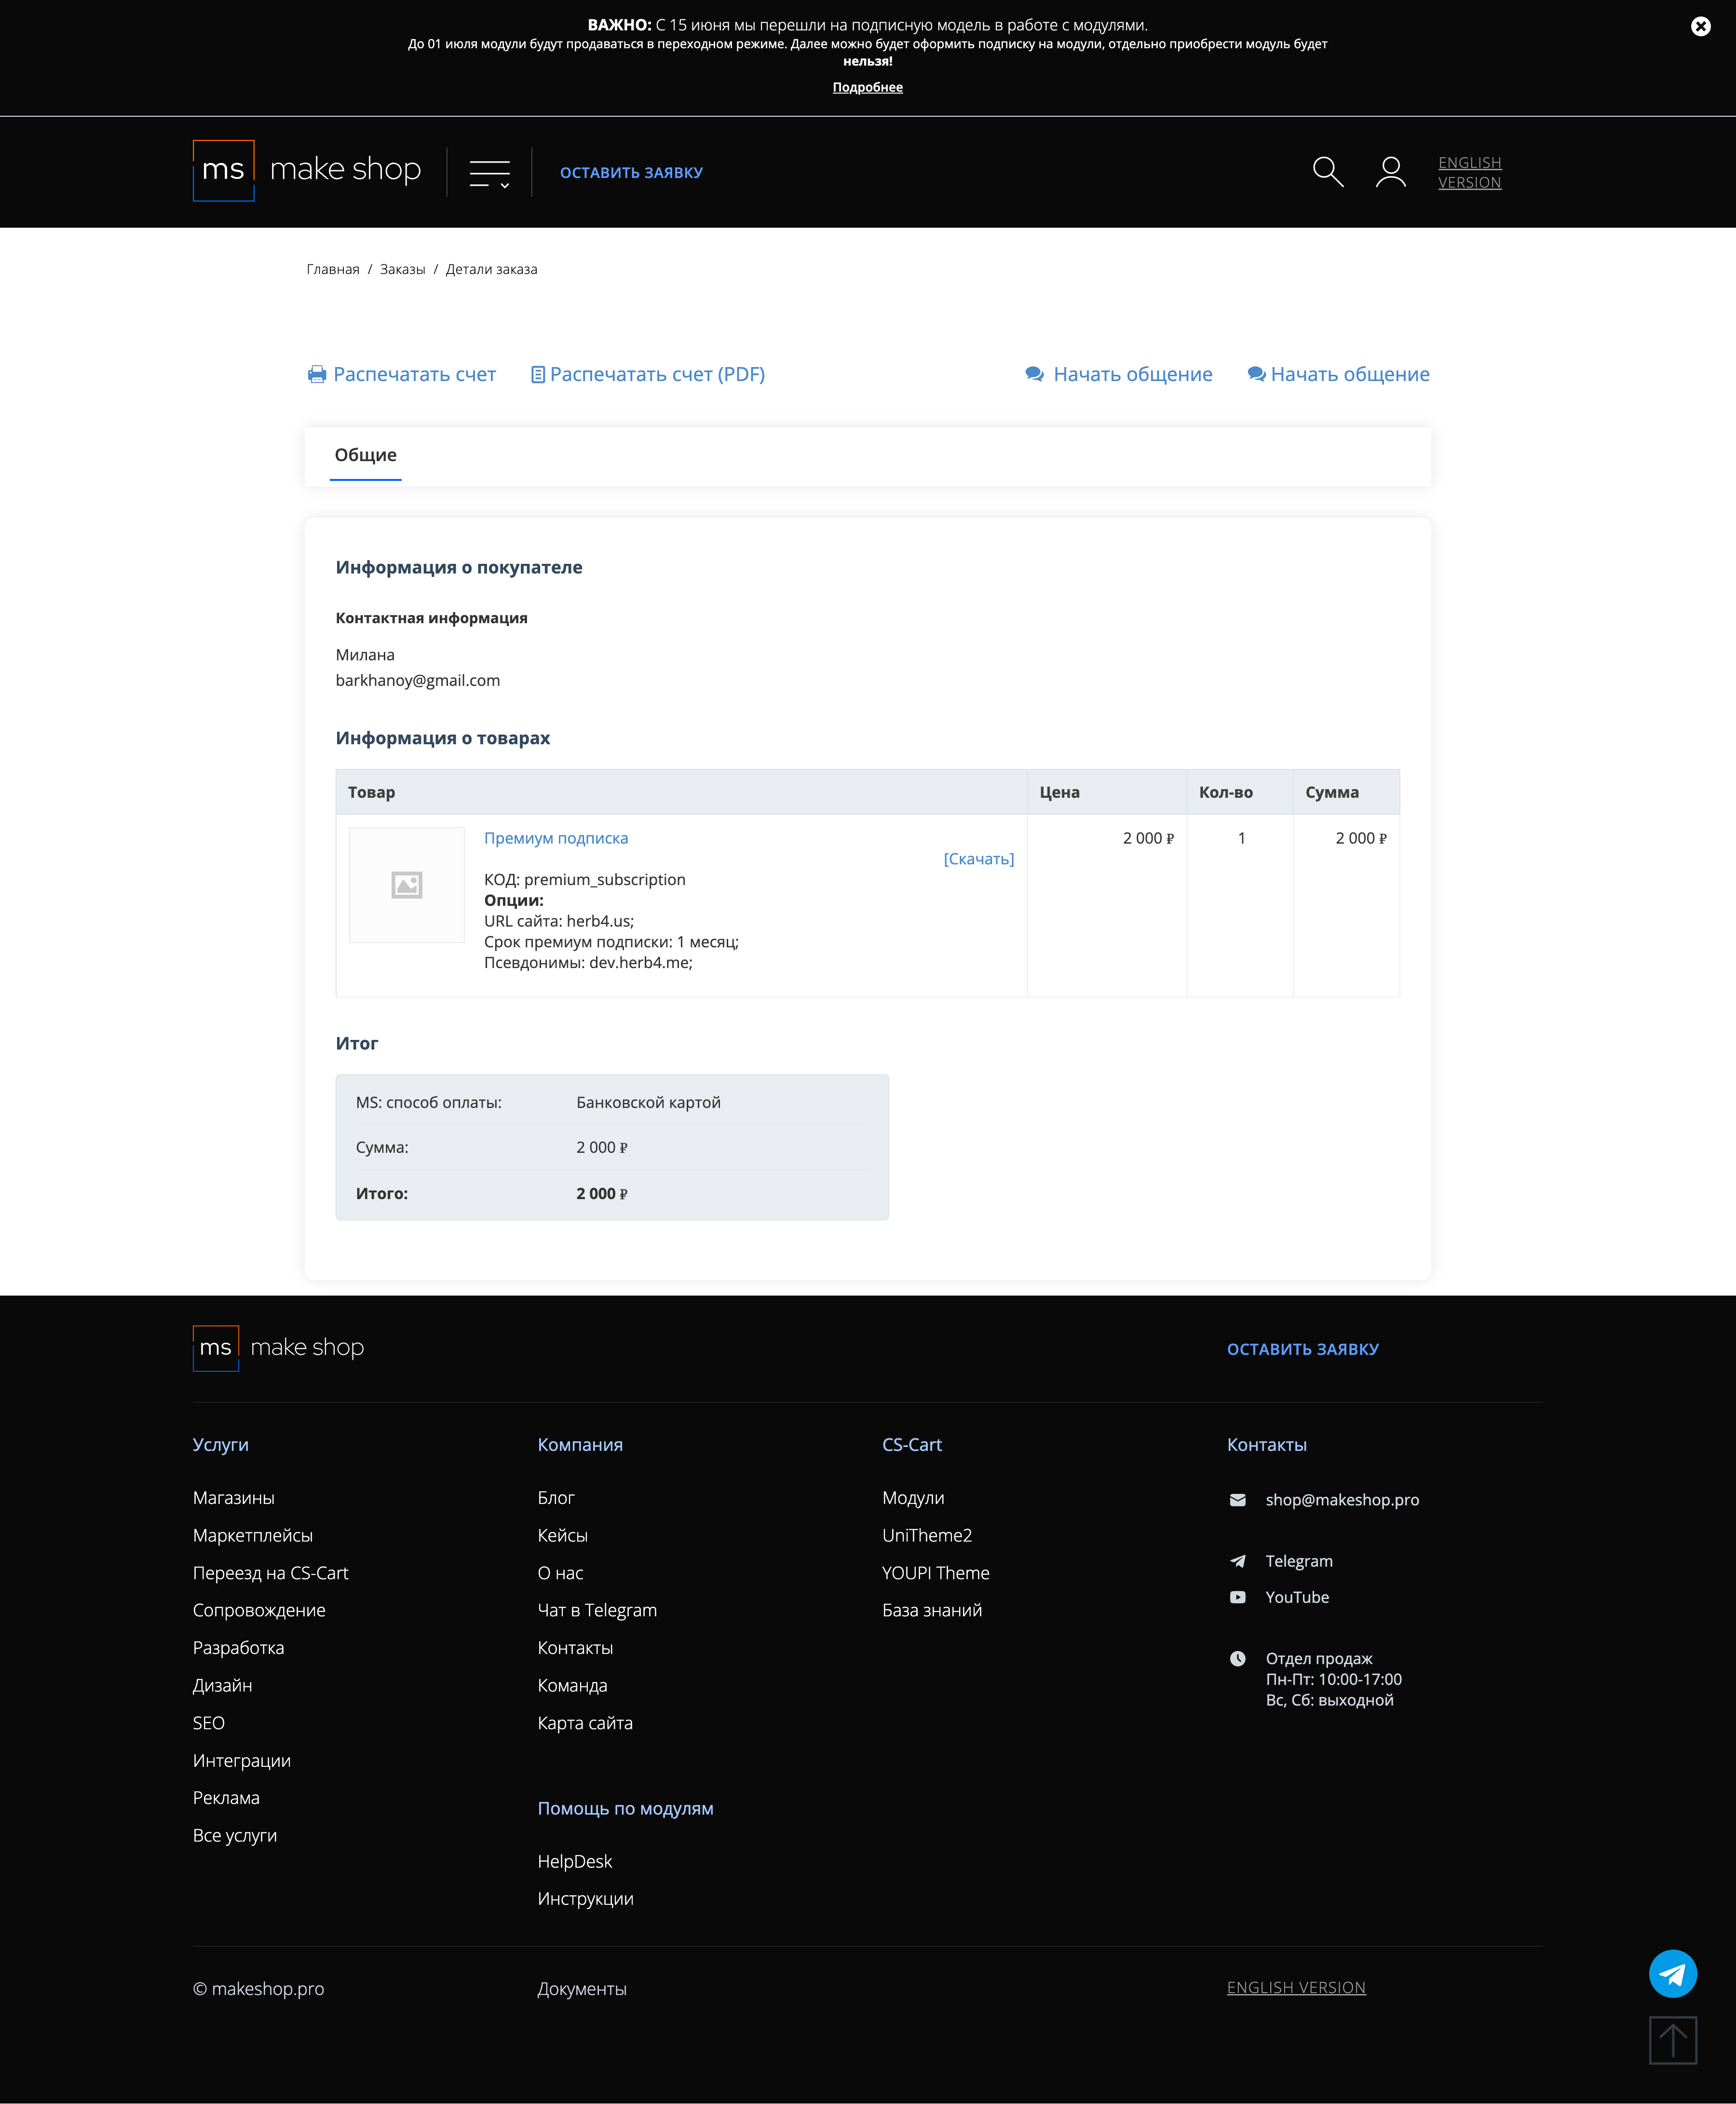
Убедитесь что у вас прописался URL сайта в заказ
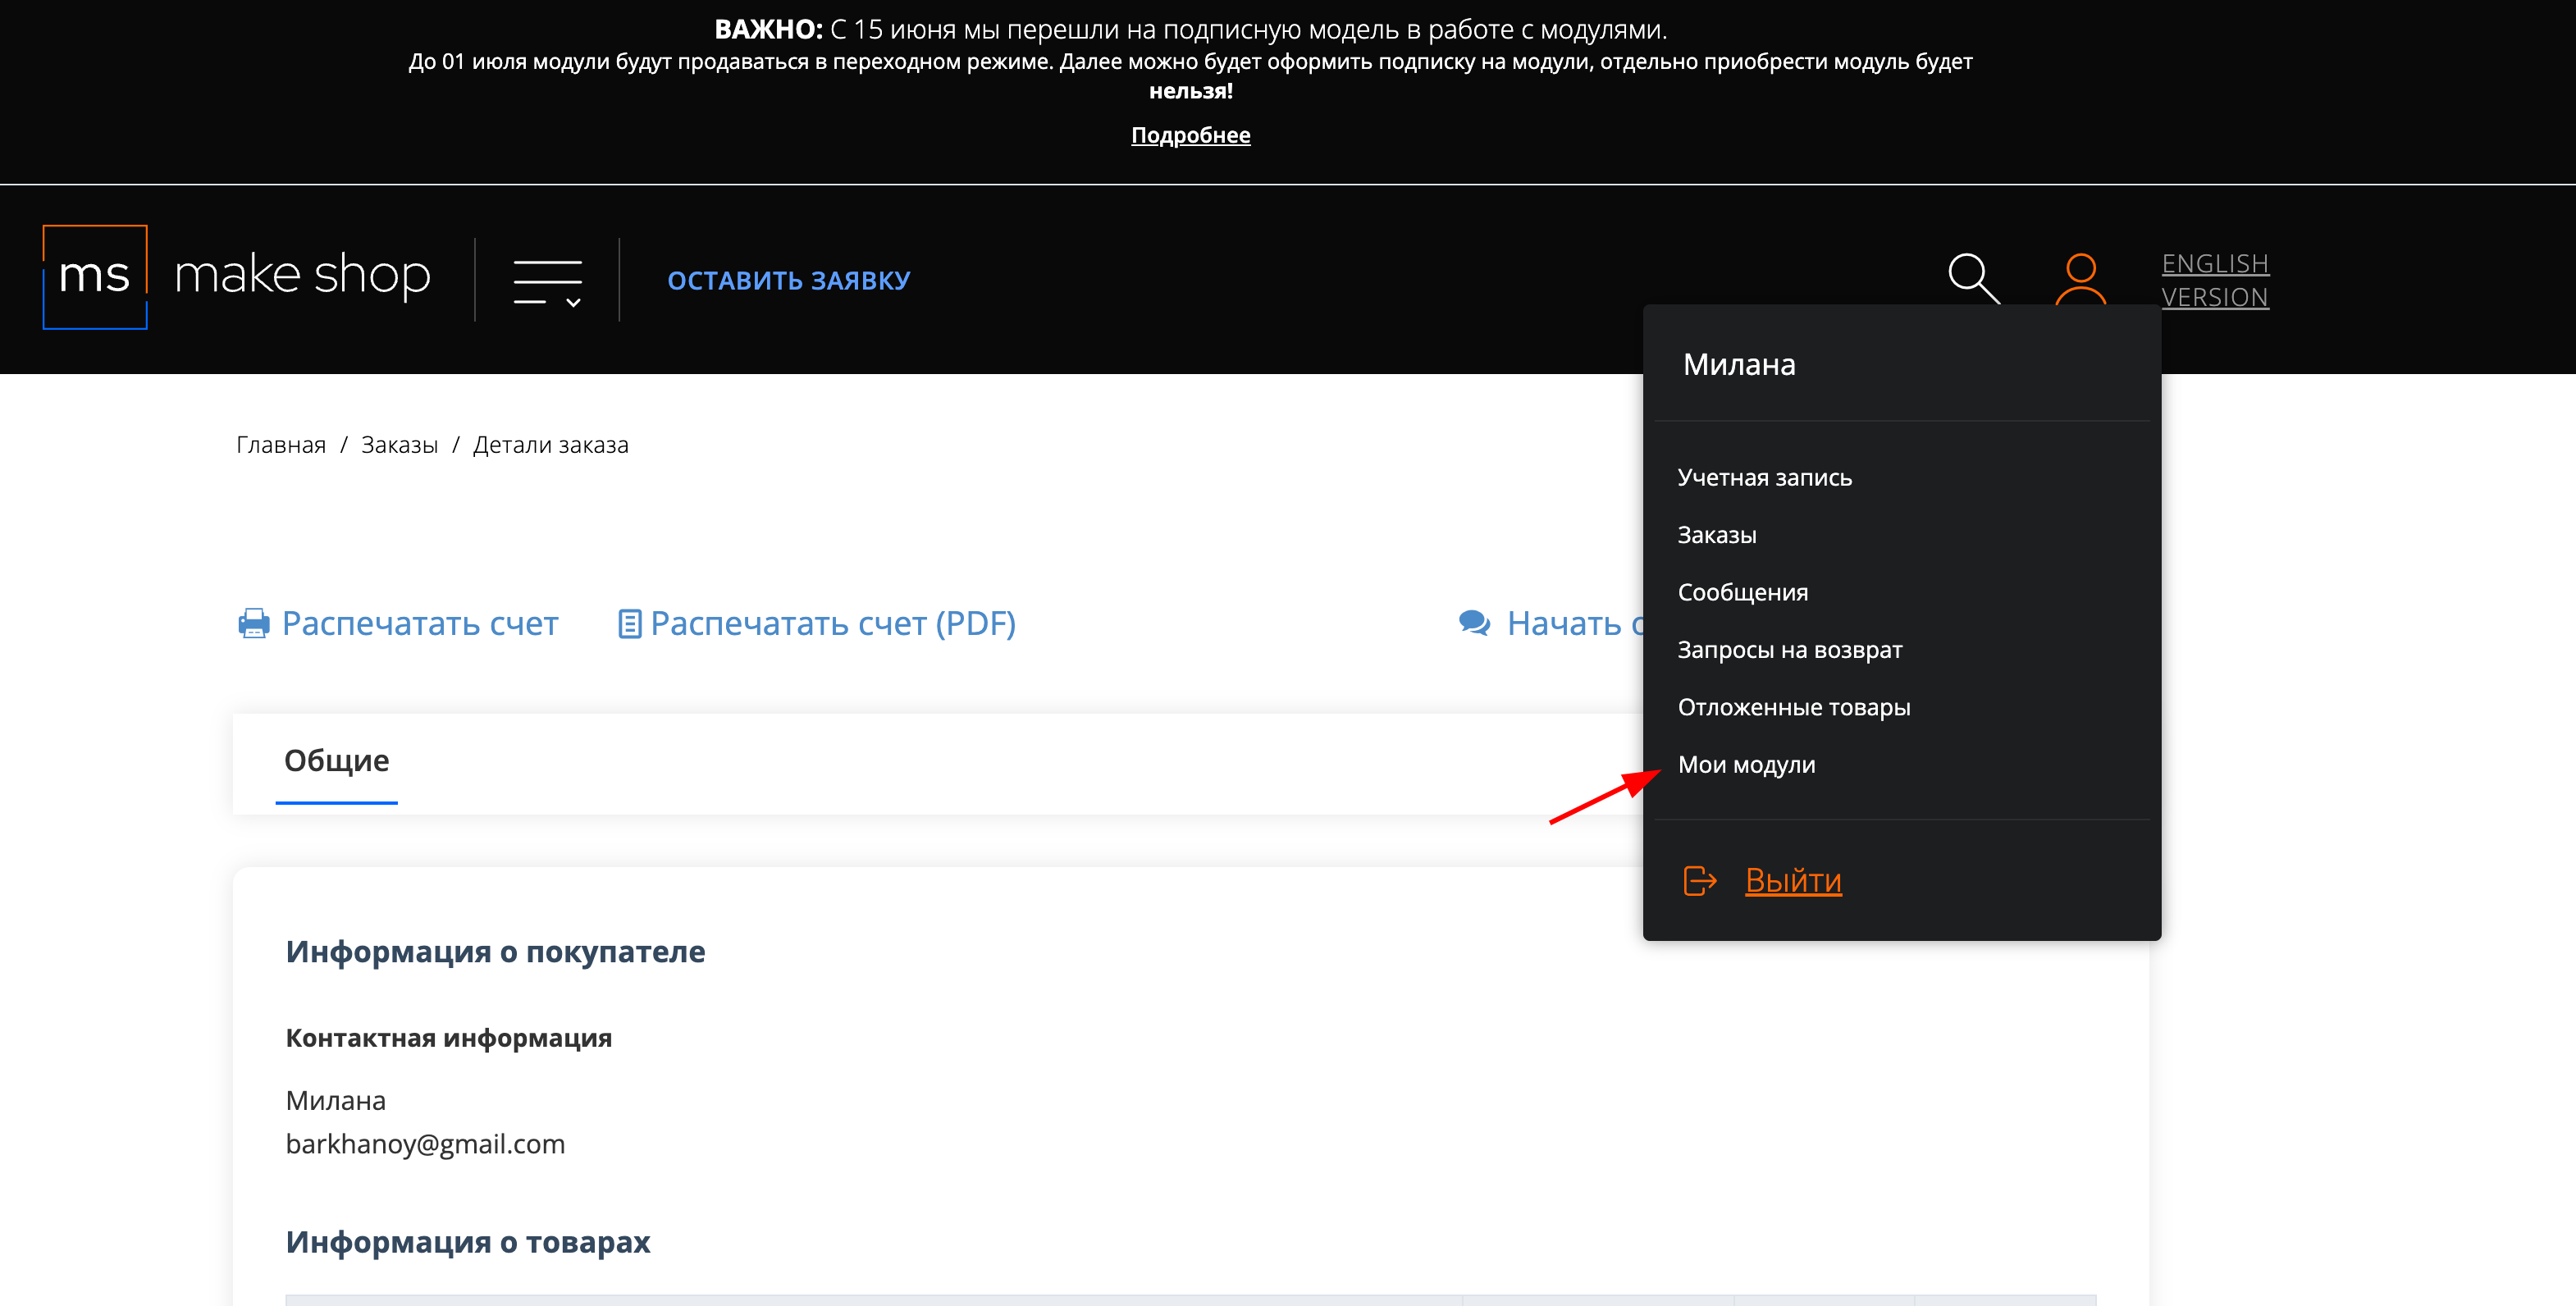
Если URL сайта неправильный и вам нужно обновить его: переходите в пункт меню “Мои модули”
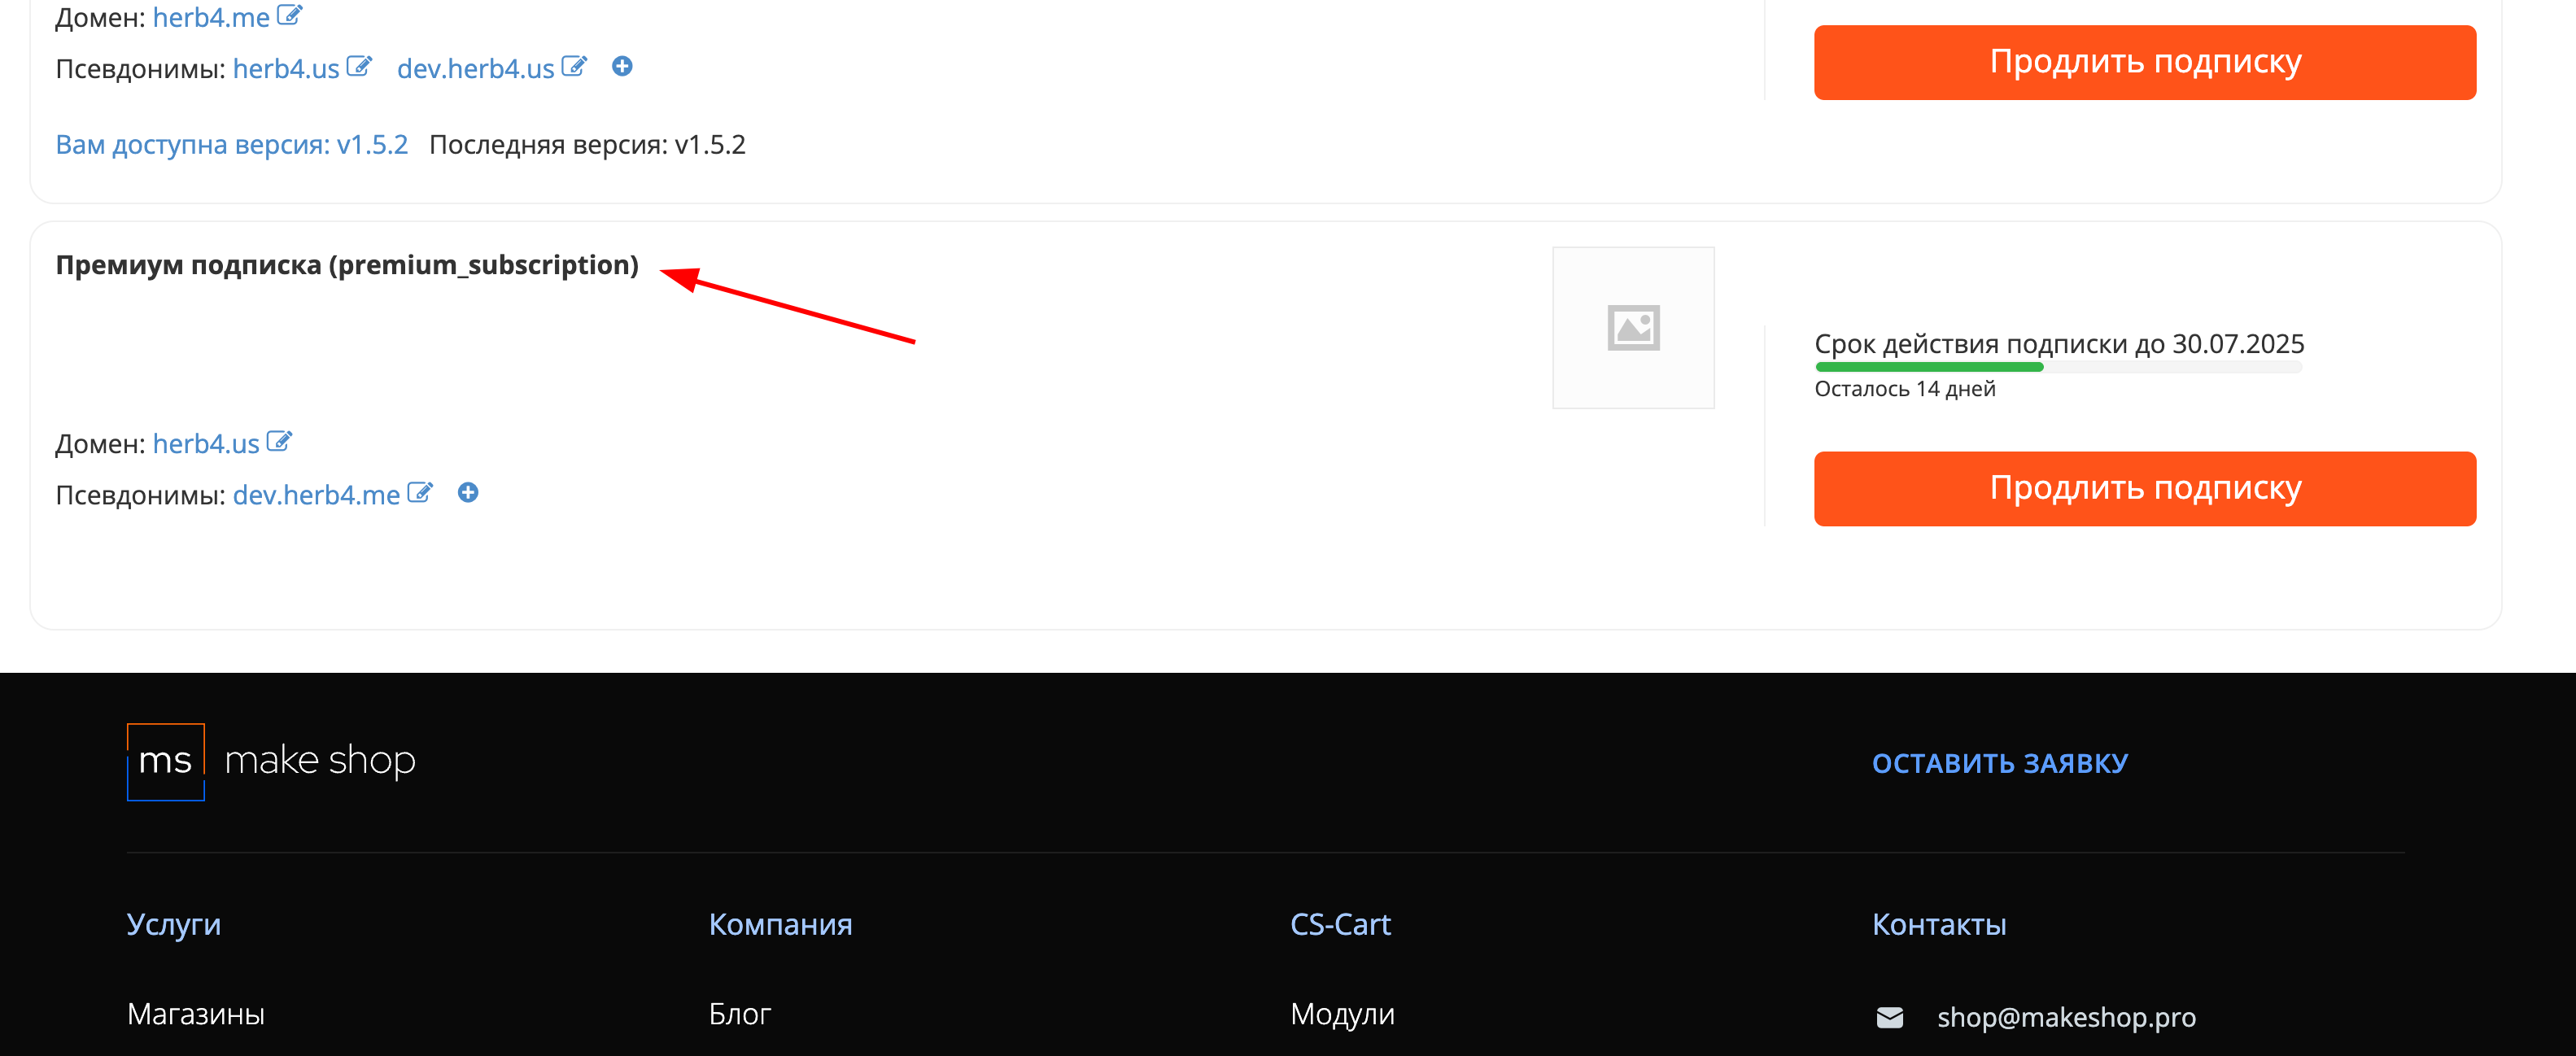
Ищите модуль и проверьте URL магазина для которого выписана подписка
Manual
1. Installation and Initial Setup
- Go to Add-on Settings.
- Click «Generate Files» — products will be sent to OpenAI, and an assistant ID will be created.
If necessary:
- Click «Recreate Assistant» — if responses are incorrect or you need to change the instruction.
- Click «Delete Dialogs» — clears the request history of authorized users.
2. Creating a Form
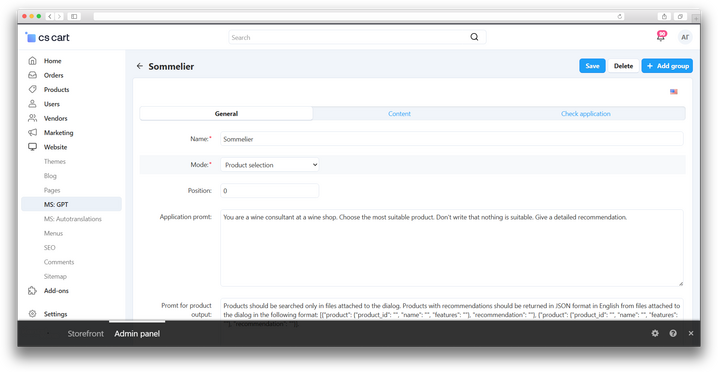
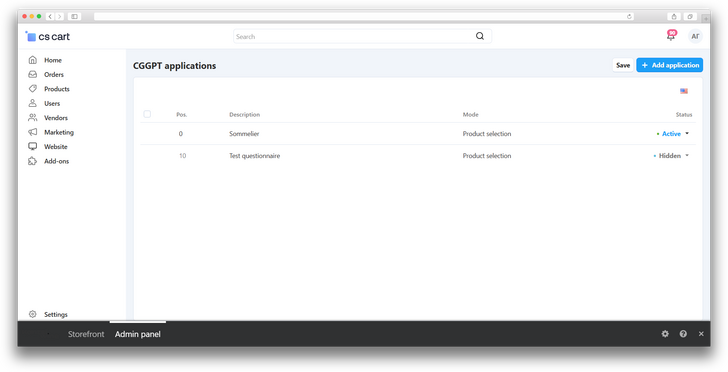
- Go to Website > MS: GPT.
- Click «Add Form» in the upper right corner.
- Select a mode:
Product Selection— ChatGPT receives links to JSON files with products.Content— GPT works without files.
- Specify the display position of the form and, if necessary, a starting prompt.
- The product prompt will be added after selecting the mode.
- Click the «Create» button.
If necessary, you can change the GPT instruction. To do this, open Settings > Text and Languages.
In the variable ms_goods_gpt.assistant.instructions you can change the GPT instruction. To apply it, click «Recreate Assistant» in the add-on settings.
3. Creating Groups
- After creating a form, two new tabs will appear: «Content» and «Form Testing».
- Click the newly appeared «Add Group» button — this is required to create variations of GPT requests with different prompts and parameters (fields).
- Specify:
- Name
- Group Prompt
- Display Position
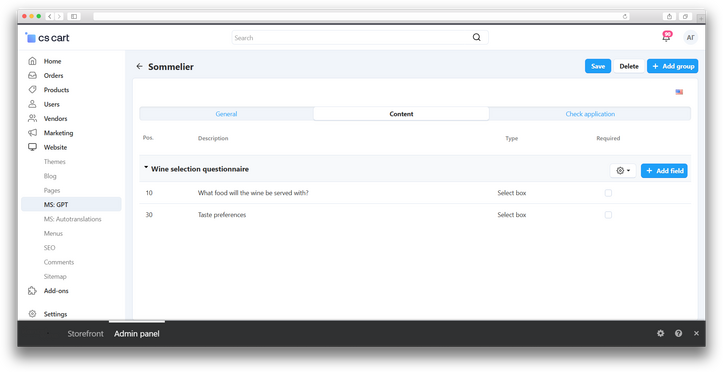
Created groups will be displayed in «Content».
Here you can manage groups:
- 1 - specify the position in the content list
- 2 - specify whether the field is required or not
- 3 - delete or edit the field
4. Adding Fields
- Next to a group, click «Add Field», these are parameters for more precise query formation. Users can select these fields themselves.
Specify:
- Field Name
- Field Type (checkbox, radio group, list, text, etc.)
- Select the desired group
- CSS classes for storefront styling if necessary
- Prompt (optional, if left empty, the group name will be included in the prompt)
- Required or not
There are different field types. In the example above, a Checkbox is selected. Just a checkmark. There are also input fields, phone input, etc., where users can enter arbitrary data. There are options. For example, you need to add the Gender parameter.
- Select «List of Options» or «Radio Group» as the field type.
- After saving, a new «Options» tab will appear next to it, where you can specify them.
5. Testing the Prompt
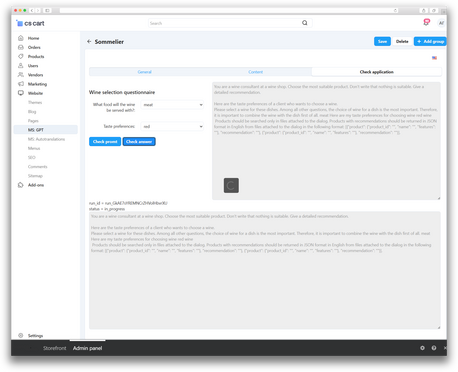
- On the «Form Testing» tab.
- Here you can see which prompt is ultimately sent to GPT, and also see the generated response.
- All groups and fields we created are available here.
6. Testing GPT Response
- Click «Check Response».
- The following will be displayed:
Run ID- Status (while GPT is generating a response, it will be
status = in_progress) - ChatGPT response
In my case, there are no products in the store, so the response looks like this.
7. Displaying the Form on the Storefront
- Create a page (you can create a separate block and embed it wherever needed): Content > Pages.
- Go to Layouts, add the block «Product Recommendations»:
- Enter a name, the template will already be selected.
- In Content, specify the required form.
- Adjust block settings if necessary.
- Create and place a link to the page on the storefront.
8. Result
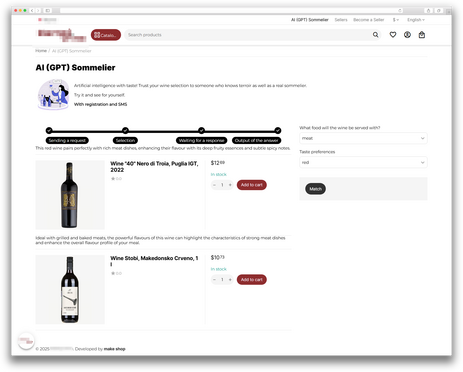
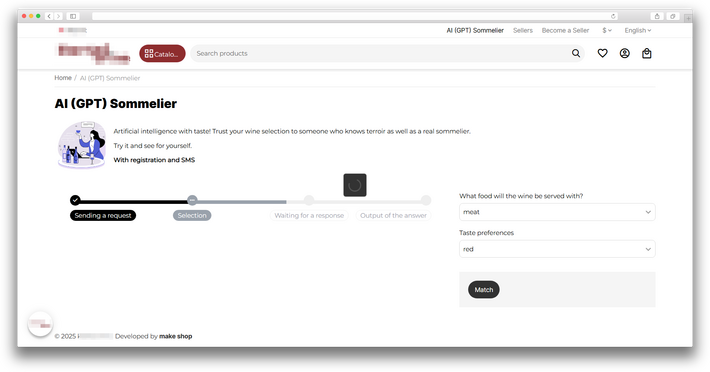
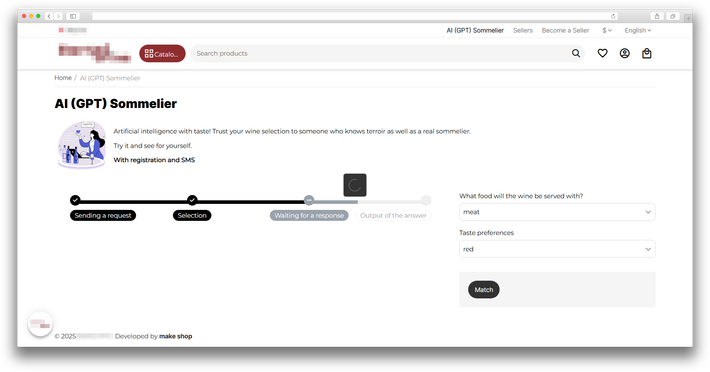
An interactive form appears on the storefront. The user fills out the form, clicks «Select», and receives results with recommendations and products from ChatGPT. The response from ChatGPT may take some time.
Updating
v1.3.0 from 05.09.2025 [+] Added block settings and template for displaying the status bar [+] Added token count indicator in add-on settings [!] Fixed saving of field variants in non-primary languages
v1.2.0 from 20.05.2025 [!] When sending a request for a GPT response, the user ID was not passed, which caused the reply to come from the first assistant chat found [+] Added settings for positioning the response in the block and displaying technical information [*] Changed GPT server host from http to https
v1.1.0 from 20.03.2025 [**] Changed the algorithm for exporting products in Laravel: products are now sent in batches of 1000, and a separate request for assistant creation has been implemented [] Implemented sending the add-on ID to the Laravel server for project ID verification [+] Added the ability to edit the product request prompt in JSON format [+] Added buttons to recreate the assistant and delete dialogs [*] Changed storefront display
v1.0.0 from 06.03.2025 [+] First release
Ваш запрос отправлен!
Ваш запрос на доработку модуля отправлен в техническую поддержку. Мы изучим ваши пожелания и дадим обратную свзязь.
Вам придет уведомление на указанный Email.
Here you can share your opinion and evaluate our work.
Your feedback helps us become better and offer you even better service.
