2.3.1
Installation
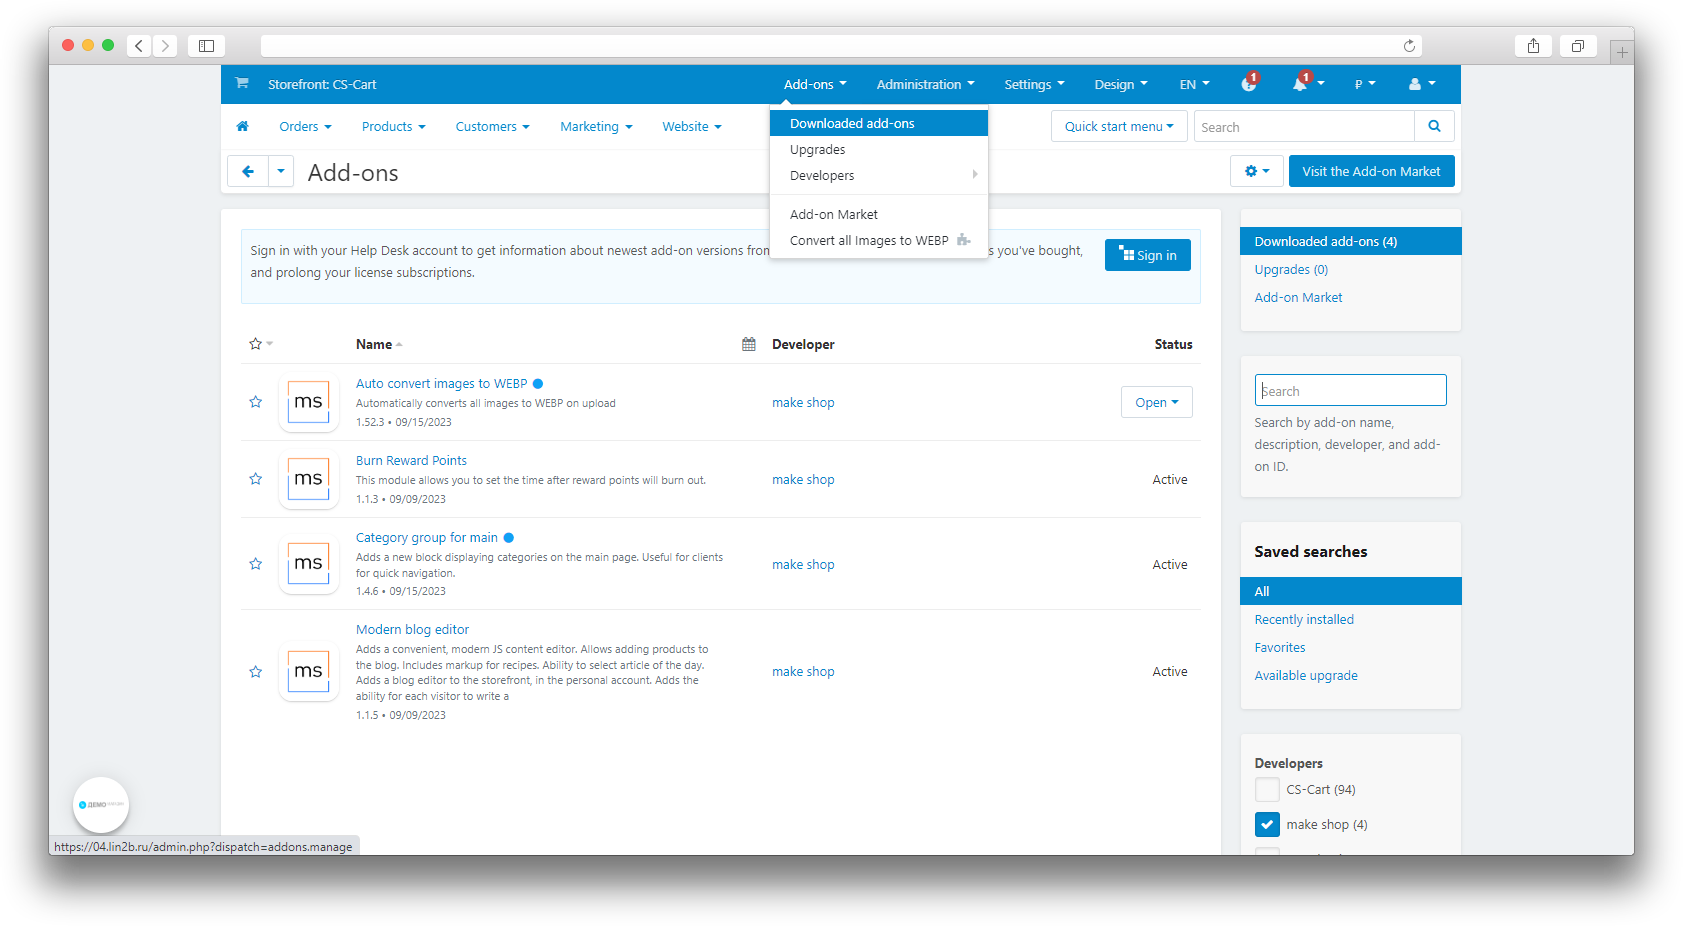
After downloading the add-on, its installation is performed using standard CS-Cart tools on the page Admin Panel → Add-ons→ Add-ons Management → Download and install the add-on (+).
For CS-Cart version 4.13.1 and higher, the Admin Panel → Add-ons→ Downloaded add-ons → Gear button → Manual installation.
Setting
General synchronization settings
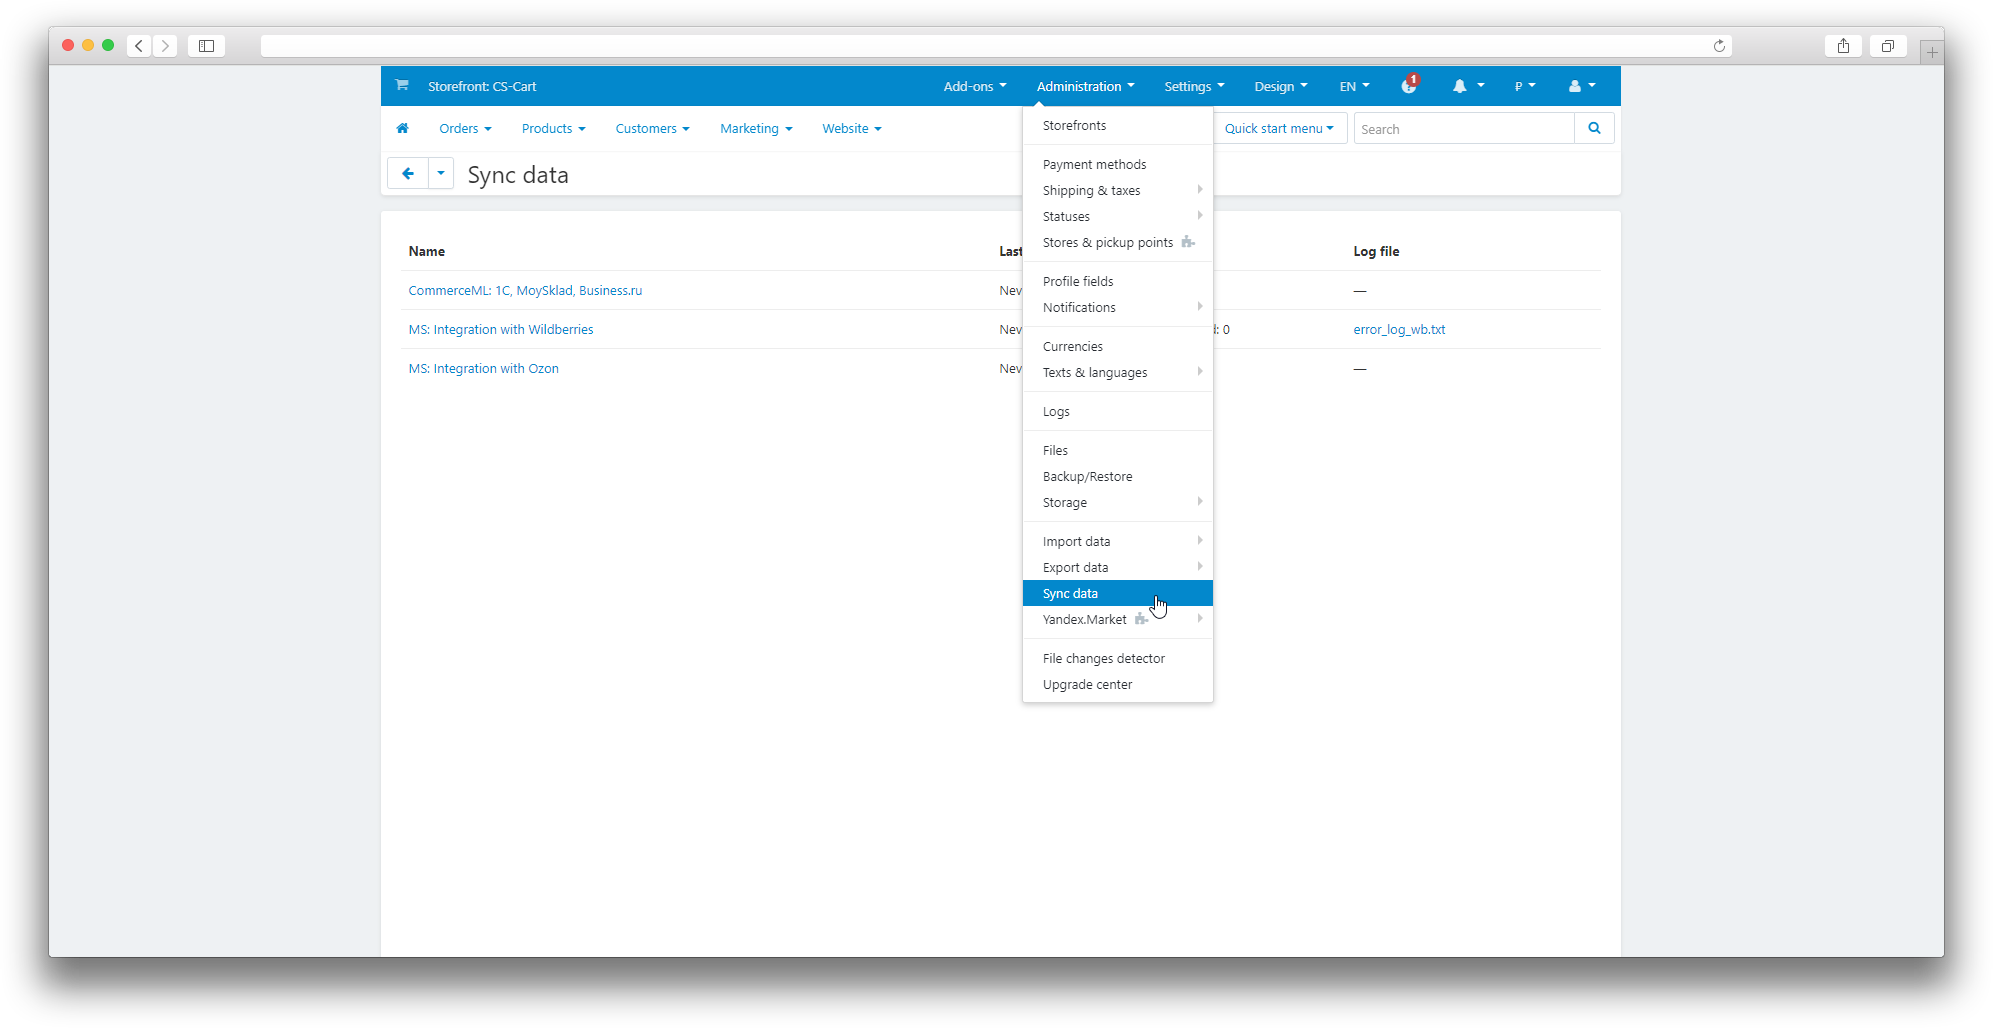
To access the synchronization settings, after installing the add-on, open the Administration → Data Synchronization → MS: Integration with Ozon section.
The General tab contains the basic synchronization settings;
- Client ID;
- API key;
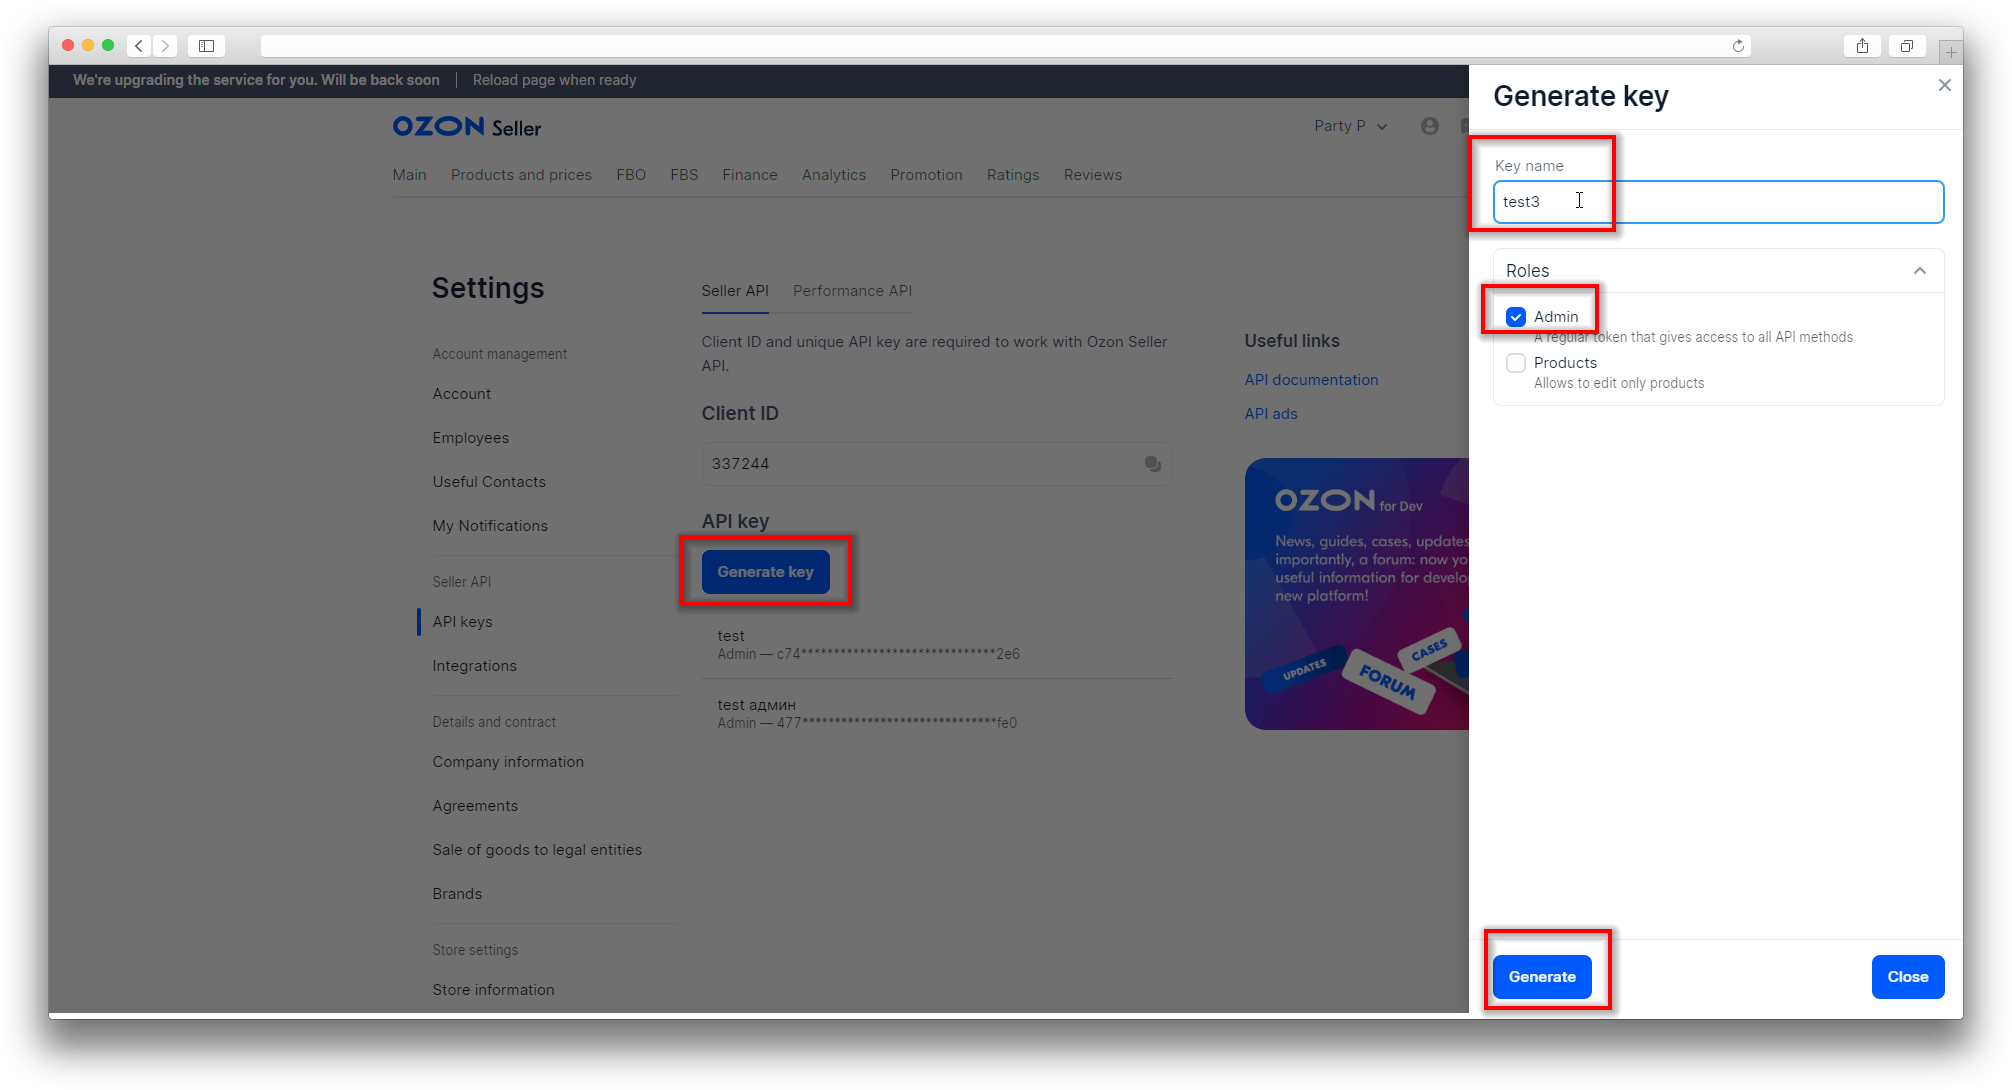
- Fill in the Key Name field;
- Mark the Admin Roles;
- Click Generate;
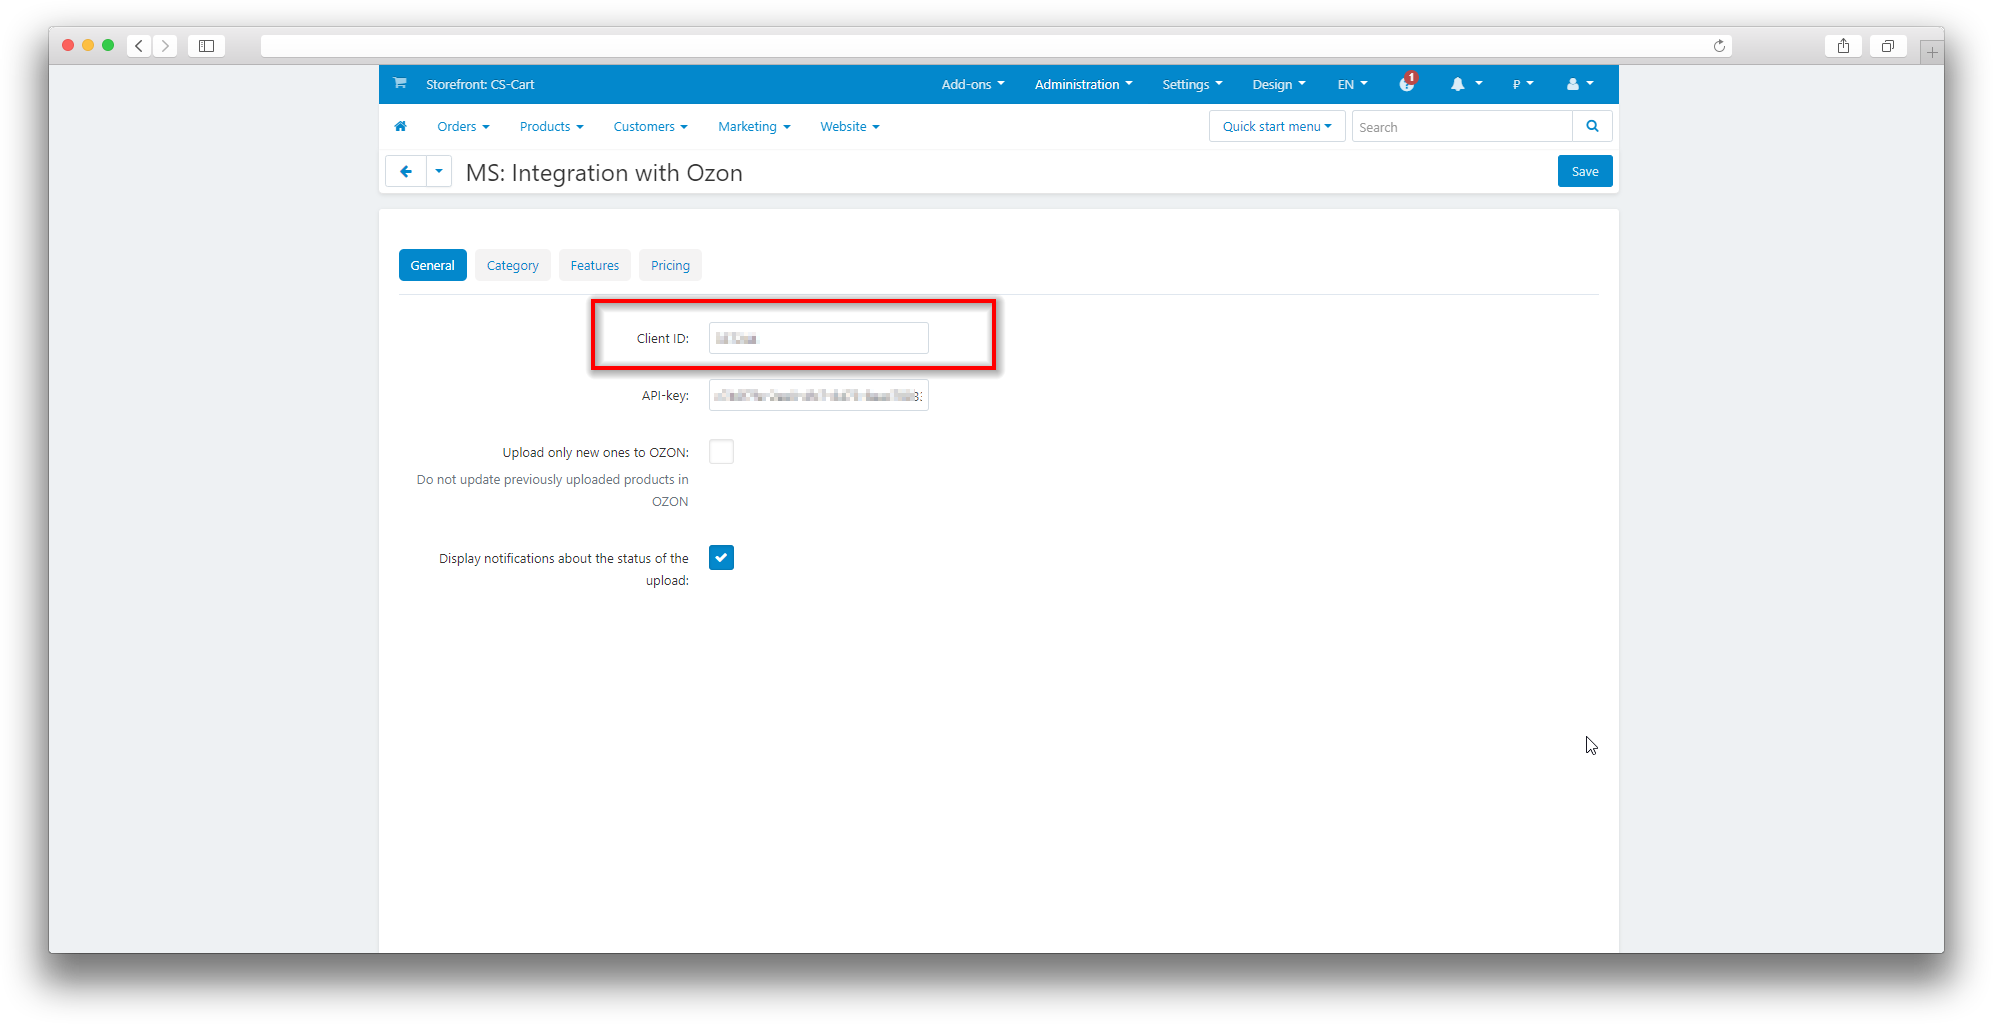
In the field, you must enter the data from the Ozon personal account.
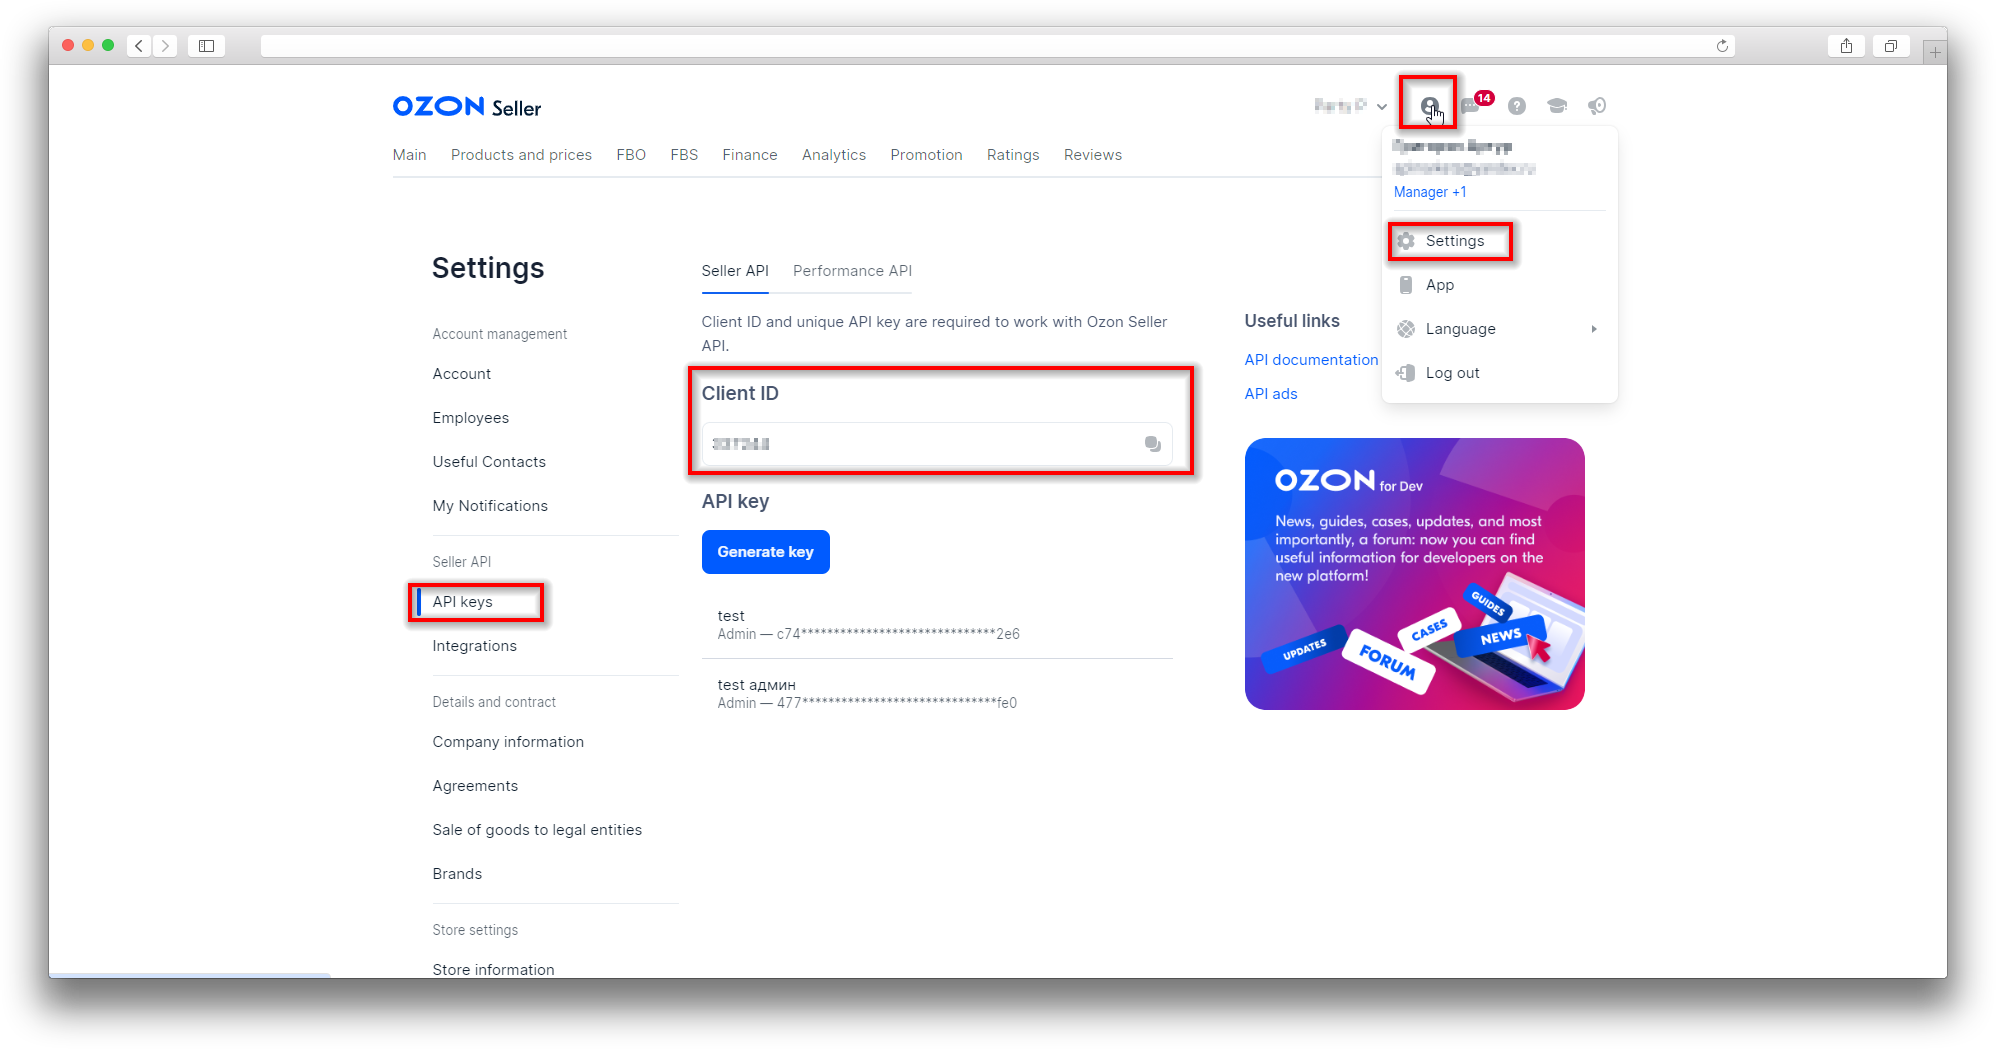
The client ID can be found in the Ozon personal account in the Settings → API keys → Client ID section.
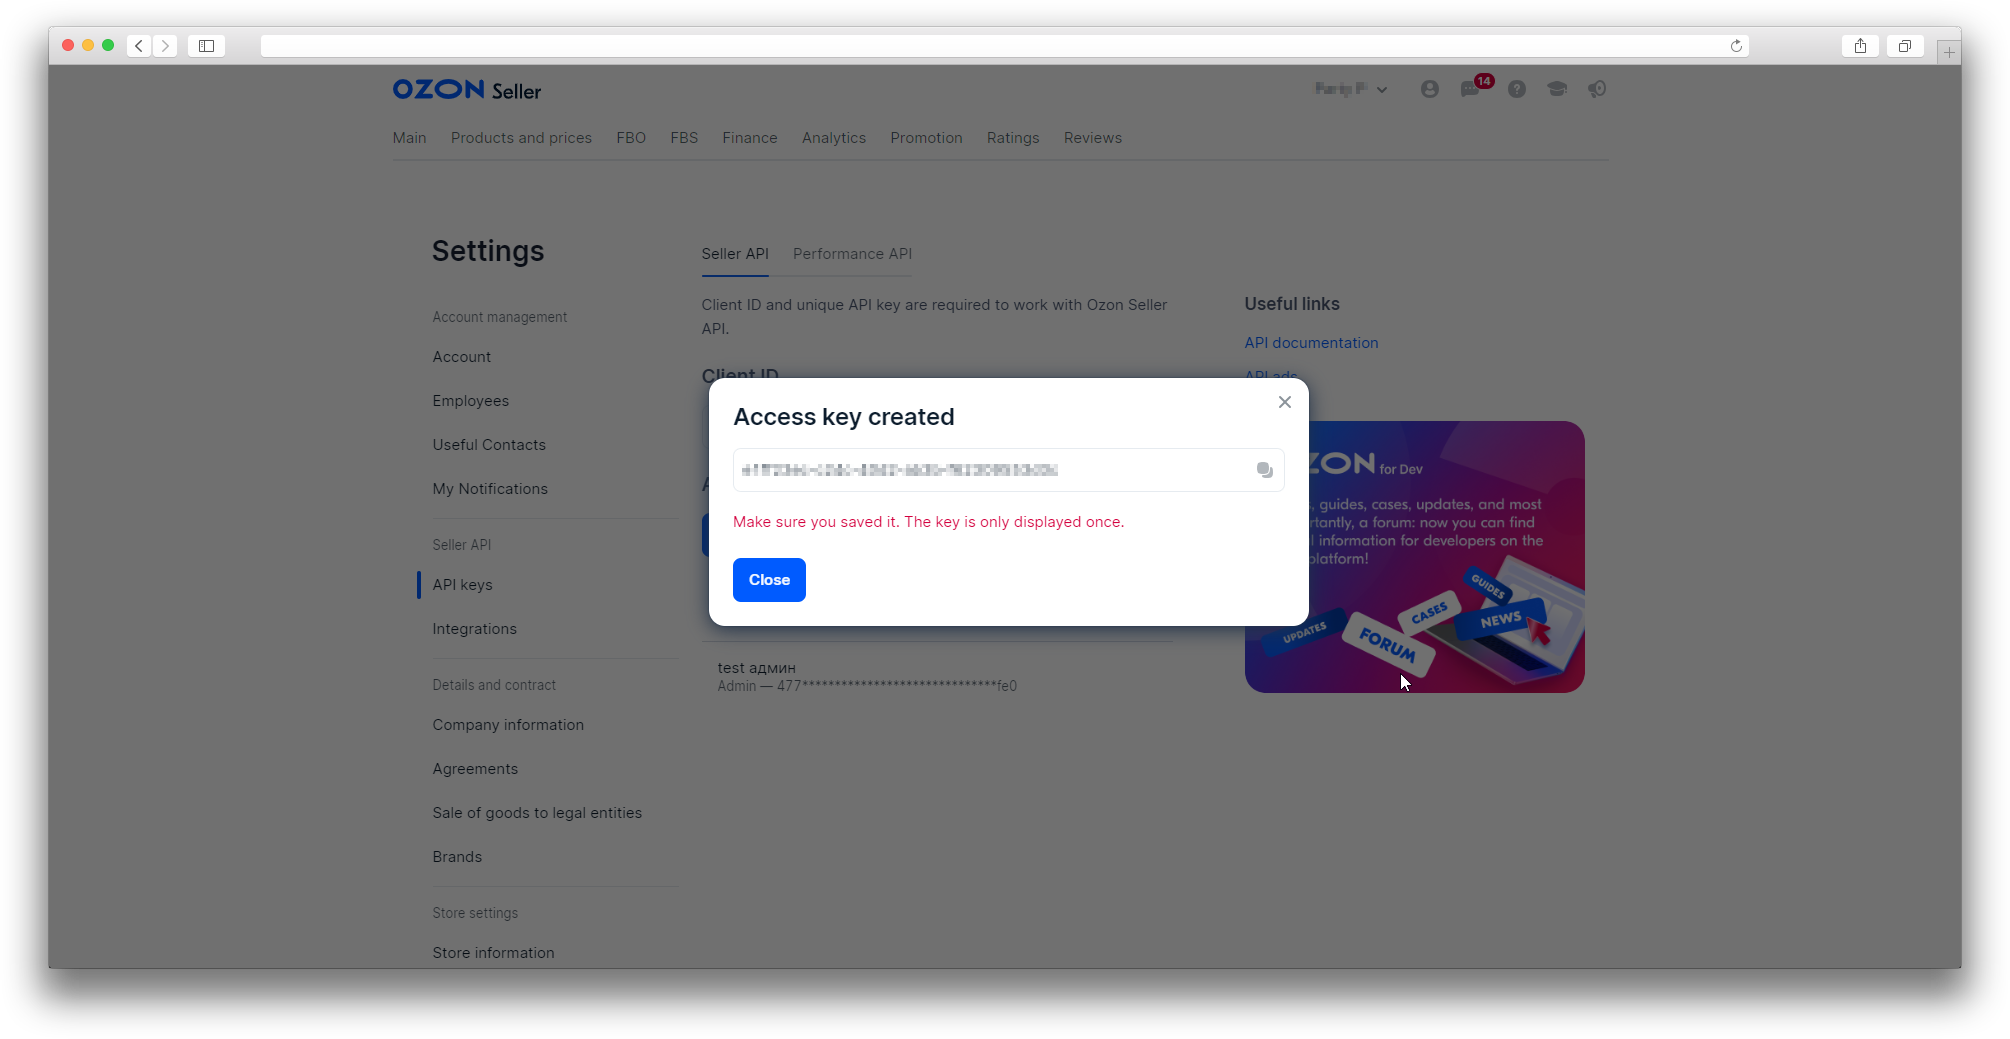
In this field, you must enter the API key created in the Ozon personal account.
The API key in the Ozon personal account is created in the Settings → API keys → Generate key section.
If this checkbox is checked, when changing and saving the product in CS-Cart, the availability of this product in Ozon will be checked, if this product already exists, then there will be no re-loading or updating.
If this checkbox is checked, notifications about the unloading status will be displayed when unloading the product in Ozon.
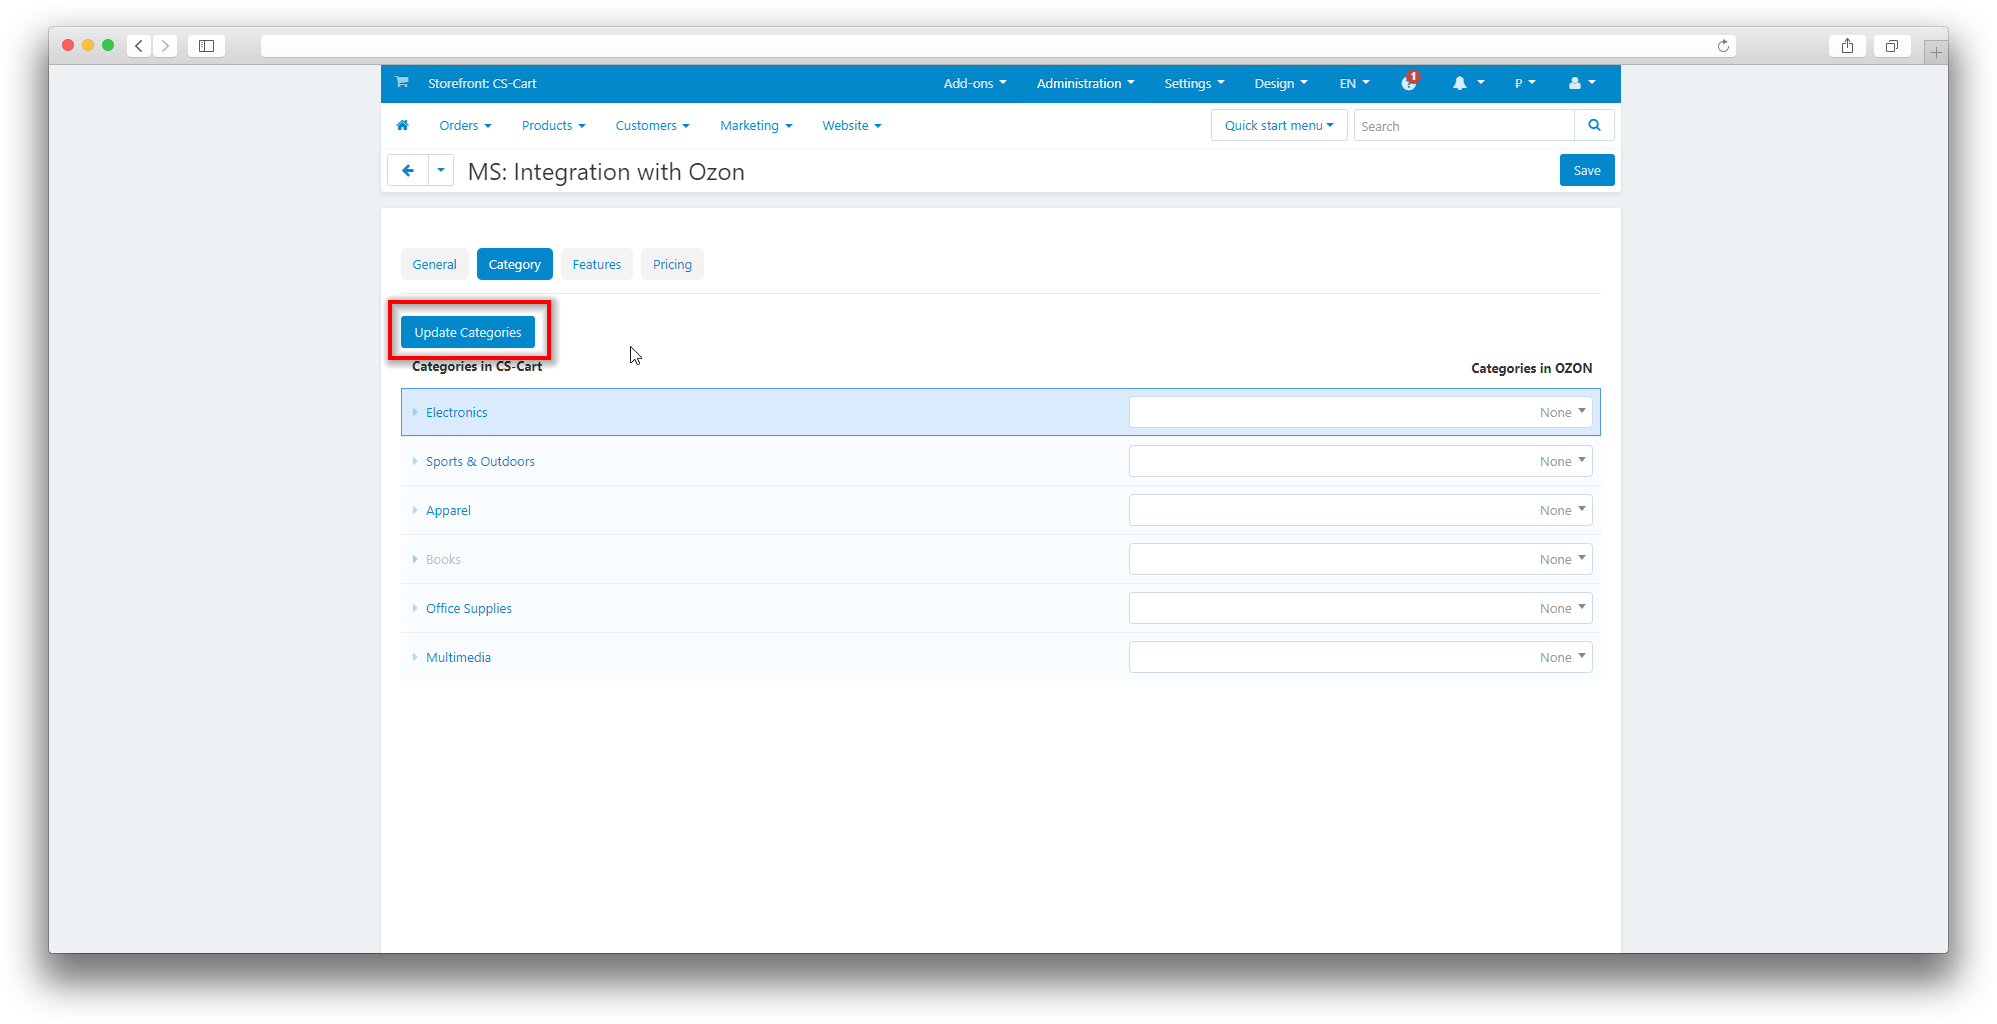
The Categories tab contains the settings for matching CS-Cart and Ozon categories;
- Click Update Categories;
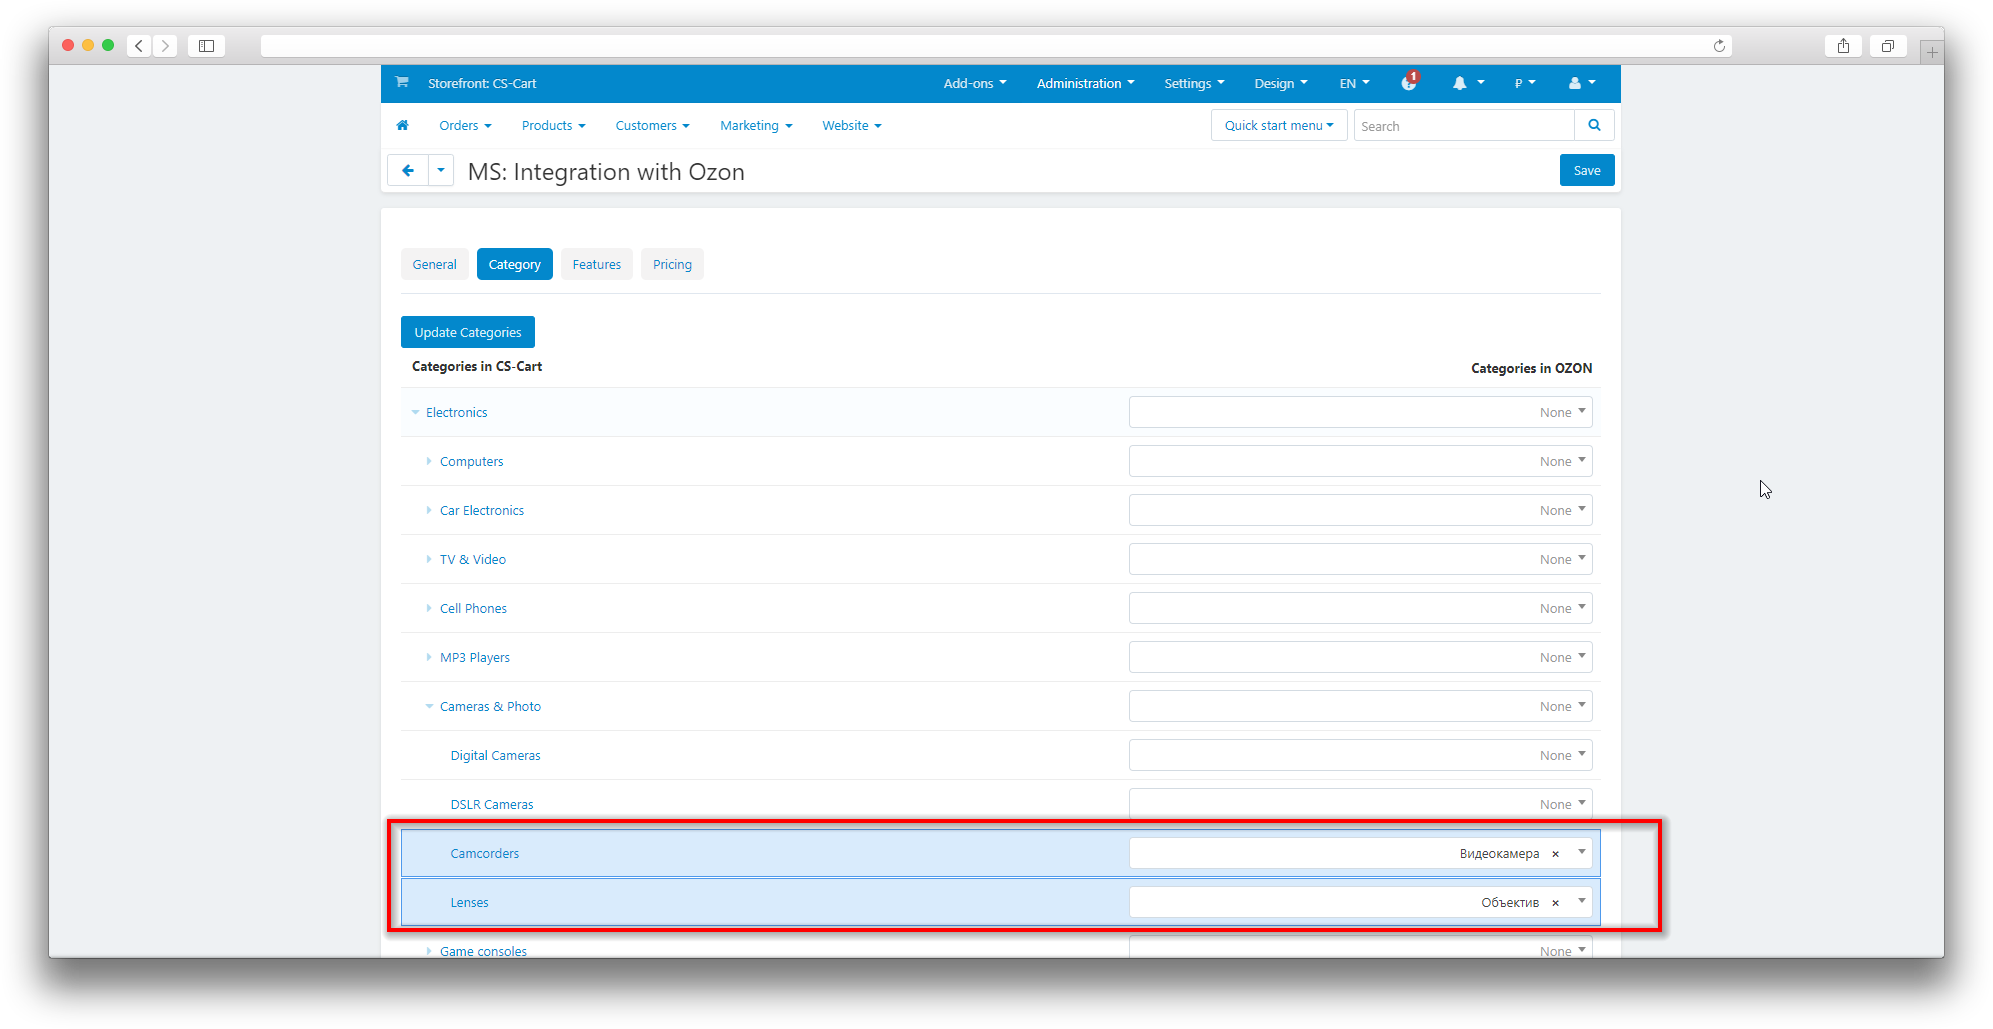
- Select the category or subcategory in which the products are located that you want to match with the Ozon category;
- Next to the selected CS-Cart category, select the required category from the list of Ozon child categories;
- Click Save after matching the categories.
The Feature tab contains the settings for comparing the features of CS-Cart and Ozon products;
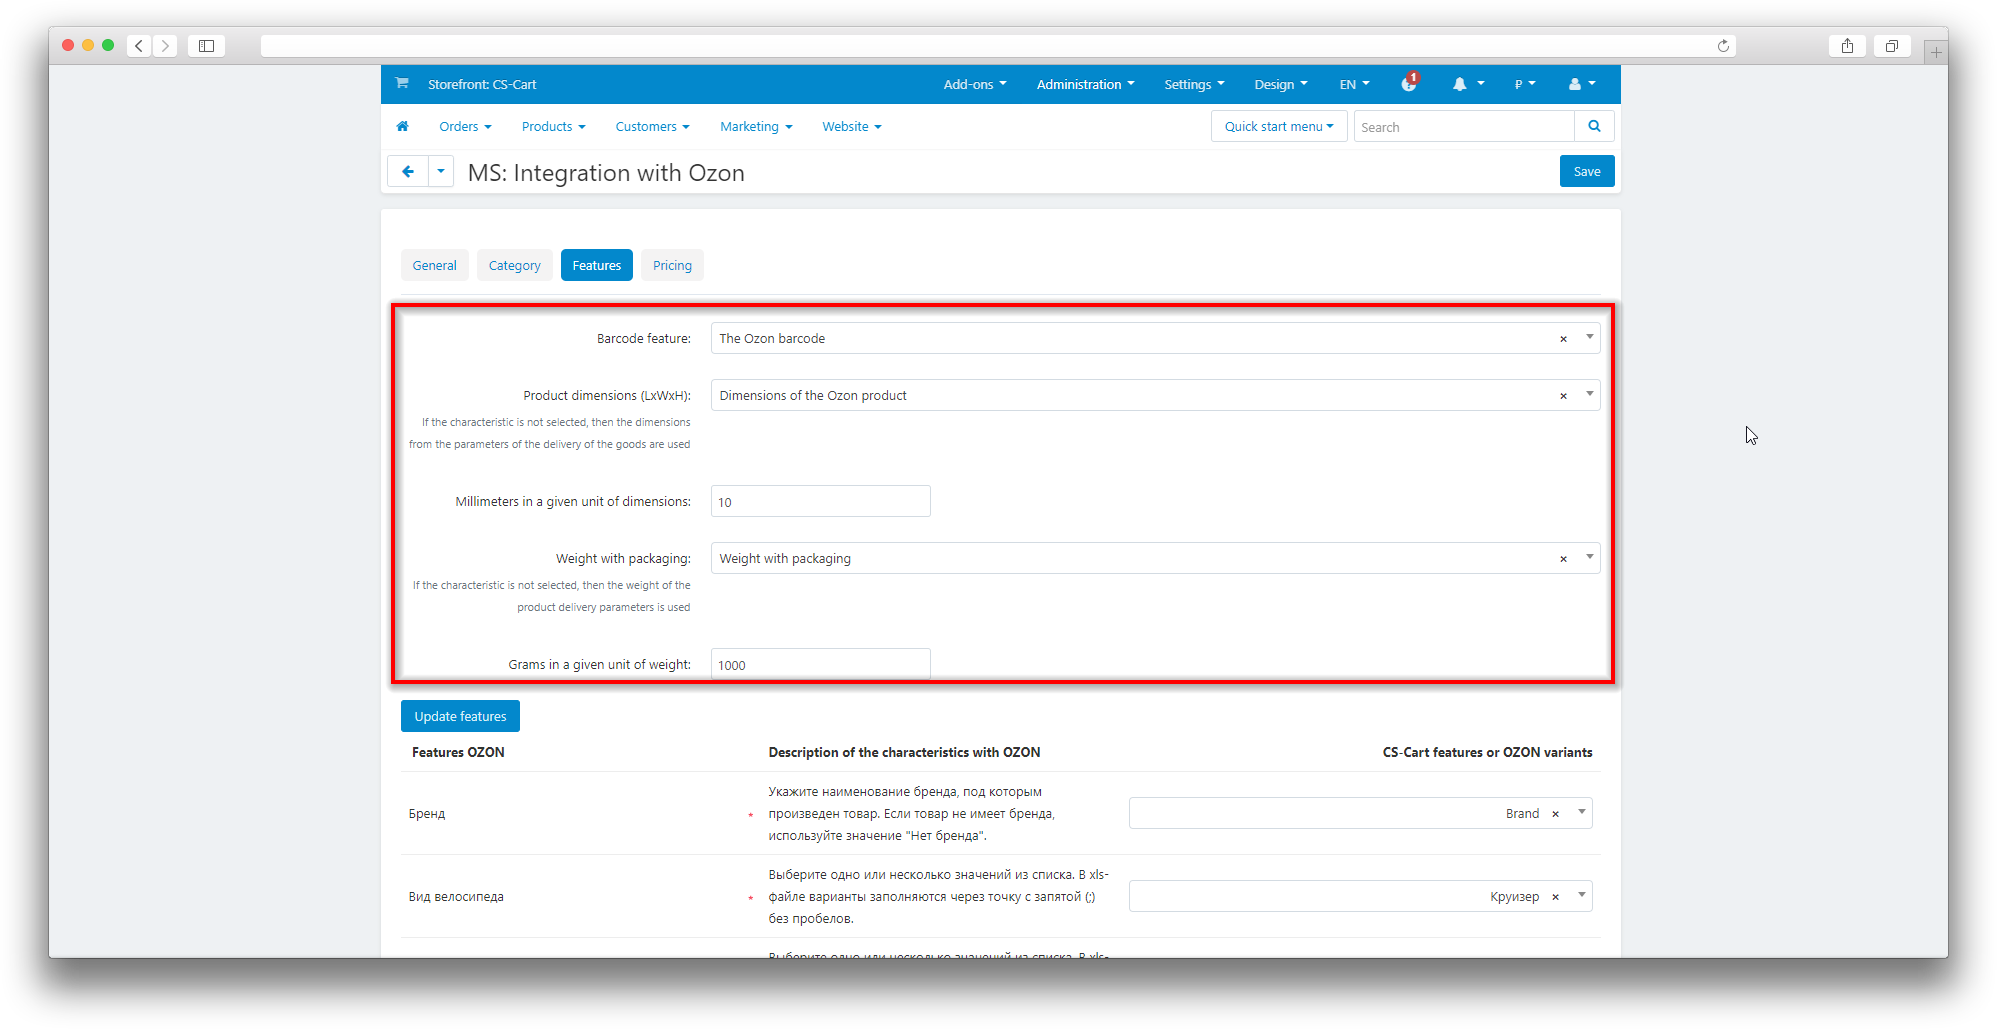
- Barcode;
- Product dimensions (LxWxH);
- Millimeters in a given unit of dimensions;
- Weight with packaging;
- Grams in a given unit of weight;
- Update the specifications;
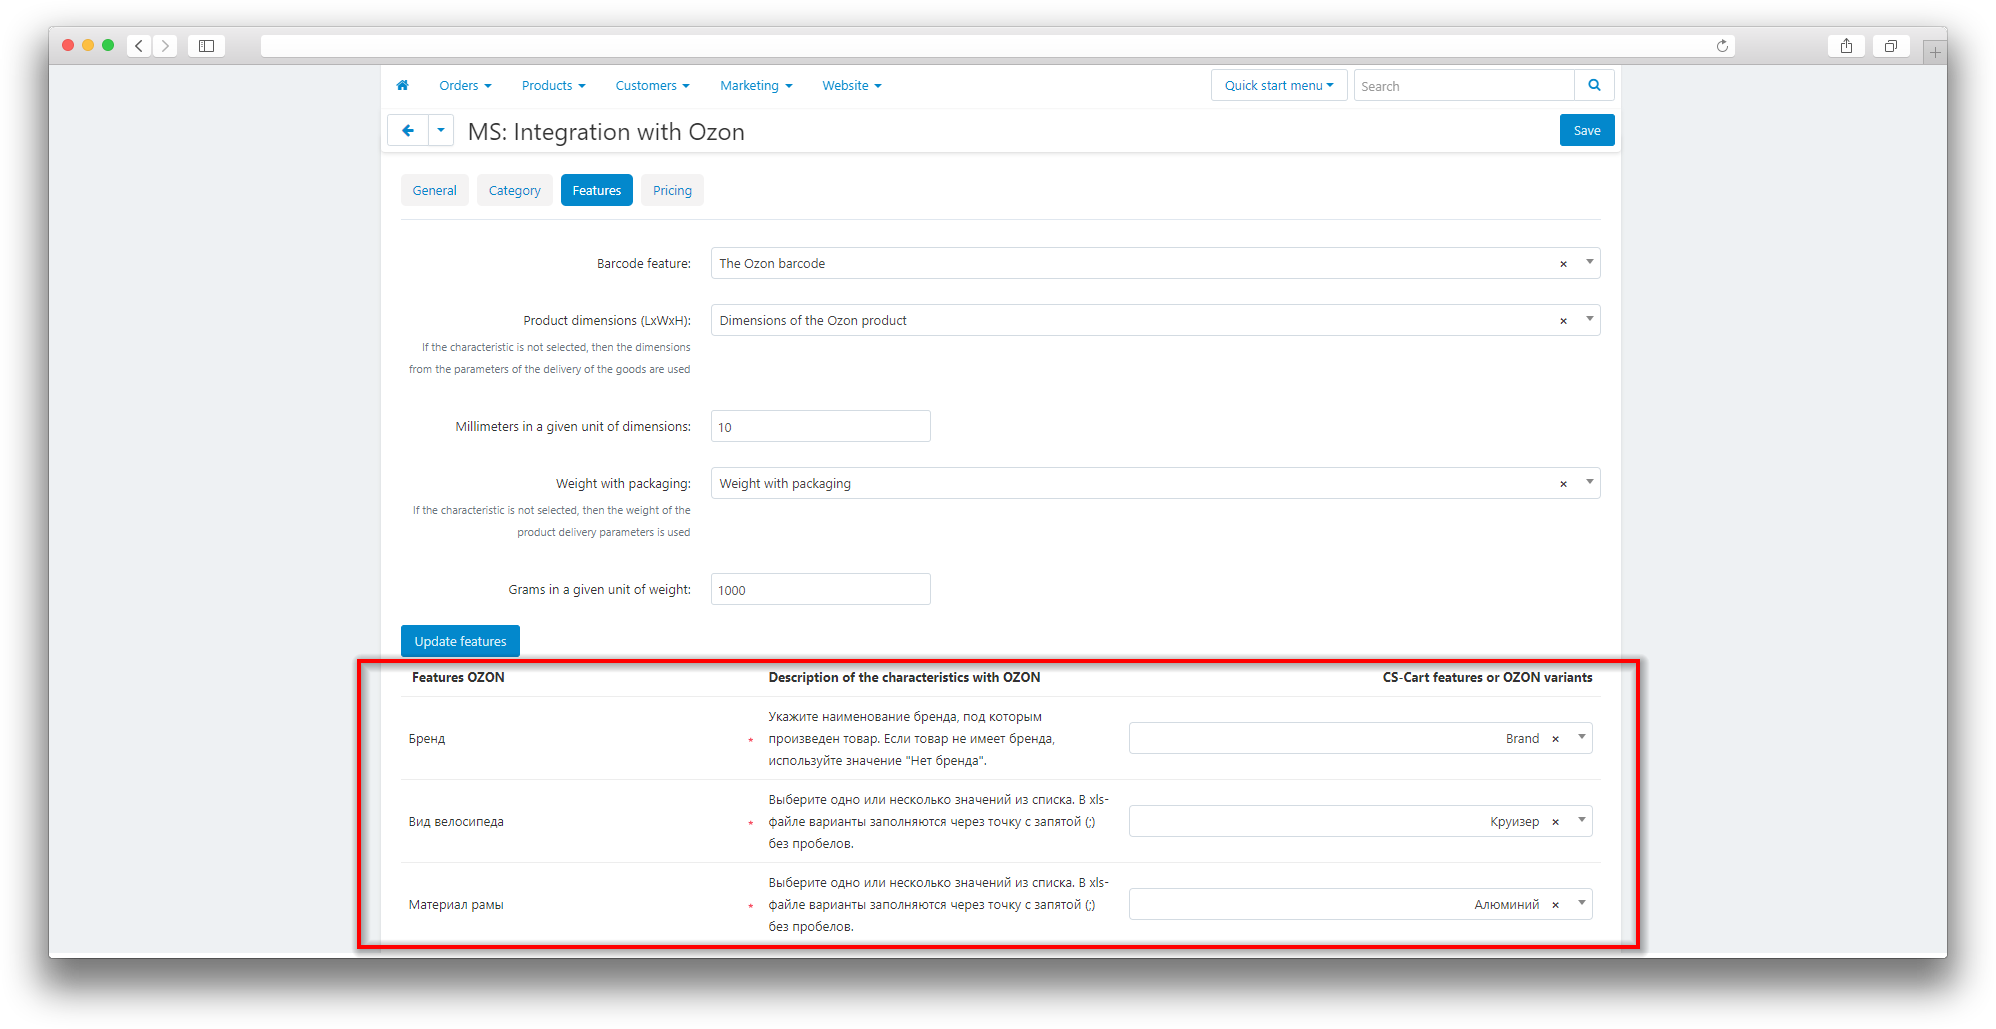
- In the table below, the features of Ozon are displayed on the left, and on the right is a list of CS-Cart features with which comparisons can be made.
In this field, you can match the Ozon Barcode with the CS-Cart features.
In this field, you can compare the Dimensions of the Ozon product with the features of CS-Cart
If this field is left empty, the dimensions from the Delivery Parameters tab in the CS-Cart product card will be used during unloading.
This field is relevant if the dimensions in CS-Cart are not measured in cm. If the dimensions are measured in mm, then enter “1” in this field, in this case, the conversion will take place in cm. since Ozon keeps records of the dimensions in cm.
In this field, you can compare the Weight of the Ozon product with the CS-Cart features
If this field is left empty, the weight from the Shipping Parameters tab in the CS-Cart product card will be used during unloading.
This field is relevant if the weight in CS-Cart is not measured in kg. If ve is measured in gy, then enter “1” in this field, in this case the conversion in kg will occur since Ozon keeps records of the dimensions in kg.
This button should be activated if new comparisons have been made in the Categories tab and updated data needs to be uploaded for further comparison of features on the Ozon platform.
The required features are marked with an asterisk.
Without filling in the required characteristics, the product will be unloaded, but it will be included in the list of products with errors on the OZON side.
The Pricing tab contains the price and tax settings for comparison with Ozon;
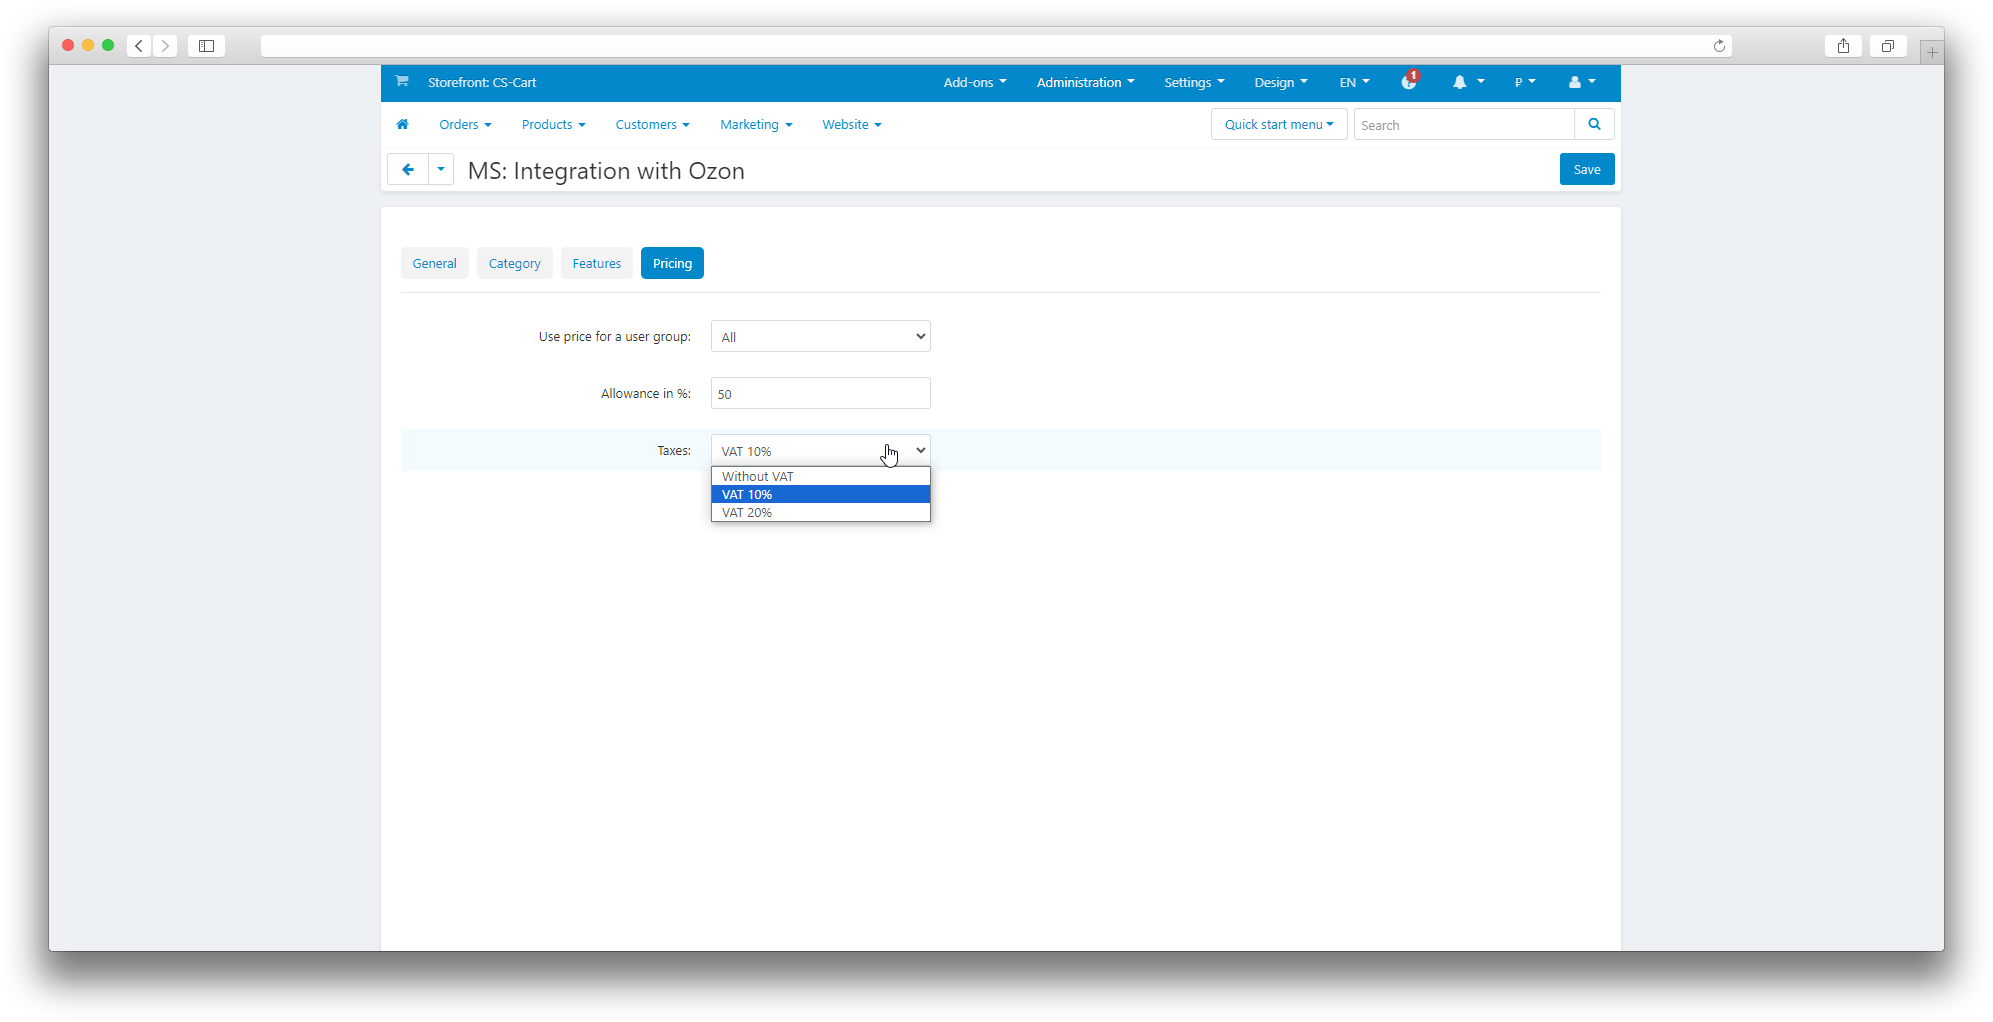
- Use the price for a group of users;
- Allowance;
- Taxes.
This function allows you to choose which prices from the CS-Cart system to use when unloading goods to Ozon.
This function allows you to enter a percentage value that will be applied as a surcharge to the prices of goods when they are uploaded to the Ozon platform.
This function allows you to select the VAT rate when unloading goods in Ozon.
Local product settings
Go to the section Products → Products → Open the product for customization → Go to the Add-ons tab → Find the MS: Integration with Ozon block.
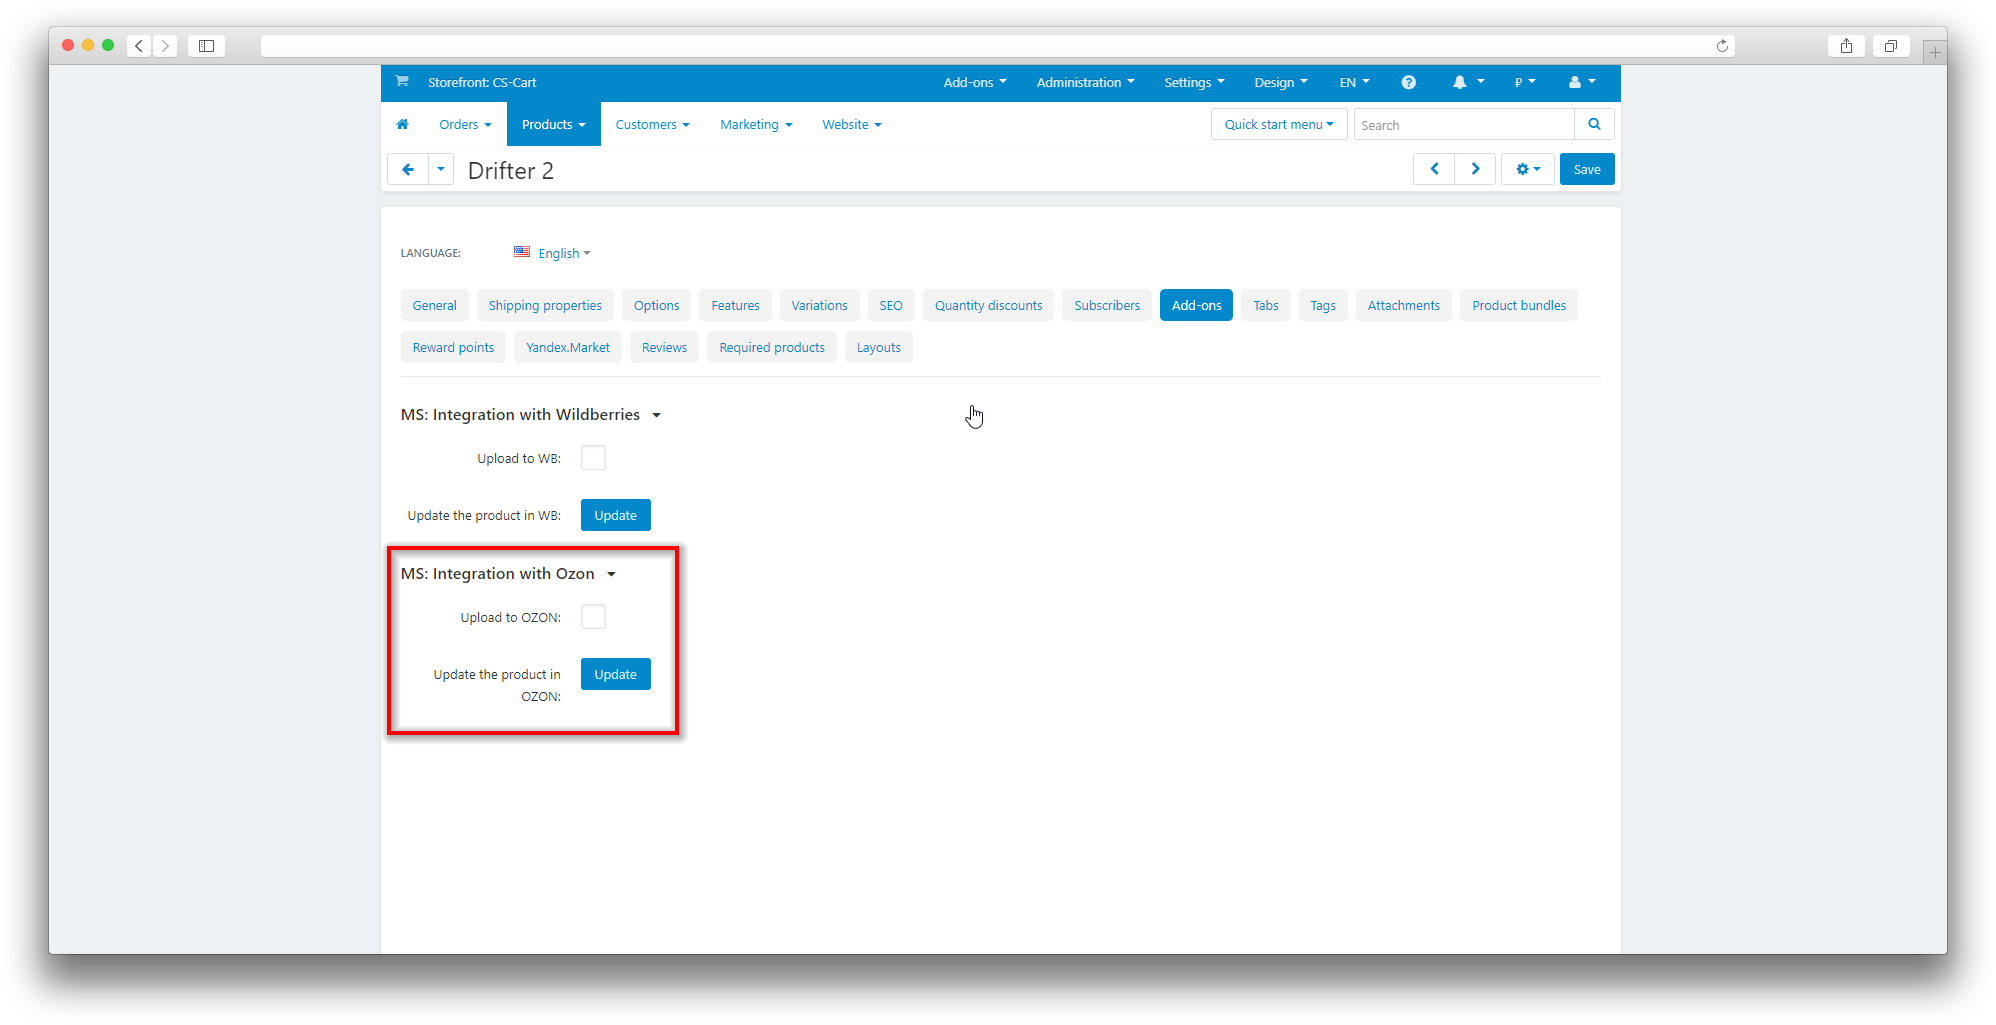
- Upload to OZON;
- Update the product in OZON.
If this checkbox is checked, then when saving the product in CS-Cart, the product will be unloaded and updated in OZON.
If the Upload only new ones to OZON checkbox is selected in the synchronization settings, then the checkbox in the local product settings will be ignored.
When this button is pressed, the product is forcibly unloaded and updated in Ozon.
The Upload to OZON checkboxes are ignored and only new ones are uploaded to OZON.
Mass editing
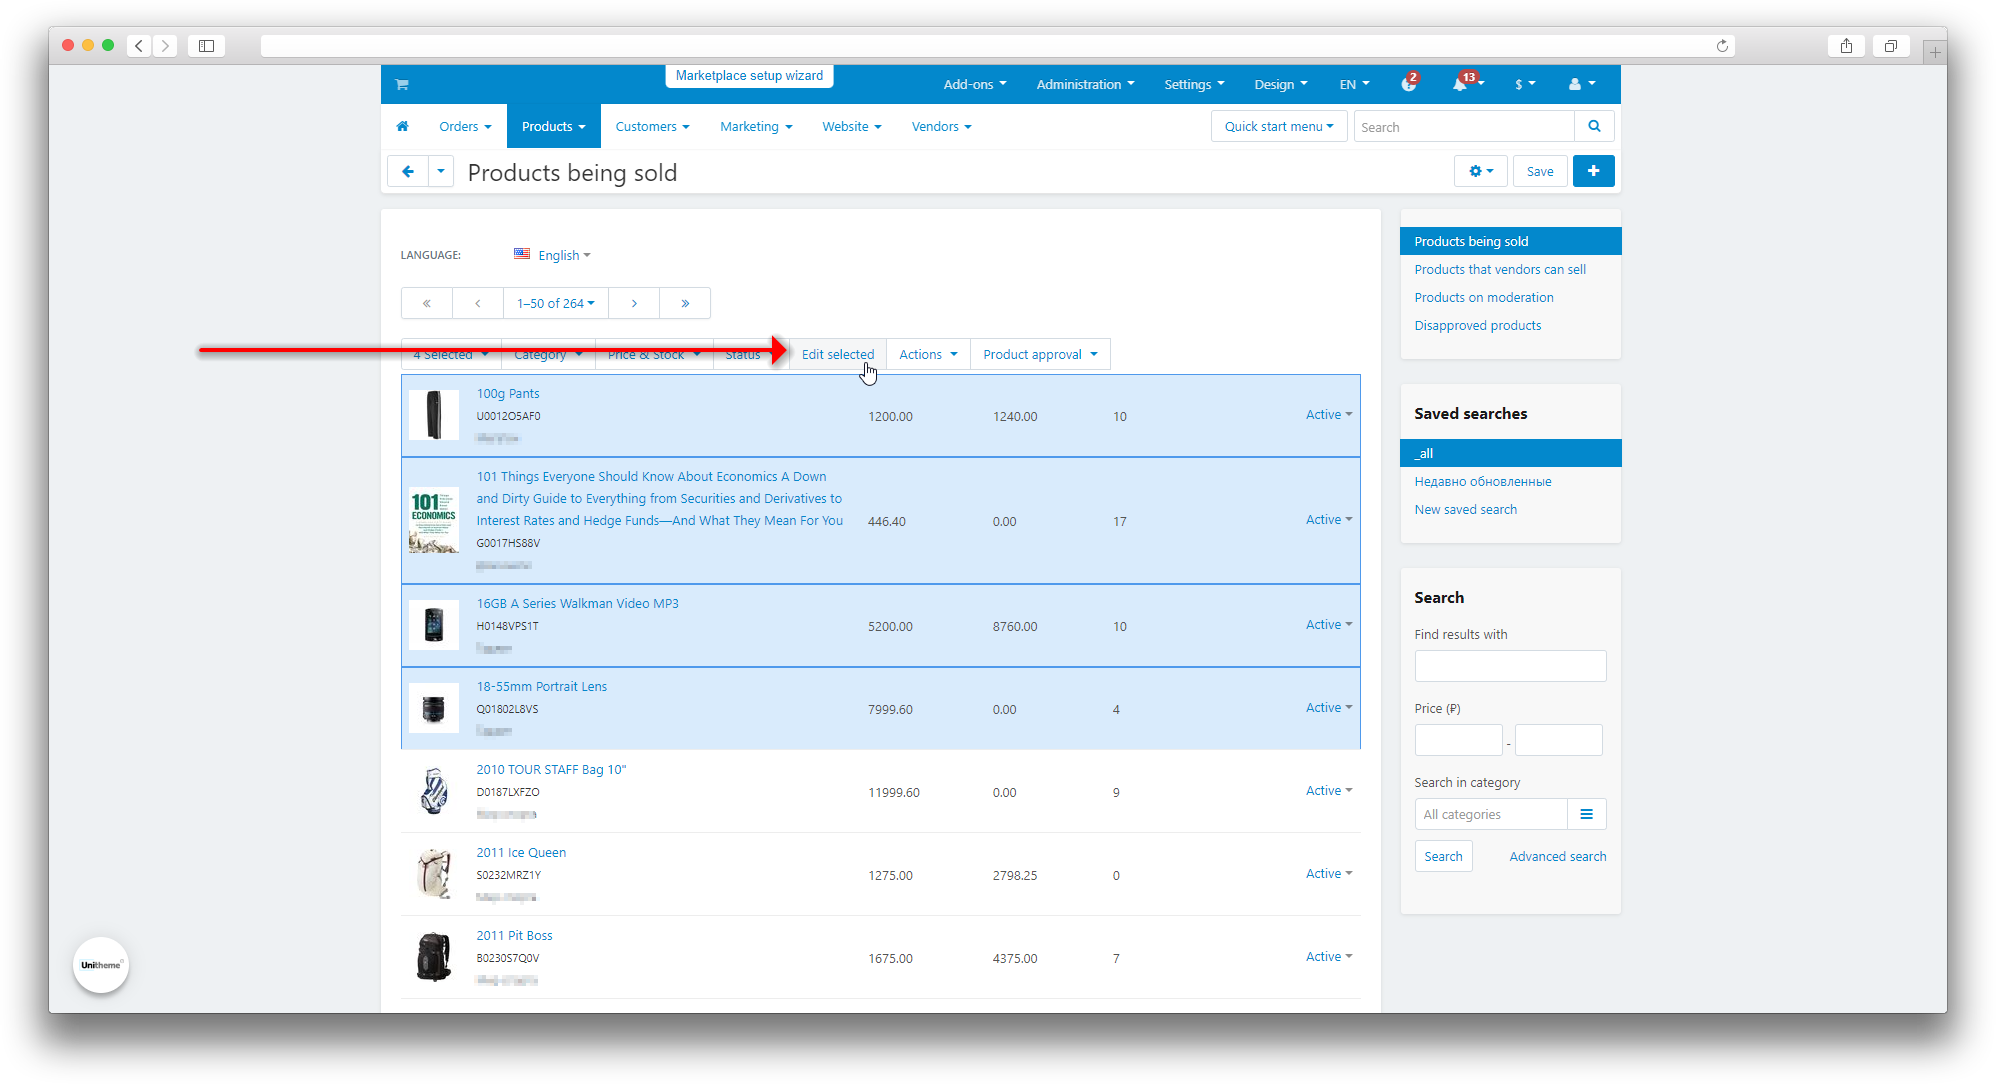
Through updating products in CS-Cart:
- Open the Products → Products;
- Select the necessary products;
- Click Edit Selected;
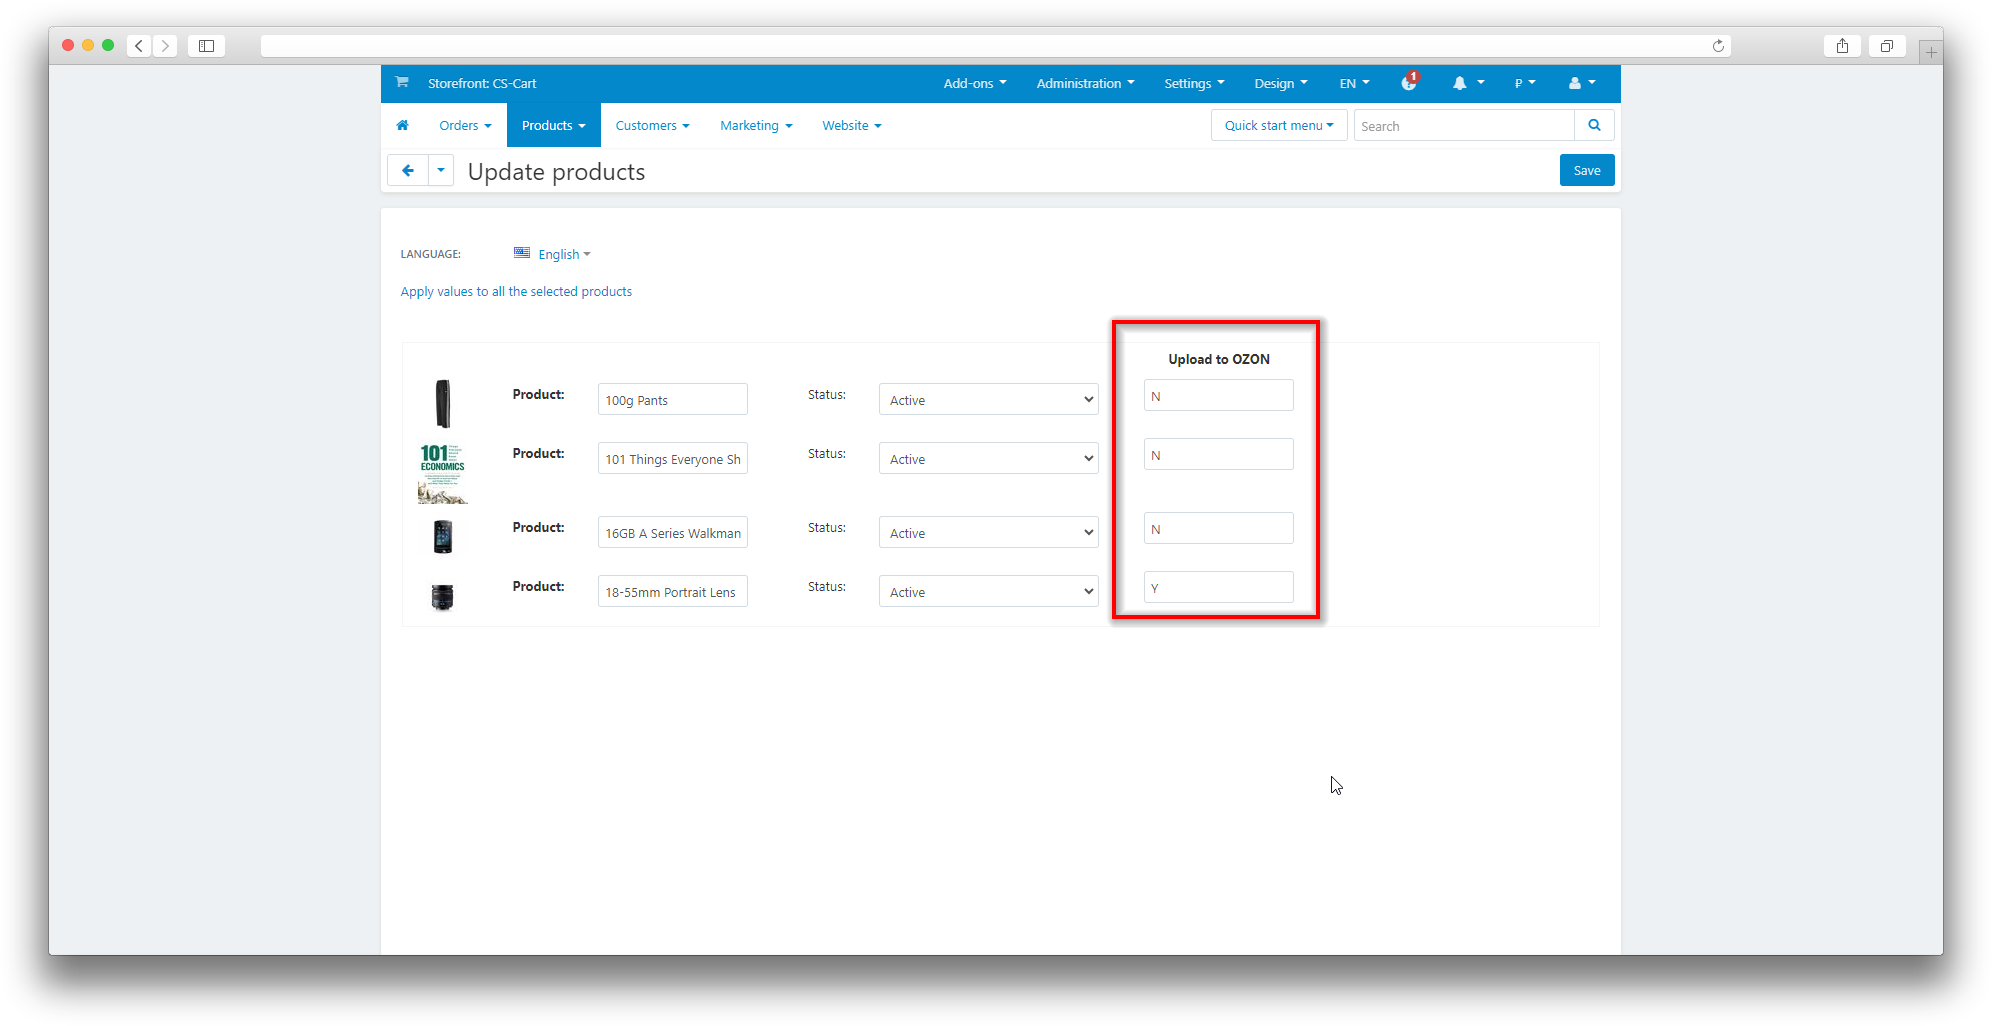
- Select fields to edit;
- Click Edit Selected;
- Enter new values for the selected field;
- The value to Upload to OZON
- Y - Yes N - No
- Click Save.

Through the export and import of goods:
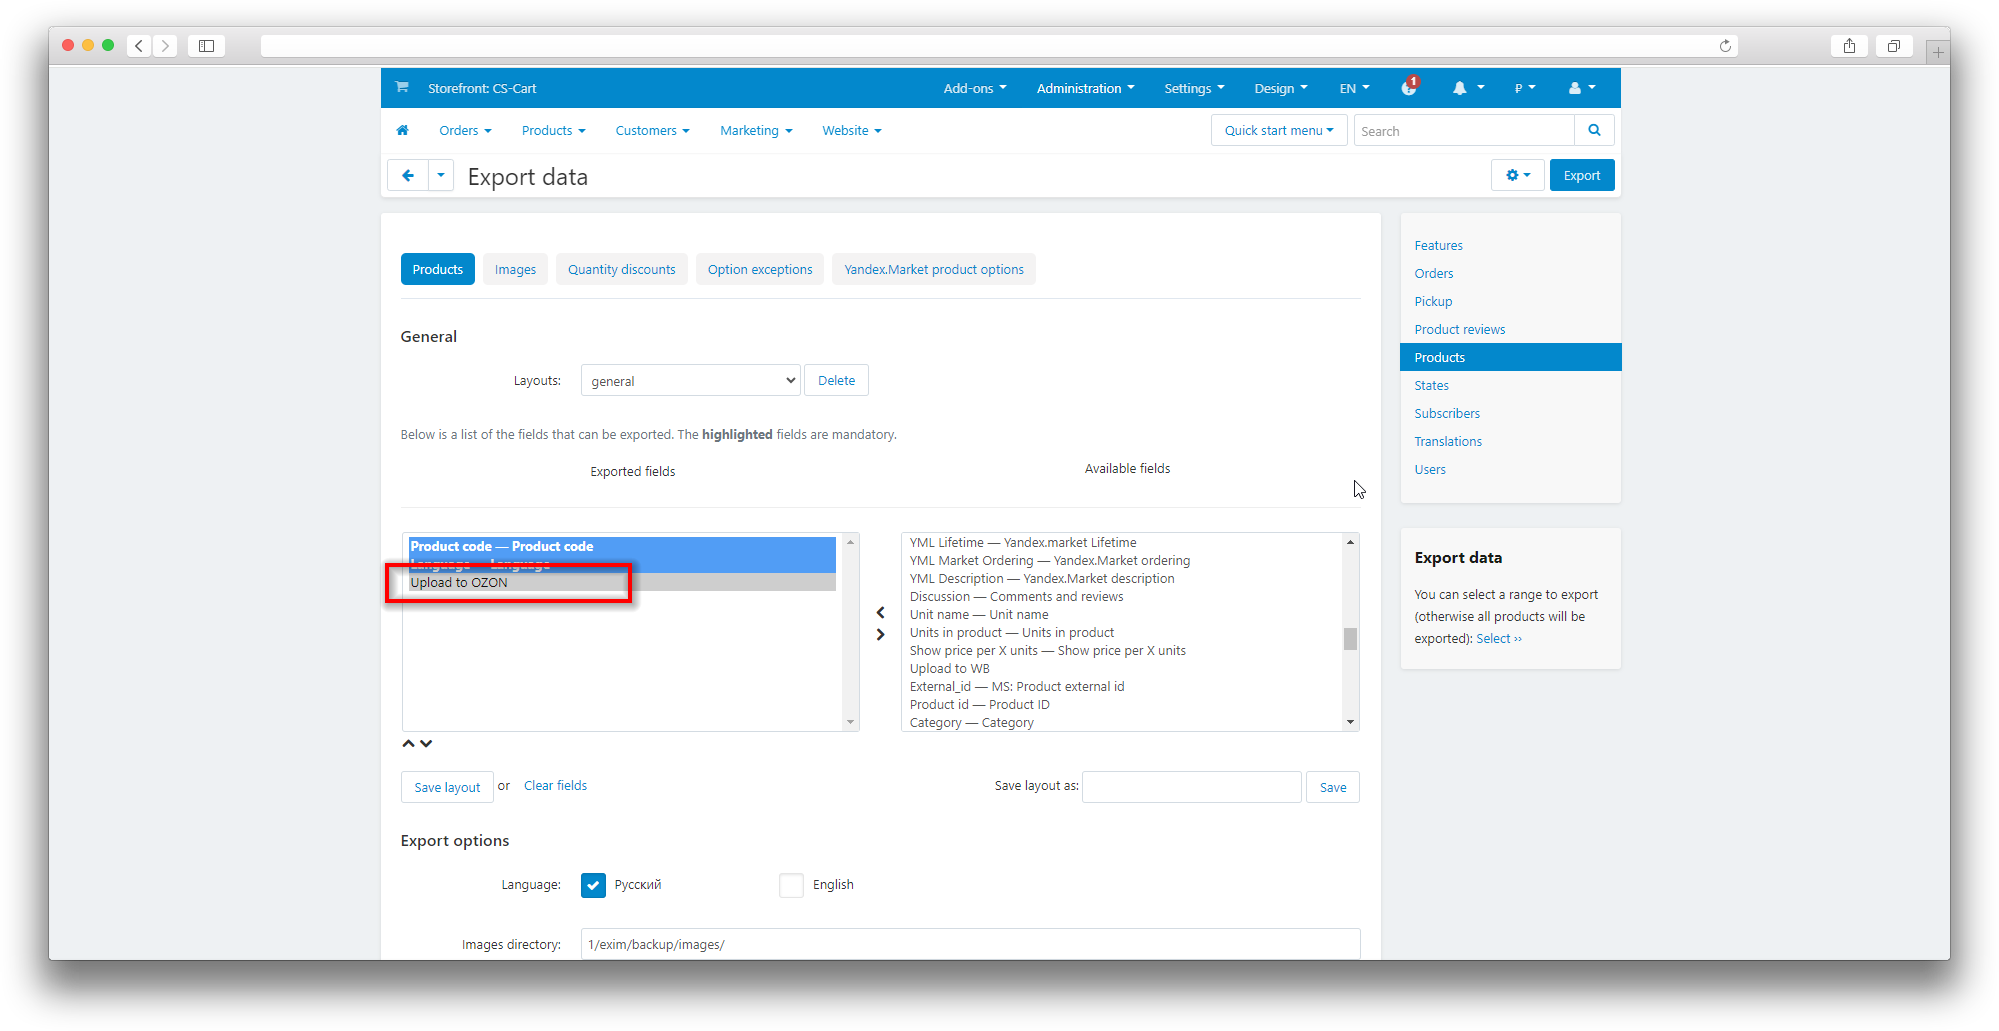
- Open the Administration → Data Export → Products section;
- Move from the list of available fields to the exported fields to Upload to OZON. This field will be displayed in the table file for editing;
- Click Export;
- Make the necessary changes in the table file and save;
- Open the Administration → Data Import → Products section;
- Press the + button;
- Select a table file;
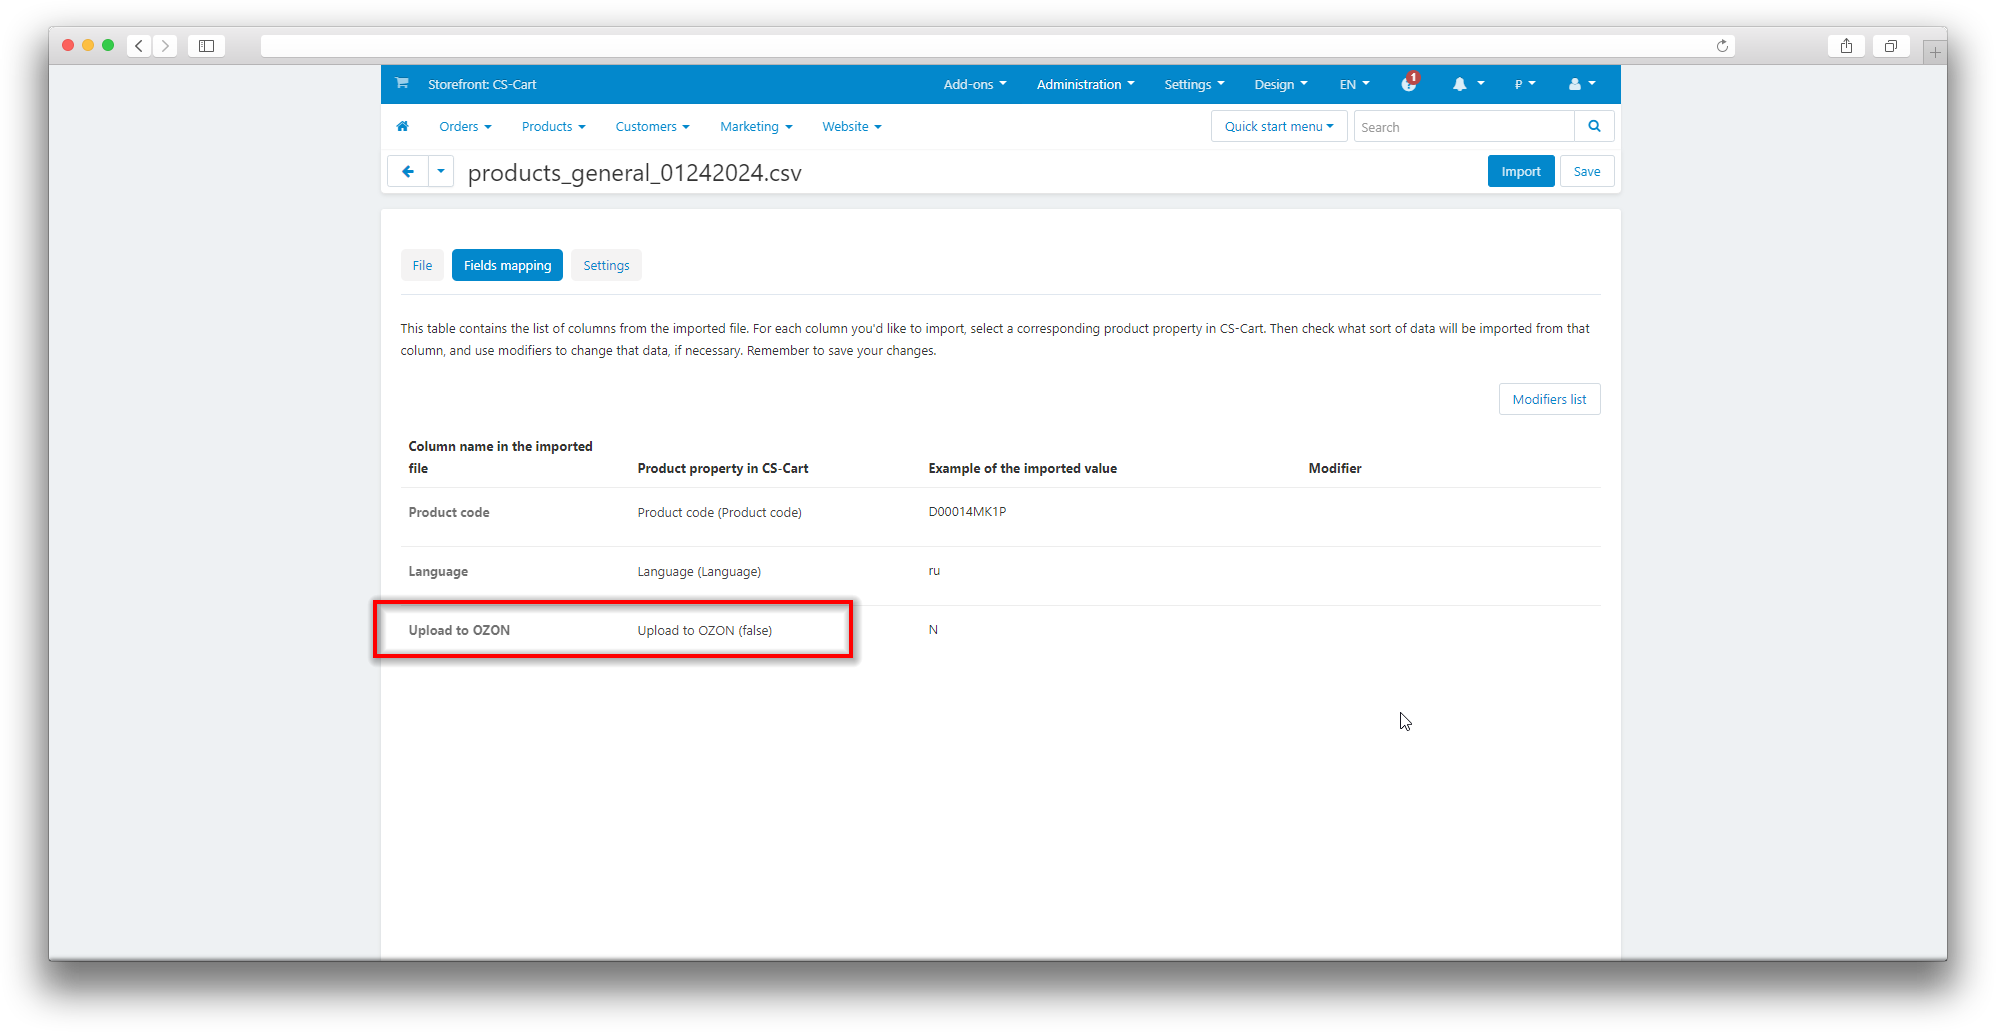
- Go to the next step Matching fields;
- Match the fields as shown below:
- Click Import.
