Add-on installation
After downloading the add-on, it can be installed using the standard CS-Cart tools on the page Admin Panel → Add-ons → Manage Add-ons → Upload and Install Add-on (+).
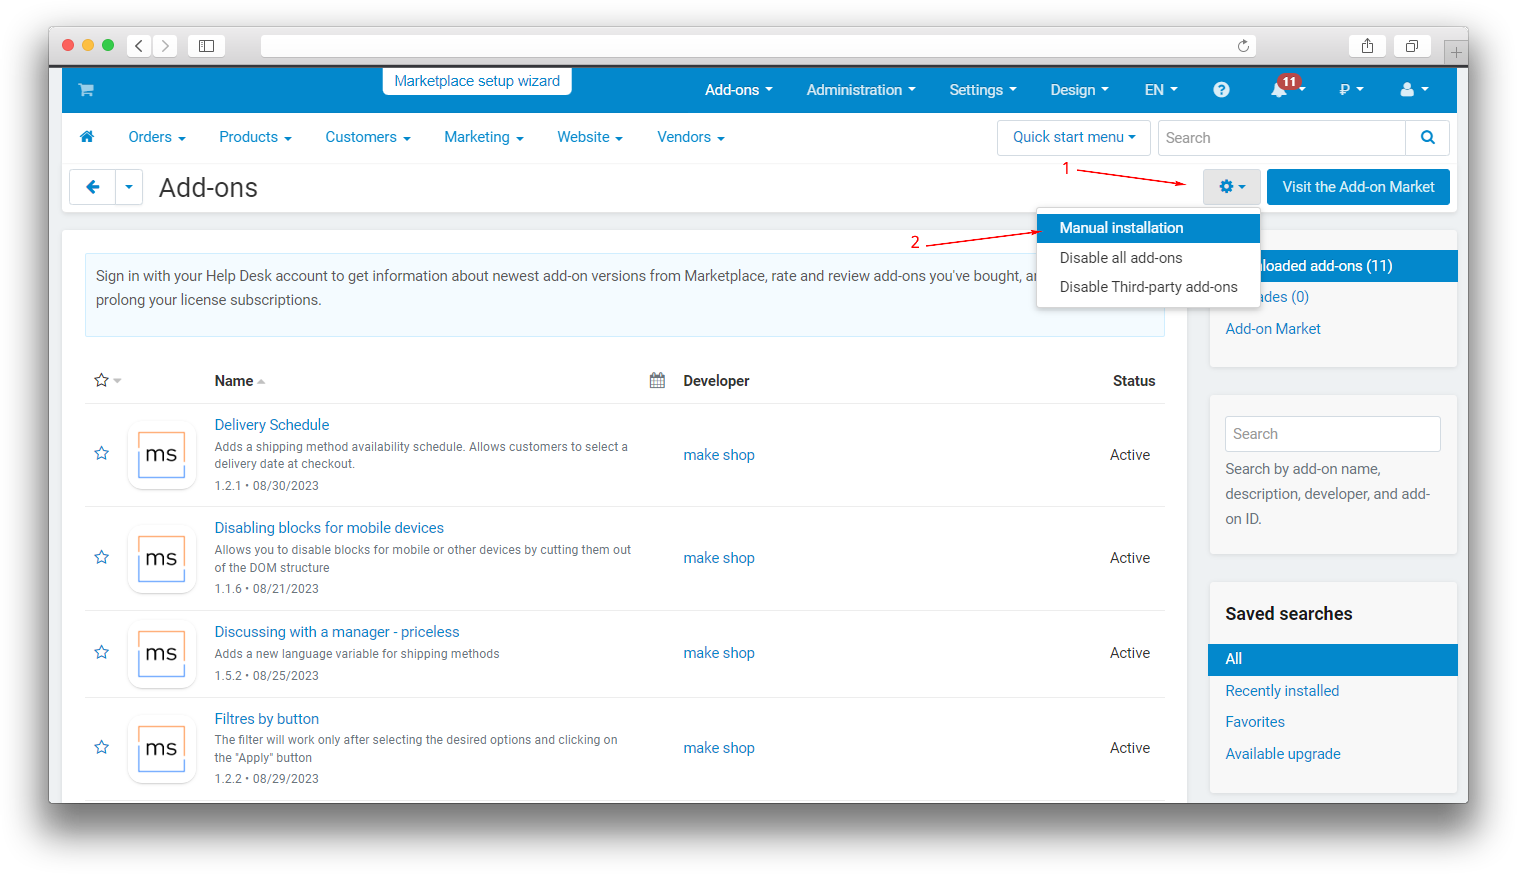
For CS-Cart version 4.13.1 or later, go to Admin Panel → Add-ons → Manage Add-ons → Gear Icon → Manual installation.
Add-on Settings
Tab [General]
To automatically fill in the fields, you need to enable integration with DaData.ru, for this enter the API key.
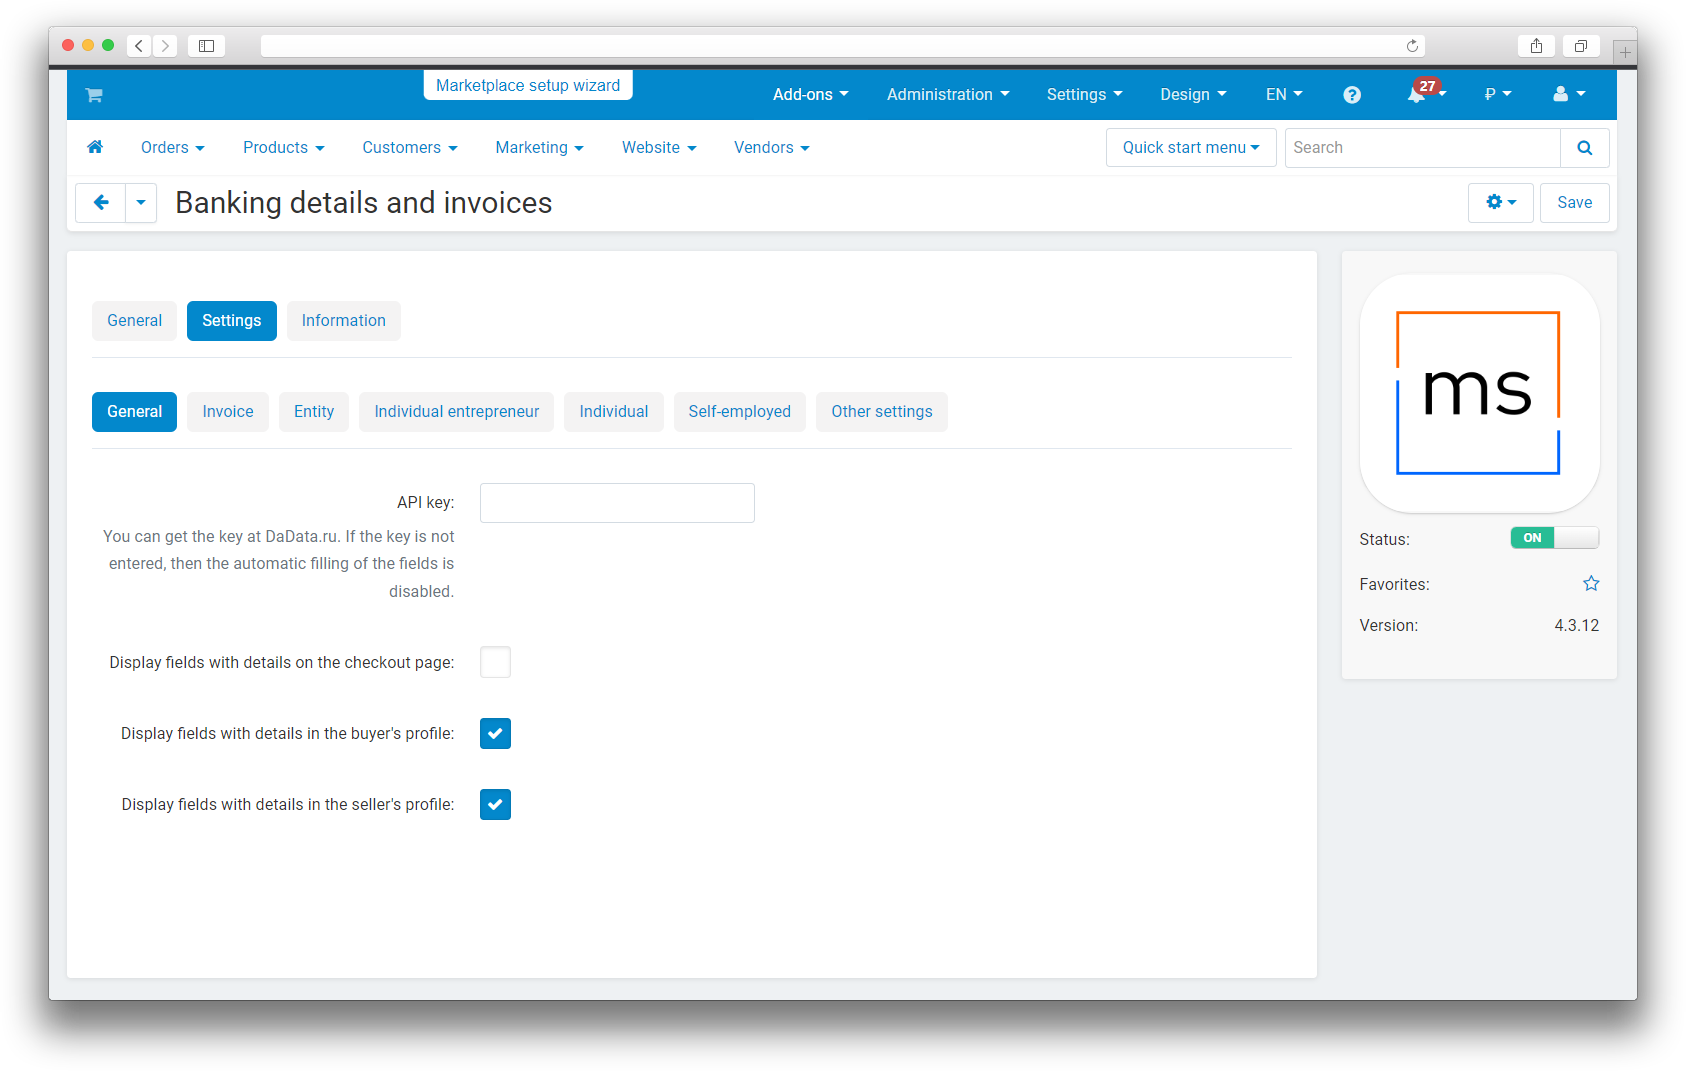
Next, select the required parameters in the checkboxes:
Display fields with details on the checkout page - billing details will be displayed on the checkout page.
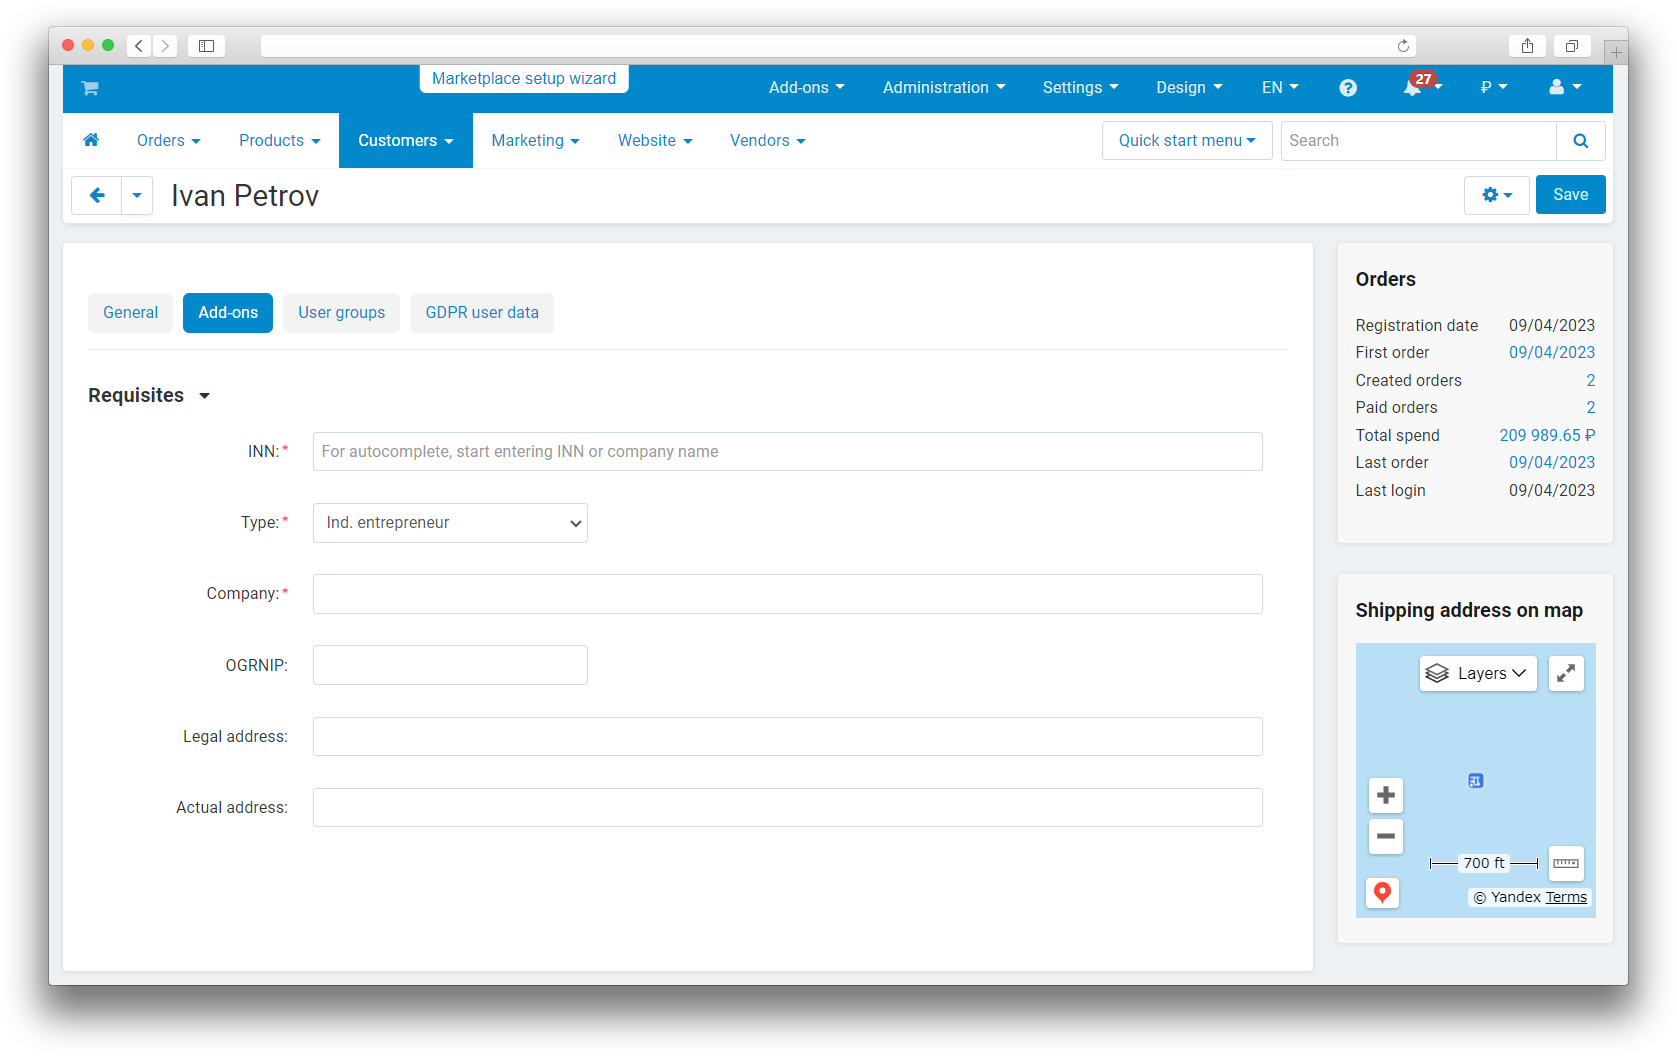
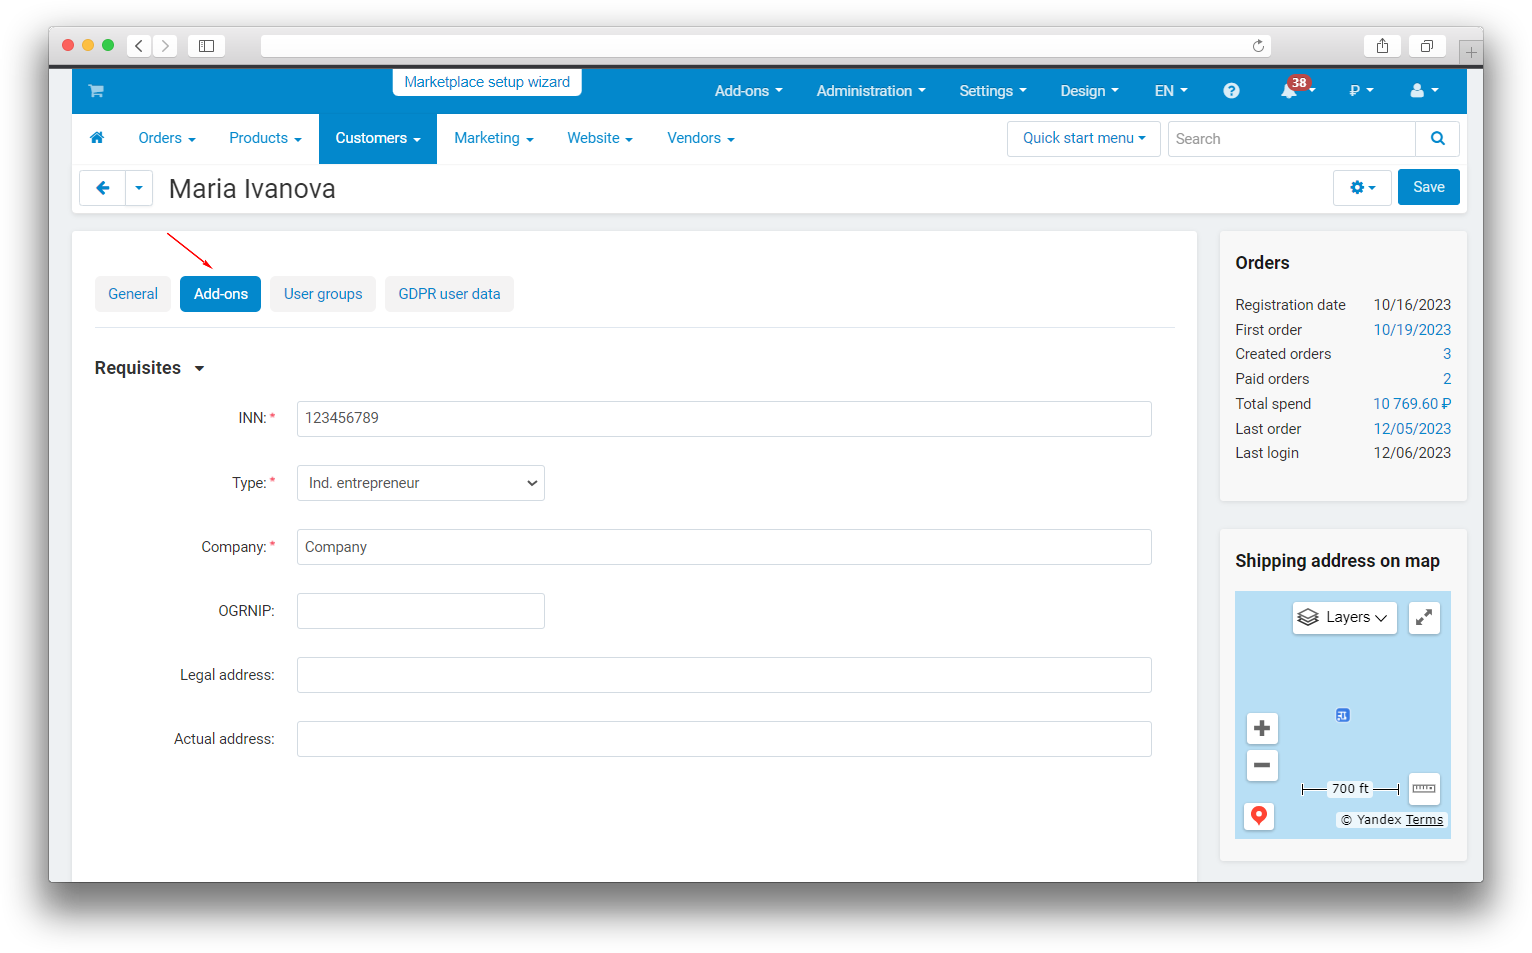
Display fields with details in the buyer’s profile - adds [Add-on] tab with buyer details. Allows sellers to make changes to details in the profile.
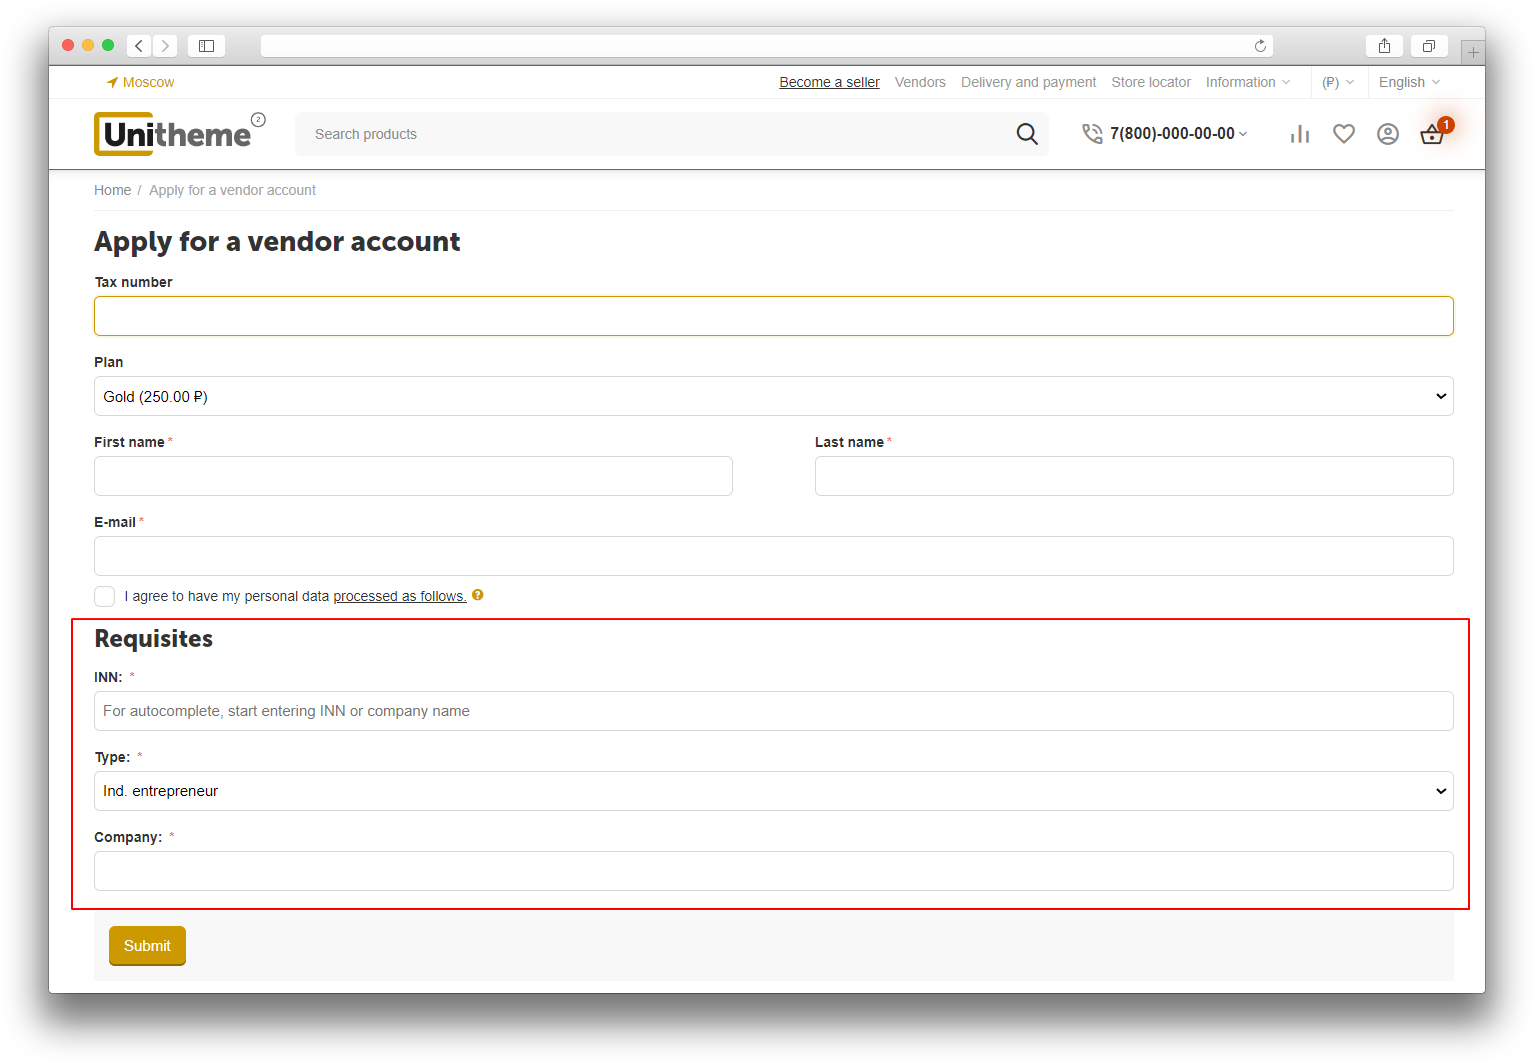
Display fields with details in the seller’s profile - adds a block with details in the seller's profile
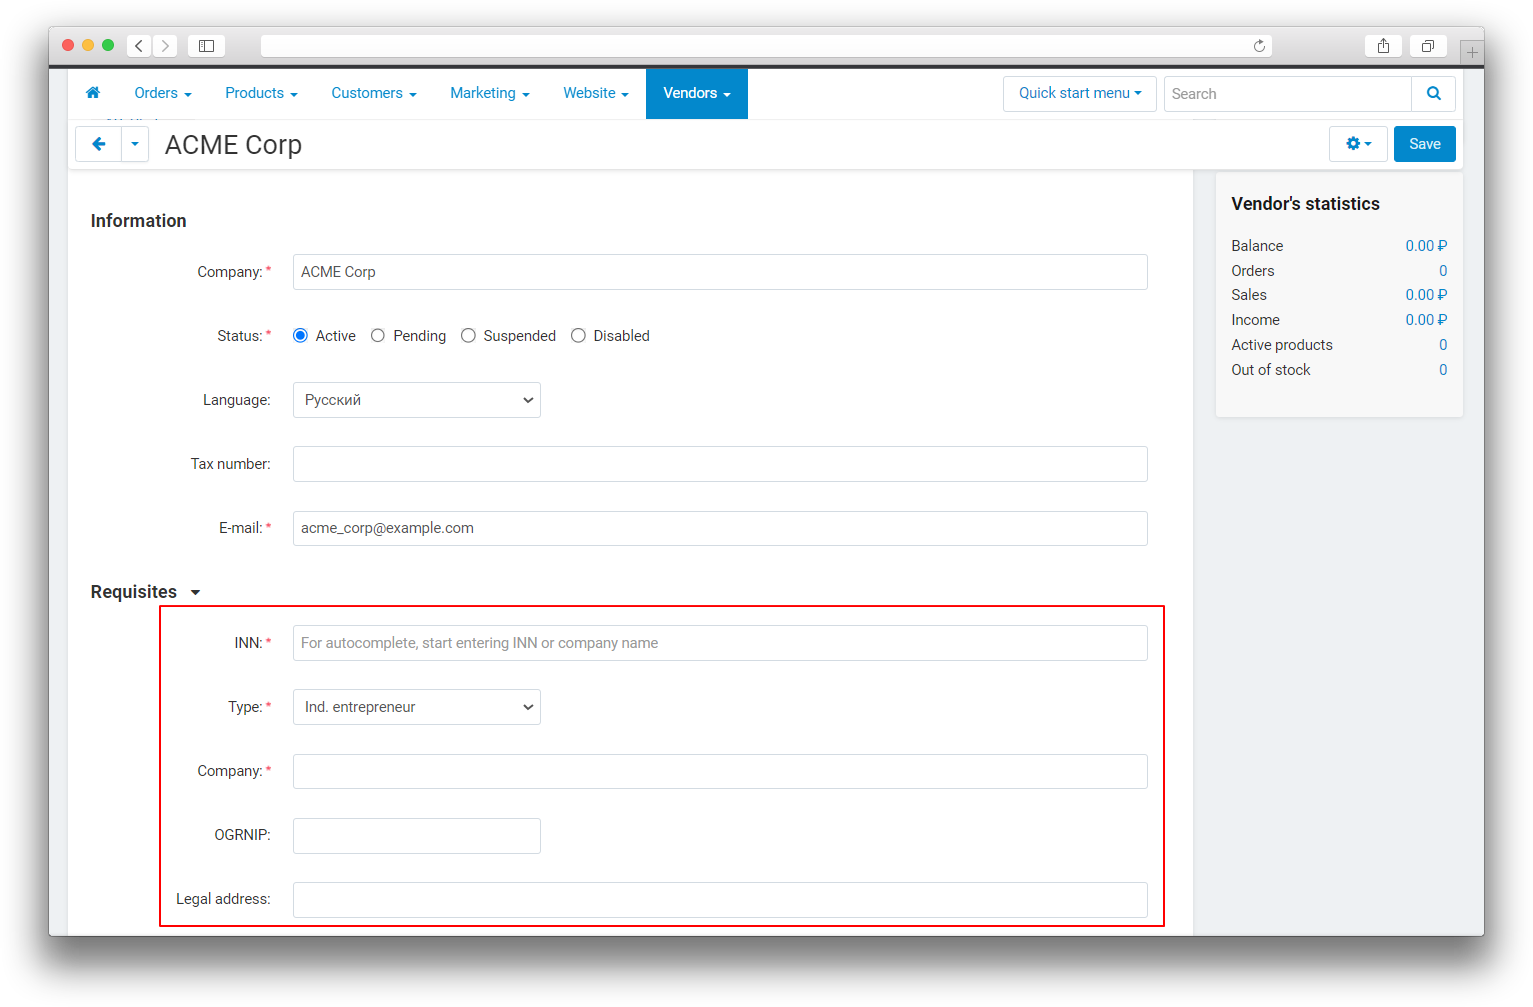
and on the new seller registration page.
IMPORTANT: If you enable fields with details, then the TIN field will be mandatory for the buyer!
Tab [Bill]
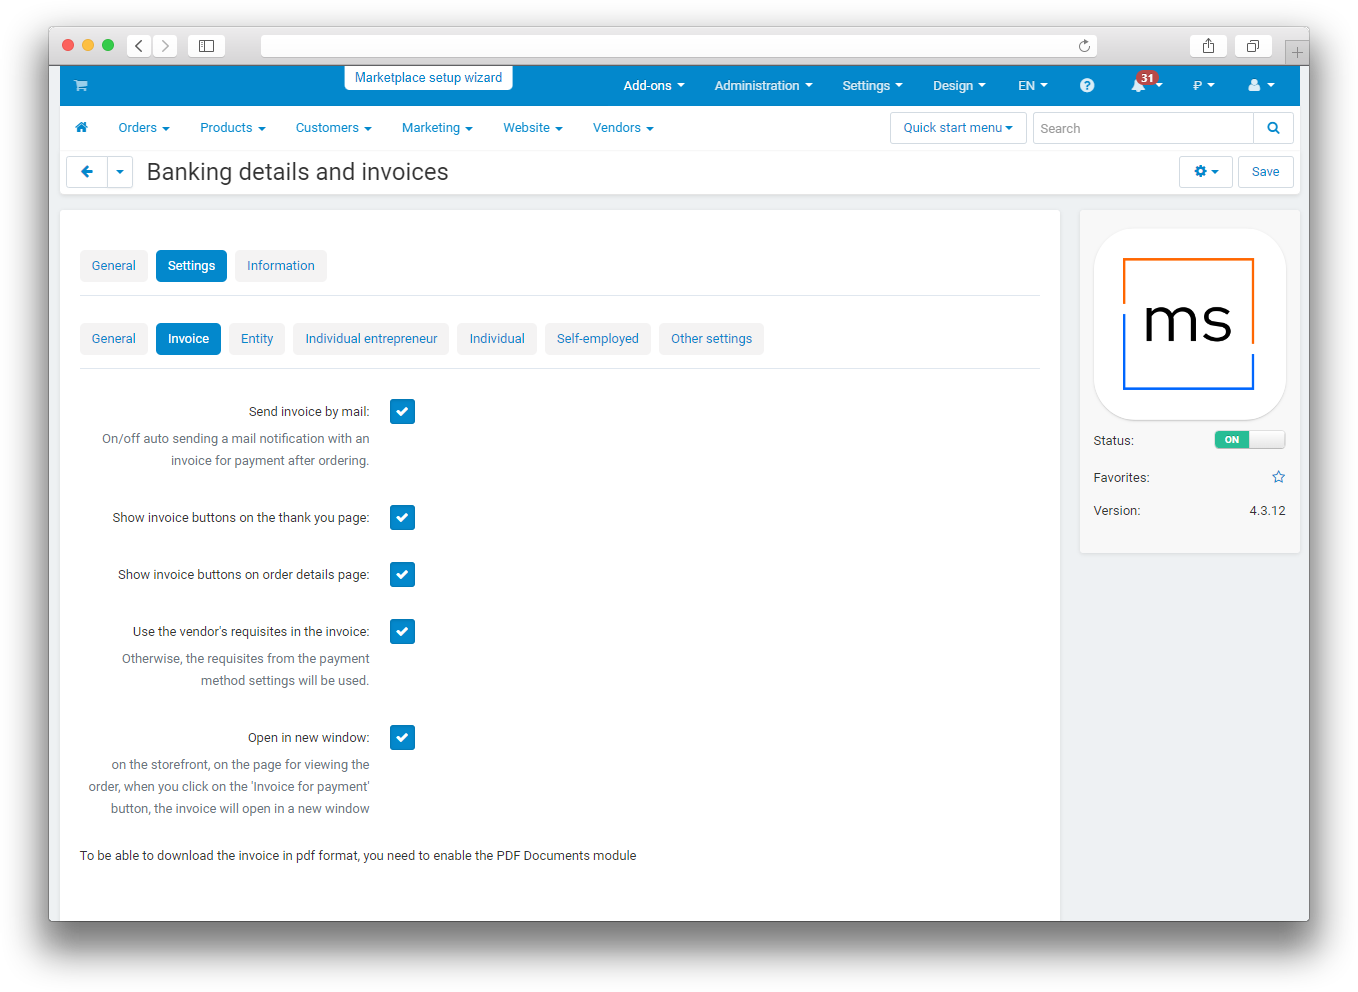
Send invoice by mail - enable automatic sending of the invoice after order placement to the buyer's mailbox.
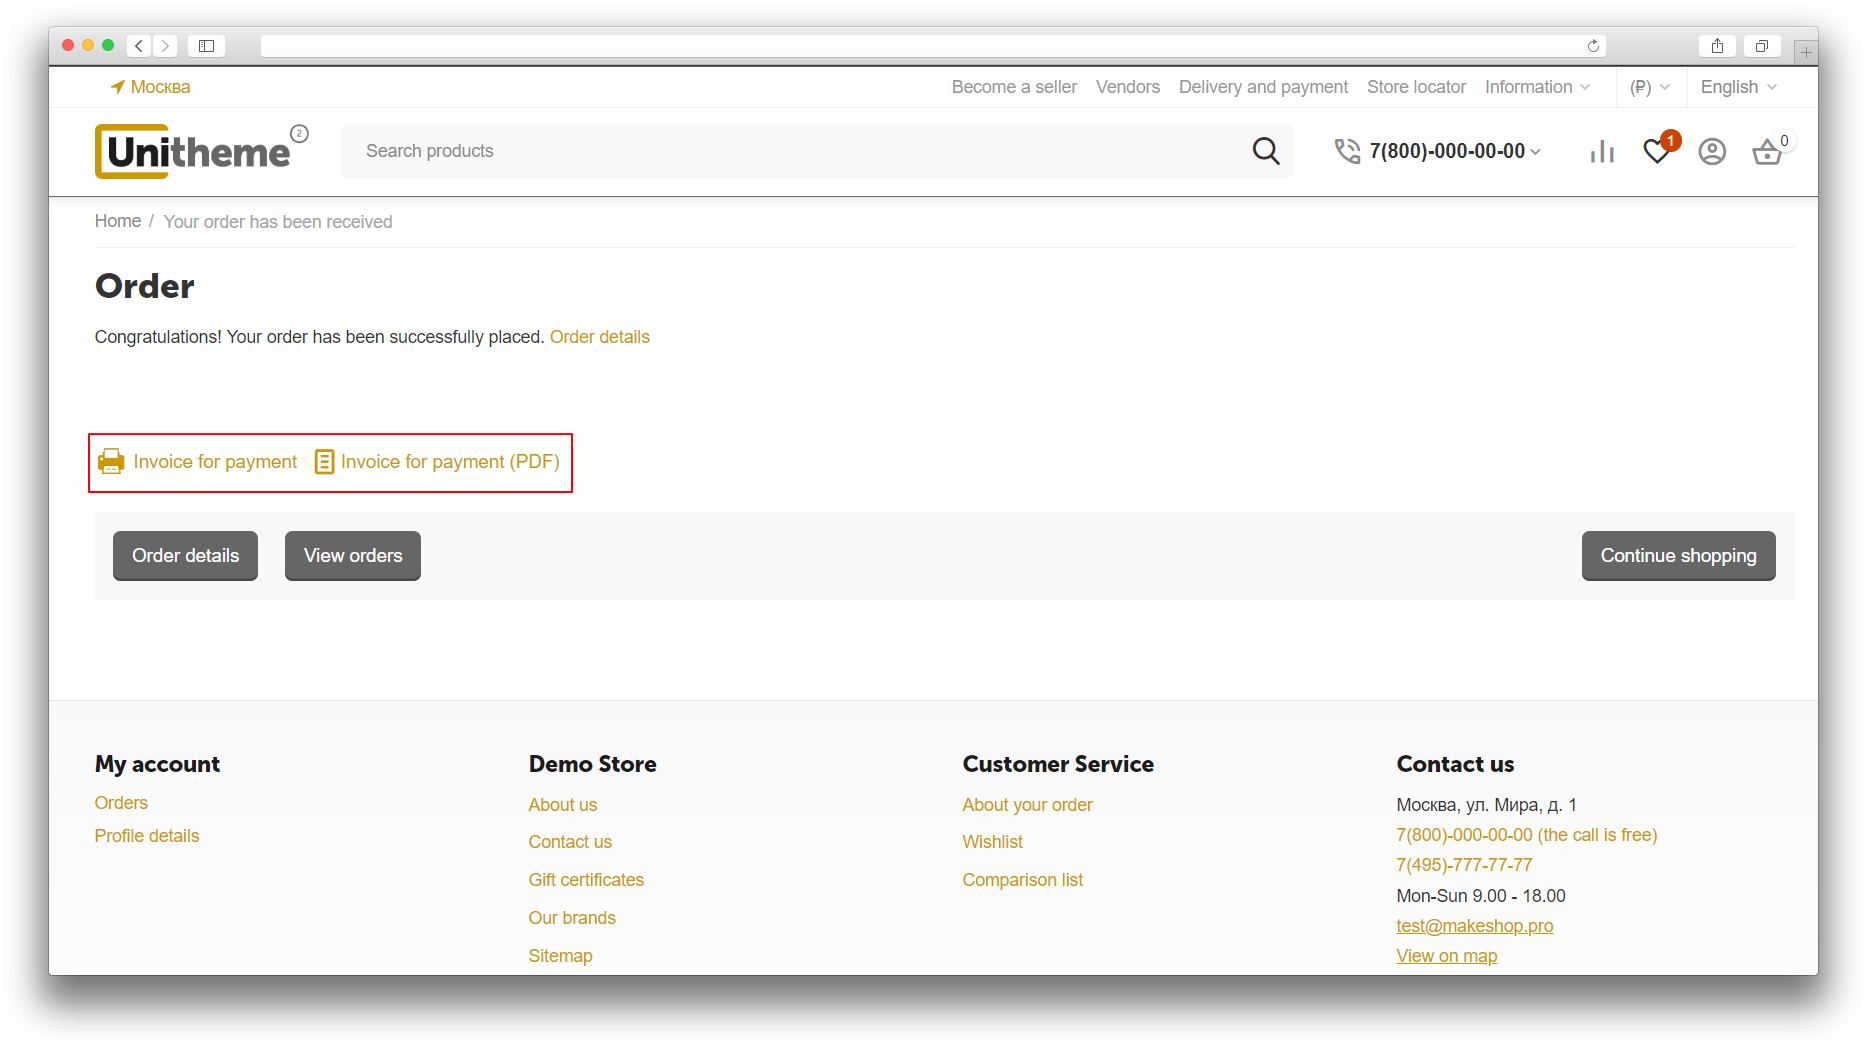
Show invoice buttons on the "Thank you for order" page - displays buttons that allow you to download or print an invoice from the successful order placement page.
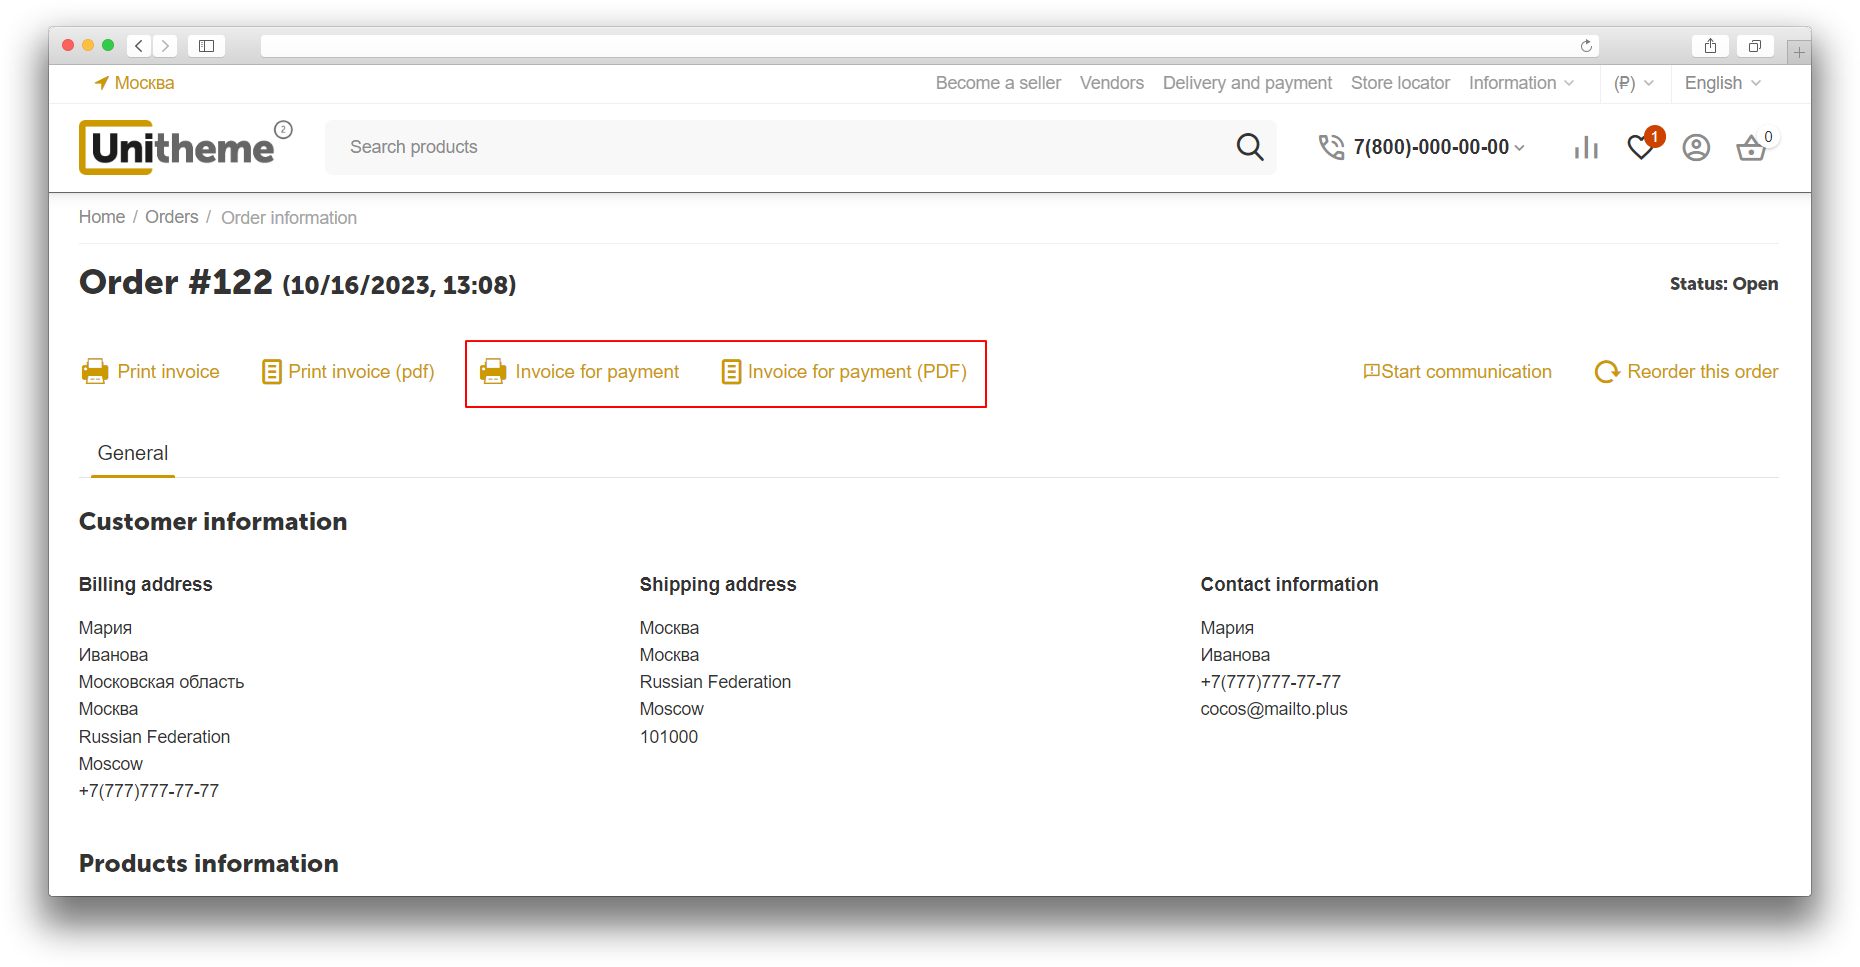
Show invoice buttons on the order details page - displays buttons that allow you to download or print an invoice from the order details page.
Use the vendor's requisites in the invoice - without this setting, vendor details from the payment methods settings will be used in the invoice.
Tabs [Entity], [Individual entrepreneur], [Individual], [Self-employed]
Here you customize the fields that will be displayed and populated for the appropriate customer types.
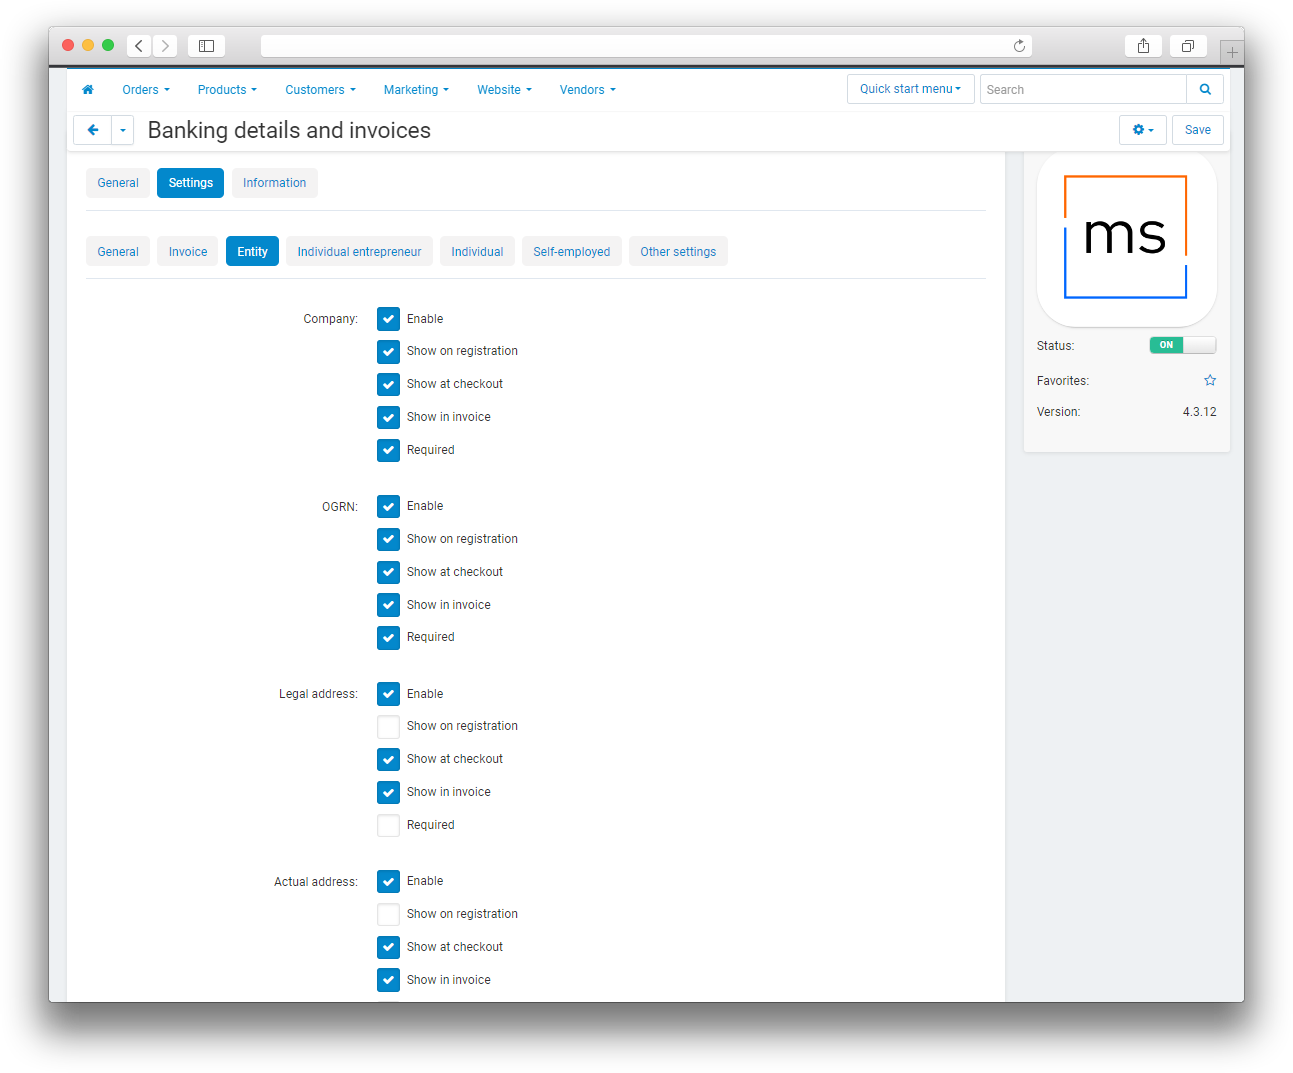
Possible values:
Enable - use the field to fill in details.
Show on registration - show the field in the registration form for the user.
Show at checkout - show the field in the checkout form (including for unregistered users).
Show in invoice - display the field in the invoice
Required - if enabled, it will be impossible to complete registration or order placement without filling in this field.
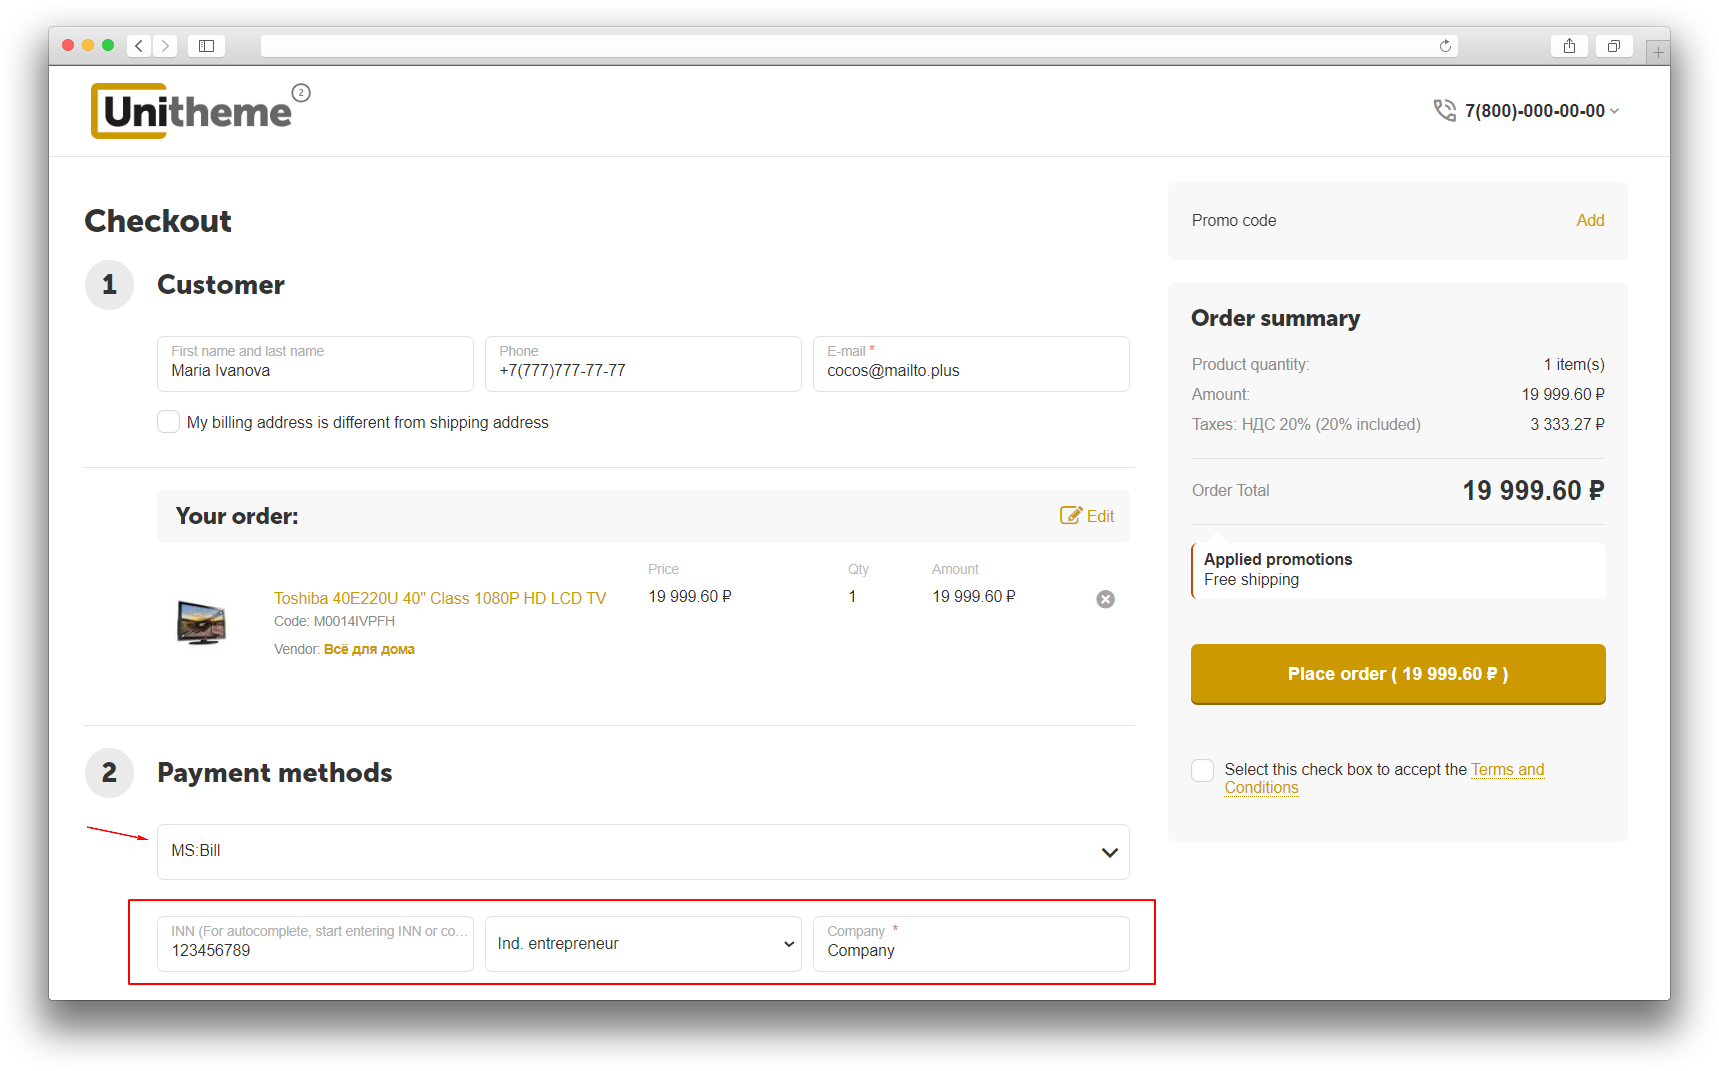
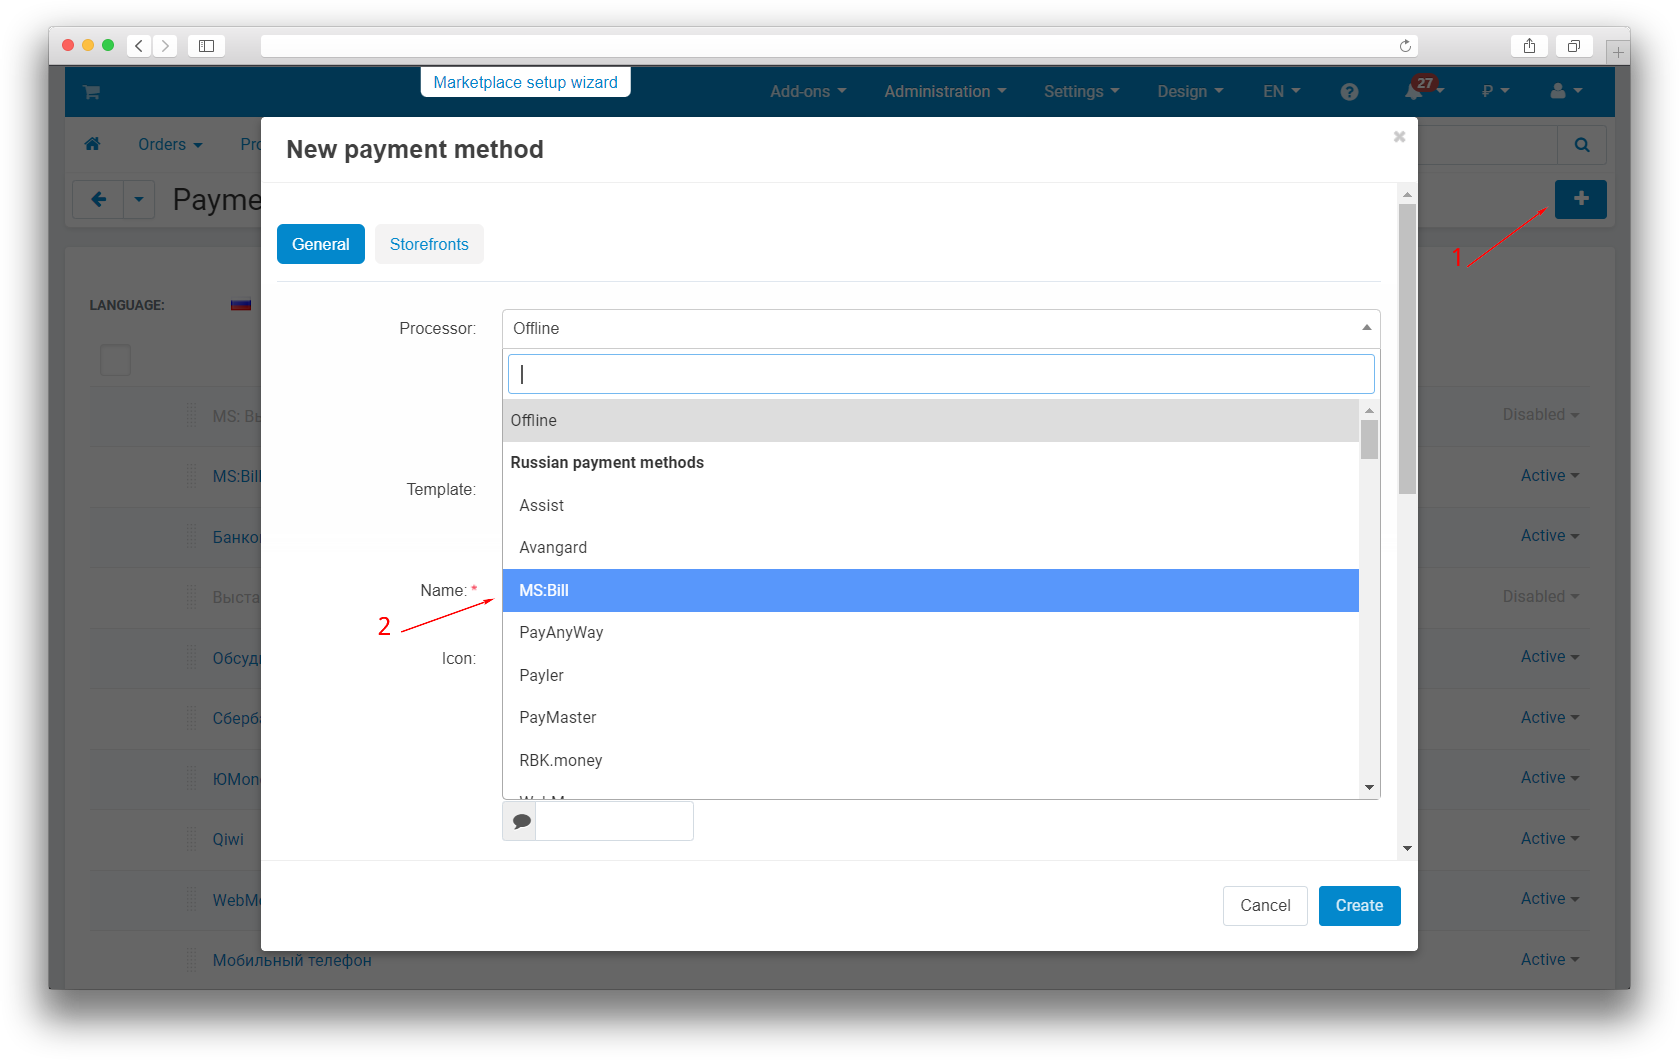
Next, add a payment method (1) and select processor: MS: Bill (2):
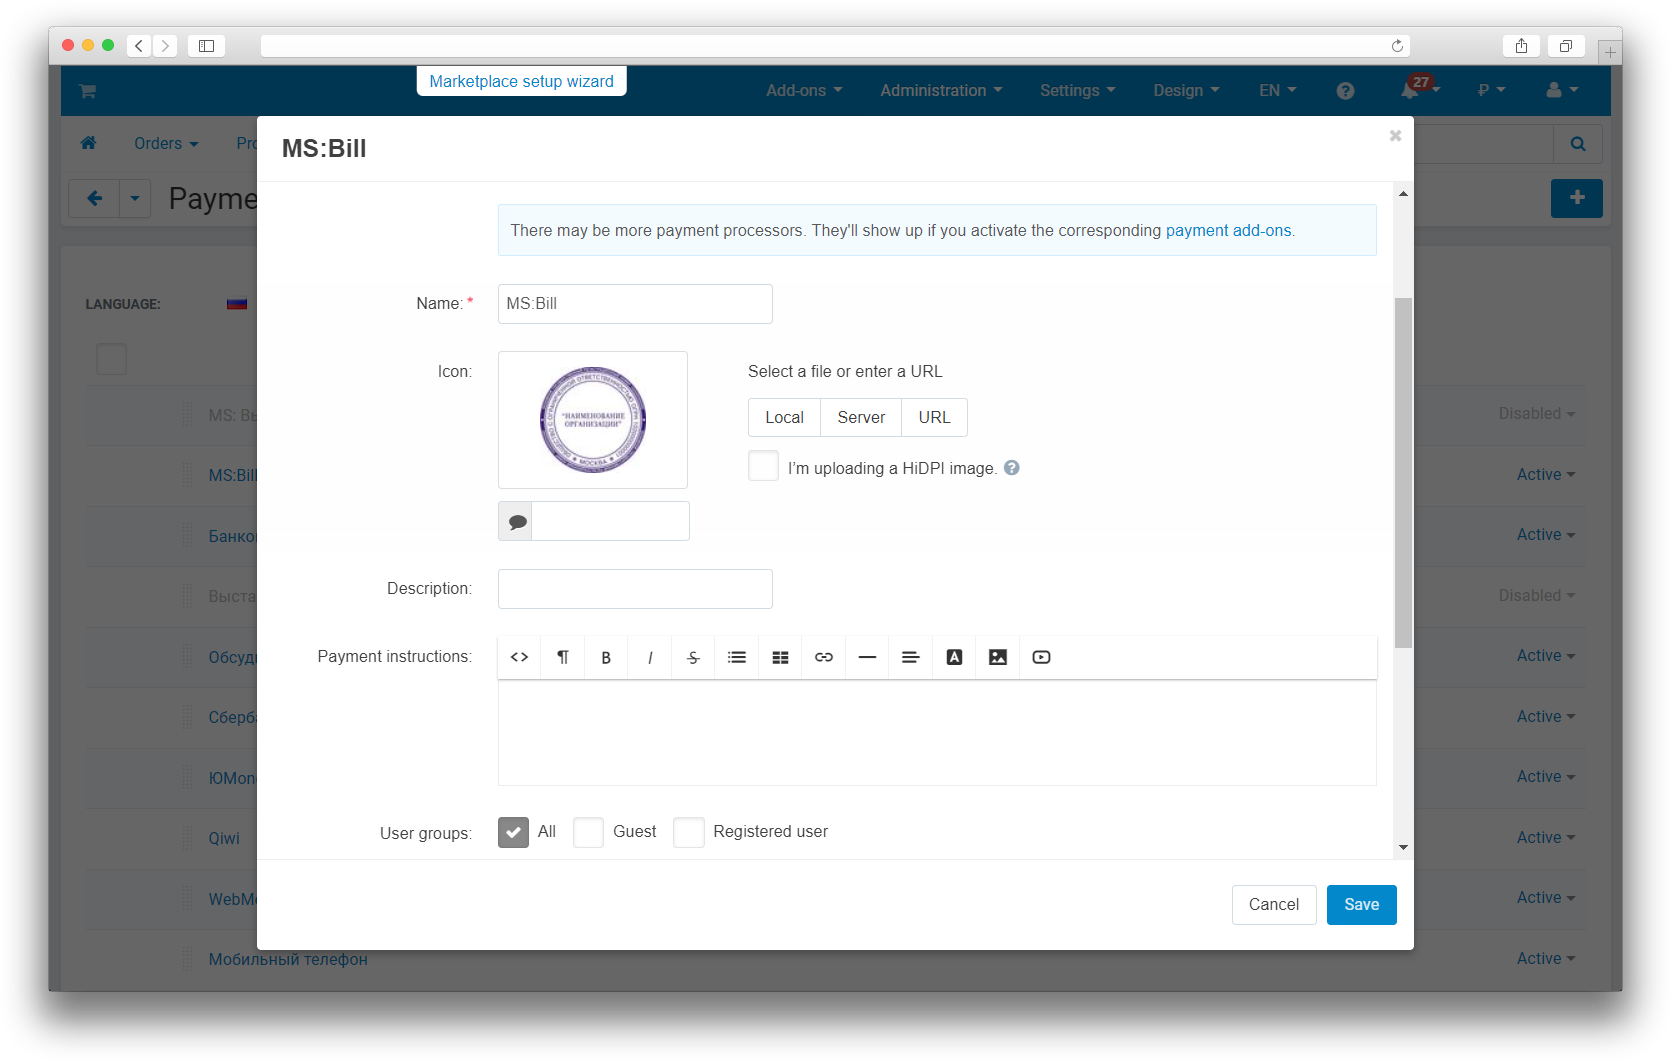
On the [Configure] tab, fill in the details of your company:
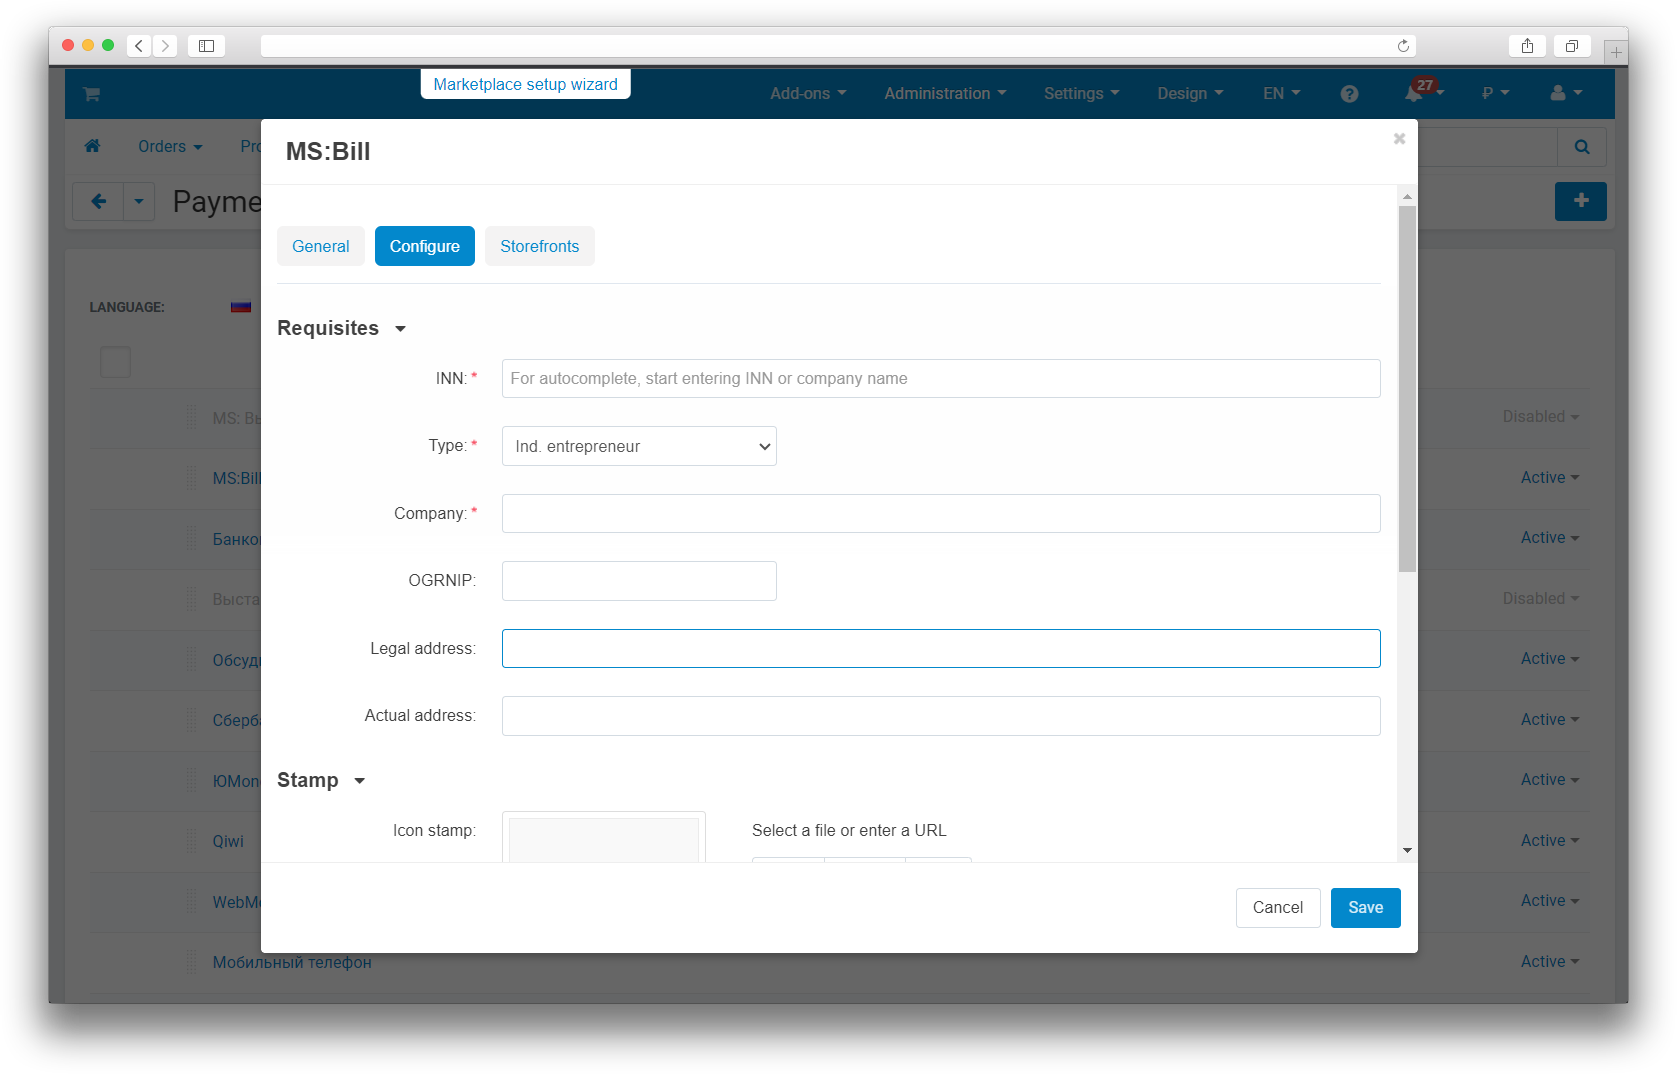
Also on this tab you can add a stamp image that will be inserted into the invoice:
The invoice can be viewed/printed/downloaded after the order is placed
and on the order details page.
Buyer information is filled in either during registration or (for unregistered users) when placing an order. It can be edited in the buyer's profile, in the Add-ons tab.